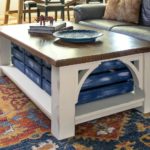
DIY Coffee Table with Storage (Farmhouse Style)
Build a farmhouse style DIY coffee table with storage underneath! This table is gorgeous, very sturdy, and works perfectly with rustic or industrial decor. This post completely guides you through the process. Paint or stain it in any colors you like.
Skills Required: Advanced Beginner to Intermediate. You’ll need to be able to use a miter saw, table saw, Kreg Jig, and drill with various bits. You’ll be doing some gluing and screwing and lots of measuring.

When your neighbors ask you for a rustic coffee table, and you have the tools, and you’re a DIY blogger – you answer the call. You want to know the funny thing about this project? It went in reverse.
The wooden crates were purchased first and then the table was built around them. If you want to build coffee table with storage, that’s the way I recommend doing it.
The nice thing about this DIY coffee table is that it has a rustic/farmhouse feel, so it can look a little rough and that adds to the character!
Tips on Building This Table
Our neighbors didn’t really have a specific measurement or area they needed to fill for this project, which made it a little bit easier. The only consideration we had to take into account for this build was the crates.
Wood Crates for Storage
The wood crates for this farmhouse coffee table were purchased from IKEA for $9.99 a piece. They are the Knagglig box, made of pine, 18″ x 12 1/4″ x 9 3/4″. If you don’t live near an IKEA, never fear! You can get your wood crates from Crates and Pallet.

Tools and Hardware
- Miter Saw with Laser
- Table Saw
- Belt Sander
- Router with bits (optional, see Step 15)
- Drill with bits, also a 3/4″ countersink bit
- Kreg Jig R3 Jr.
- Planer (optional, see Step 14)
- Wood – as specified on cut list below
- Wood corbels – 4 (optional, see Step 12)
- Wood glue – we recommend Titebond III
- Wood screws – 1 1/2″ – 2″ length (about 80; 8 additional screws if you are using corbels)
- Clamps
- Measuring tape
- Pencil
Cut List*
- 1 – 4″ x 4″ x 8′ board cut into four (4) pieces 16 1/2″ long (legs)
- 1 – 2″ x 4″ x 8′ board cut into four (4) pieces 18″ long (short side support pieces)
- 2 – 2″ x 4″ x 8′ boards cut into four (4) pieces 39″ long (long side support pieces)
- 1 – 2″ x 4″ x 8′ board cut into four (4) pieces 18″ long (cross support pieces for top and lower shelf)
- 1 – 1″ x 4″ x 8′ board cut into two (2) pieces 39″ long (bottom shelf side pieces)
- 2 – 3/4″ x 12″ x 8′ boards cut into two (2) pieces 3/4″ x 9″ x 46″ (bottom shelf center pieces)
- 6 – 2″ x 6″ x 6′ boards cut into six (6) 2″ x 4 3/4″ x 50″ length pieces (top of table)
*if you are a newbie woodworker, remember that wood sizes are given as the cut from a log. For example, a 2″ x 4″ is cut that size from a rough log, but then it dries smaller (around 1.5″ x 3.5″). So your EXACT measurements may vary, though they will be close. It’s your job to trim them down tot he sizes we specified.

Wood and Where to Purchase
We purchased Douglas Fir from Home Depot. We wanted a wood that was relatively inexpensive and would look naturally distressed. AND we gave ourselves a challenge of using construction grade wood and seeing how nice we could make it look.
For the lower shelf, we actually used two pieces of scrap wood from another project that were a different width and just trimmed them down. Basically it doesn’t matter what width the boards are, as long as they are 3/4″ thick and you cut them in such a way as to cover the 18″ x 46″ shelf area.
Our cost for this DIY coffee table with storage was around $70 (not including the crates or corbels), but you could reduce the cost by using a less expensive wood (like pine). The original table was also built several years ago, and prices of wood have increased (so keep that in mind).

Wood Corbels
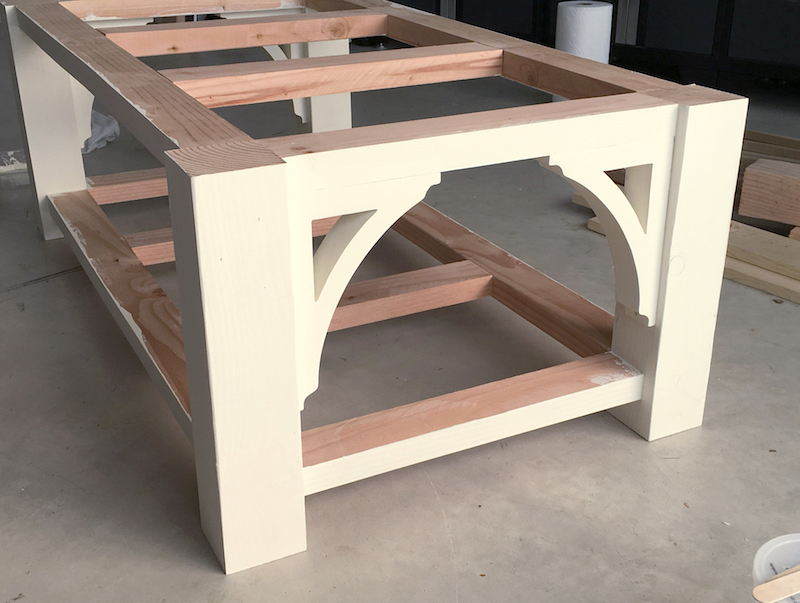
The corbels were purchased from Amazon.com (see them here). The brand, Ekena Millwork, has several sizes and finishes. We used four (4) of the 1 3/4″W x 6 1/2″D x 9″H small Thornton Wood Bracket in Alder, for a total cost of $19.50 x 4 = $78. We wanted to use them to add that special decorative touch to this farmhouse coffee table.
The corbels keep the crates from sliding out the sides too. Of course you don’t need to use them, but I think you’ll agree they look pretty awesome. So I’ll leave that up to you.
Paint and Wax
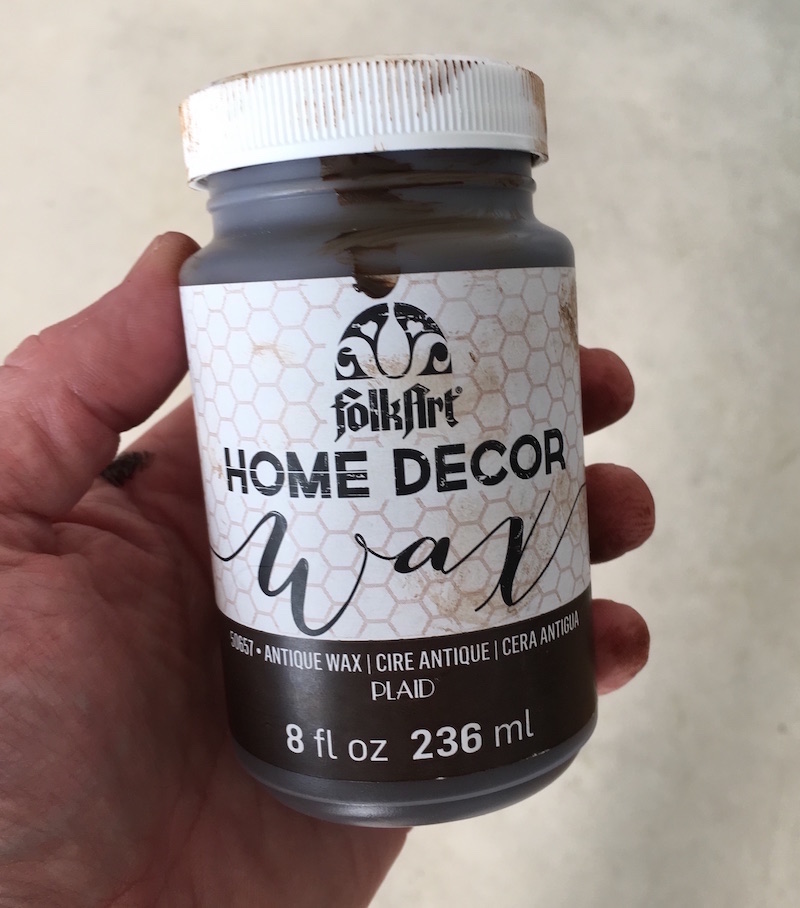
Everything was painted using FolkArt Home Decor Chalk, including the table top with the stained wax. It’s a really awesome paint that goes on so smoothly . . . and coverage is perfect (plus the colors are good!!). It’s our favorite furniture paint by far.

Are you ready to learn how to build this project? Check out your farmhouse coffee table instructions below.
DIY Coffee Table with Storage
Equipment
- 1 Compound Miter Saw with Laser
- 1 Belt sander
- 1 Drill with drill bits also a 3/4″ countersink bit
- Kreg Jig R3 Jr.
- Planer (optional, see Step 14)
Materials
- 1 4″ x 4″ x 8′ board cut into four 4 pieces 16 1/2" long (legs)
- 1 2″ x 4″ x 8′ board cut into four 4 pieces 18″ long (short side support pieces)
- 2 2″ x 4″ x 8′ boards cut into four 4 pieces 39″ long (long side support pieces)
- 1 – 2″ x 4″ x 8′ board cut into four 4 pieces 18″ long (cross support pieces for top and lower shelf)
- 1 – 1″ x 4″ x 8′ board cut into two 2 pieces 39″ long (bottom shelf side pieces)
- 2 – 3/4″ x 12″ x 8′ boards cut into two 2 pieces 3/4″ x 9″ x 46″ (bottom shelf center pieces)
- 6 – 2″ x 6″ x 6′ boards cut into six 6 2″ x 4 3/4″ x 50″ length pieces (top of table)
- 4 Wood corbels optional, see Step 12
- Wood glue we recommend Titebond III
- 80 Wood screws 1 1/2″ – 2" length – about 80; 8 additional screws if you are using corbels
- 1 Pencil
Video
Instructions
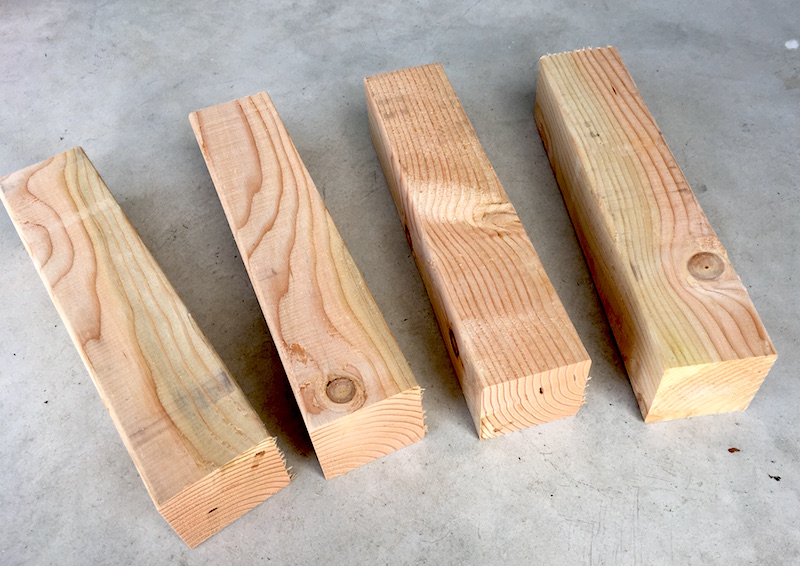
- Take a 4” x 4” x 8' piece of wood and, using a miter saw, cut it into four (4) pieces 16 1/2” long. These will be your legs.
- Take a 2” x 4” x 8' piece of wood and, using a miter saw, cut it into four (4) pieces 18” long. These will be your short side support pieces.
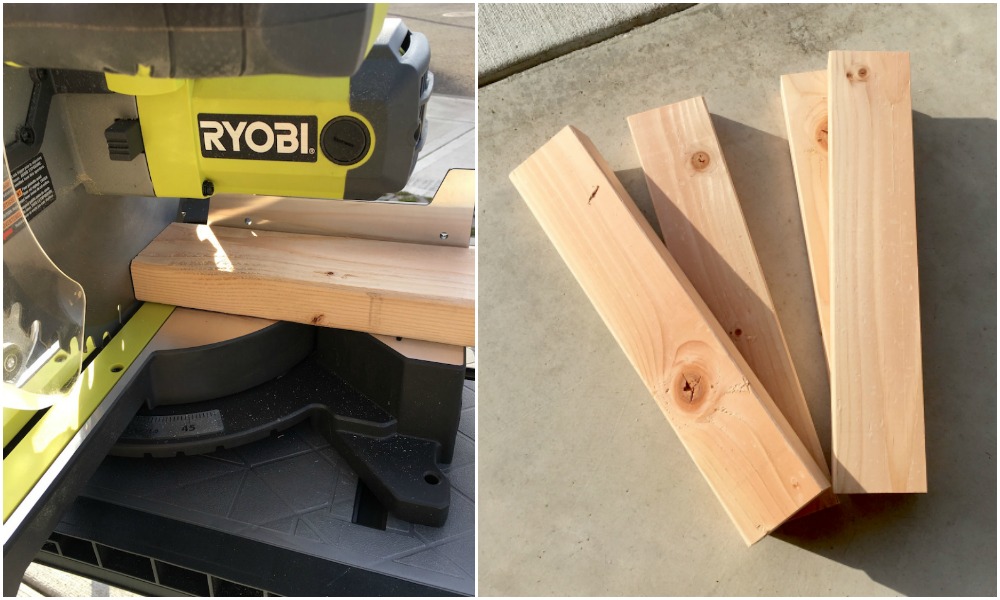
- Take two (2) 2” x 4” x 8' pieces of wood and, using a miter saw, cut them into four (4) pieces 39” long. These will be your long side support pieces.
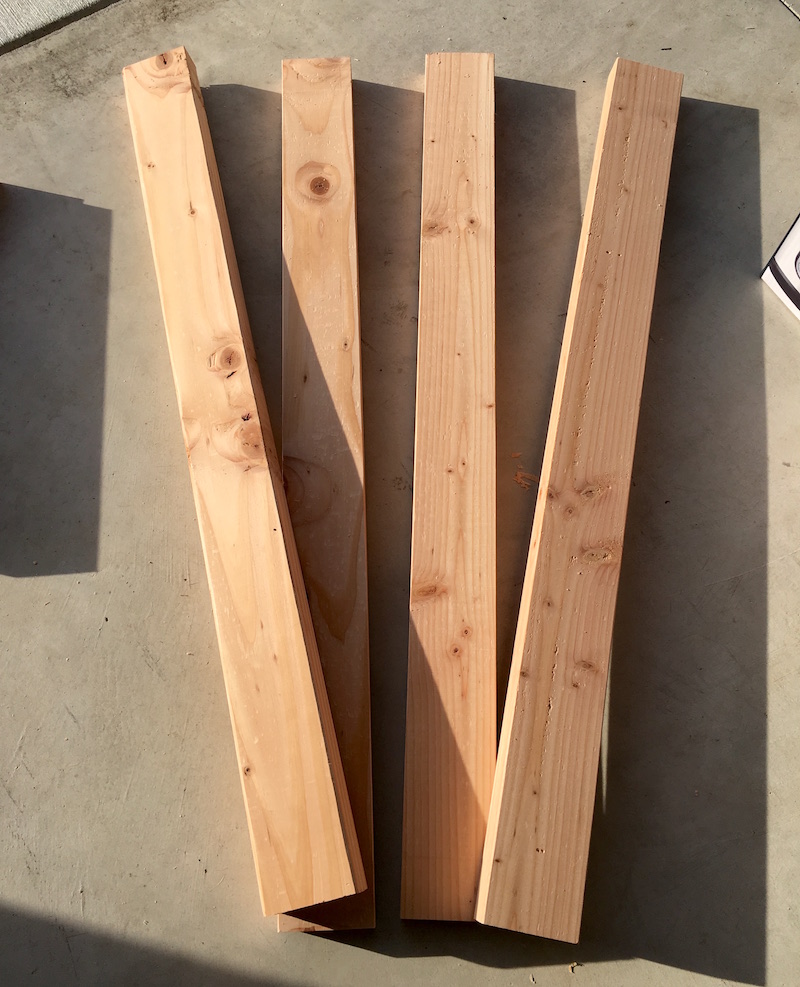
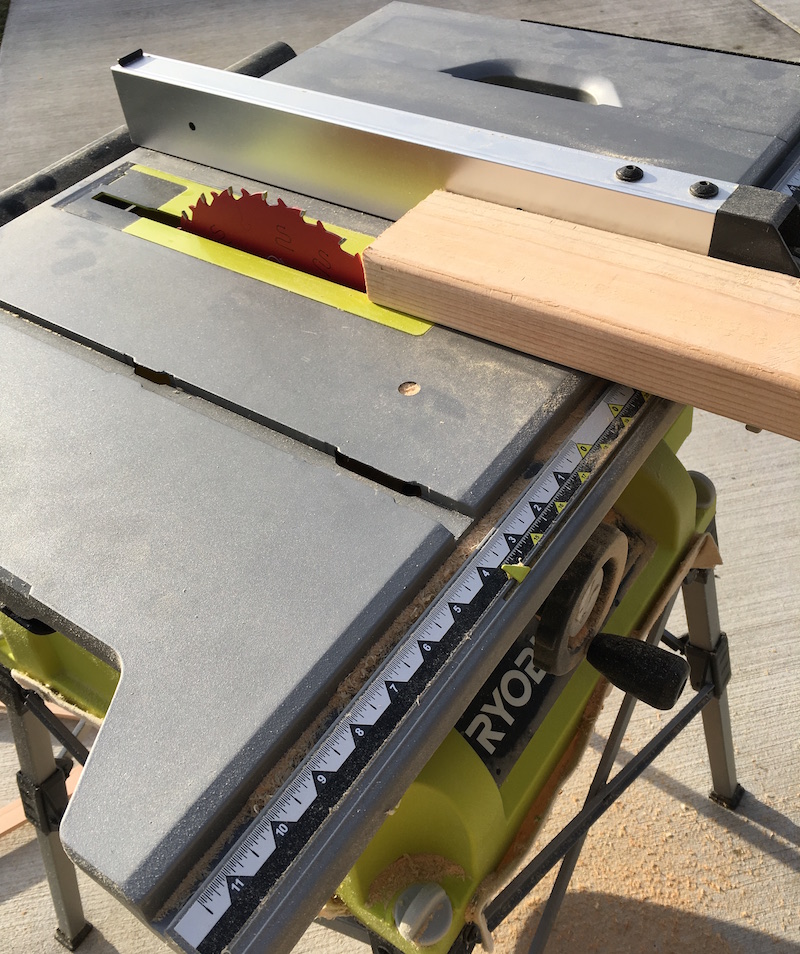
- For this step, you're going to keep the pieces the same length and rip some width off using a table saw. You're going to use the table saw to cut all eight pieces from steps 2 and 3 to a 2" x 2 3/4" width (maintaining the length). You'll end up with four pieces – 2" x 2 3/4" x 18" and four pieces – 2" x 2 3/4" x 39".
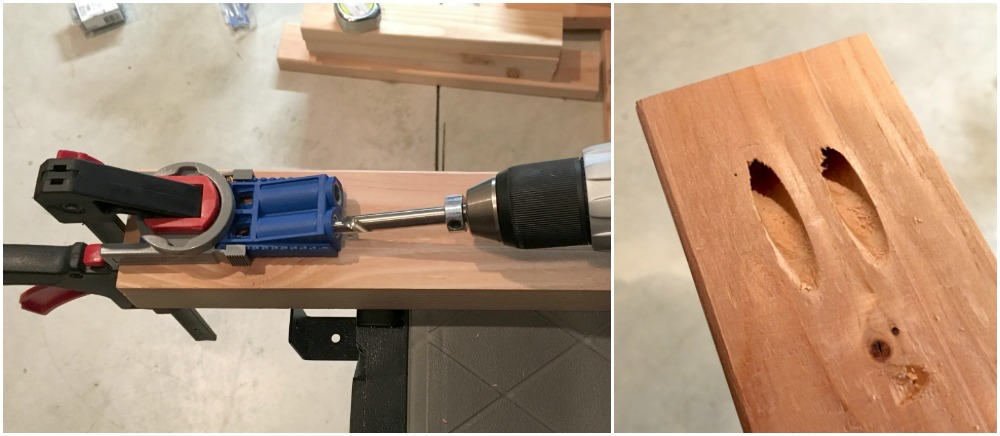
- Using a Kreg Jig and a drill, create the holes so that you can attach your side and end support pieces to the legs. The Kreg Jig holes are going to go at the end of each of the pieces you cut in steps 2 and 3.
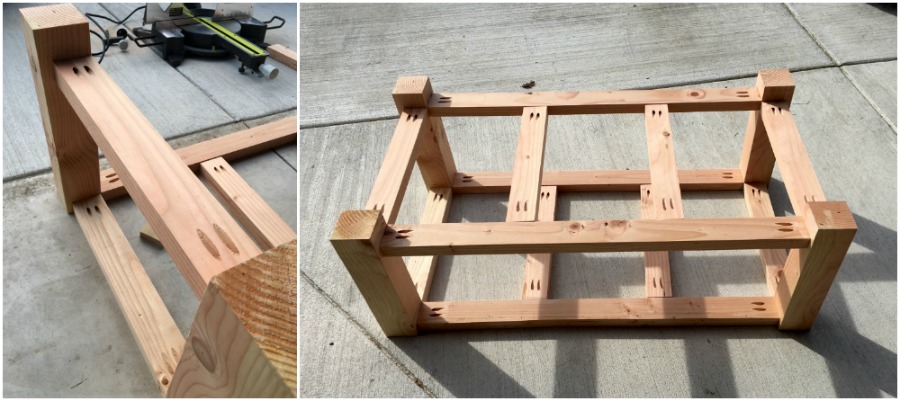
- Start with two long and two short support pieces. You are going to assemble the table frame upside down for ease. Line up the inside of your support pieces flush with the inside of the table legs.
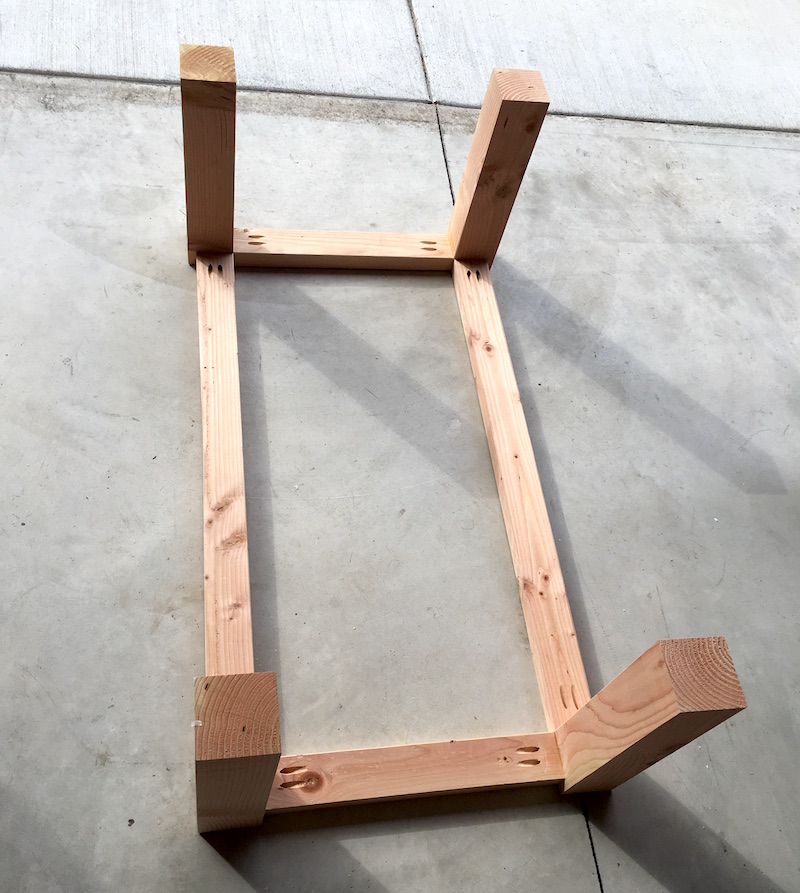
- Use your screws, Kreg Jig driving bit (it comes in the kit), and a drill to attach the upper support pieces to the legs (use wood glue to make the connection more structurally strong).
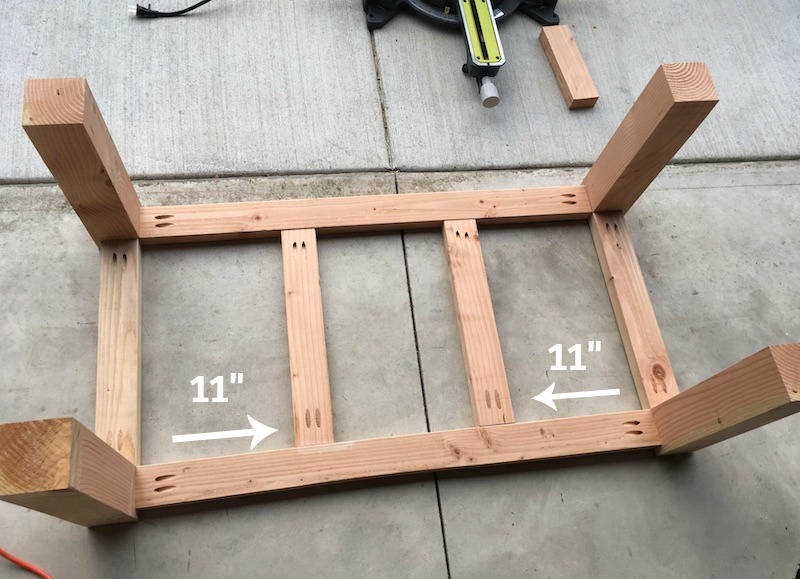
- Use a miter saw to cut the wood that will act as cross/support pieces for your table top and then for your lower shelf. Cut a 2" x 4" x 8' board down to four (4) pieces that are 2" x 4" x 18" long each.
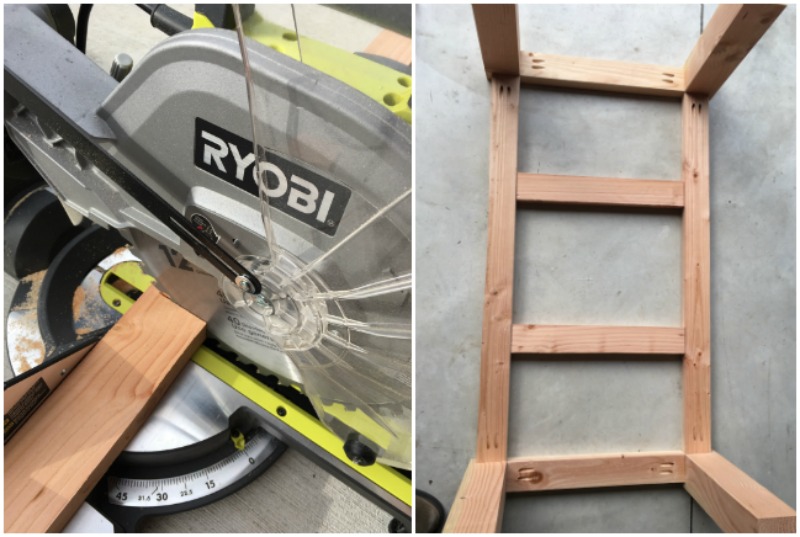
- Use your Kreg Jig to make the holes, then use screws, glue, and drill to attach these pieces 11” in from each end.
- With the table frame still upside down, start attaching the lower support pieces. Put them in place the same way you placed the upper support pieces, but 2” from the bottom of the legs.
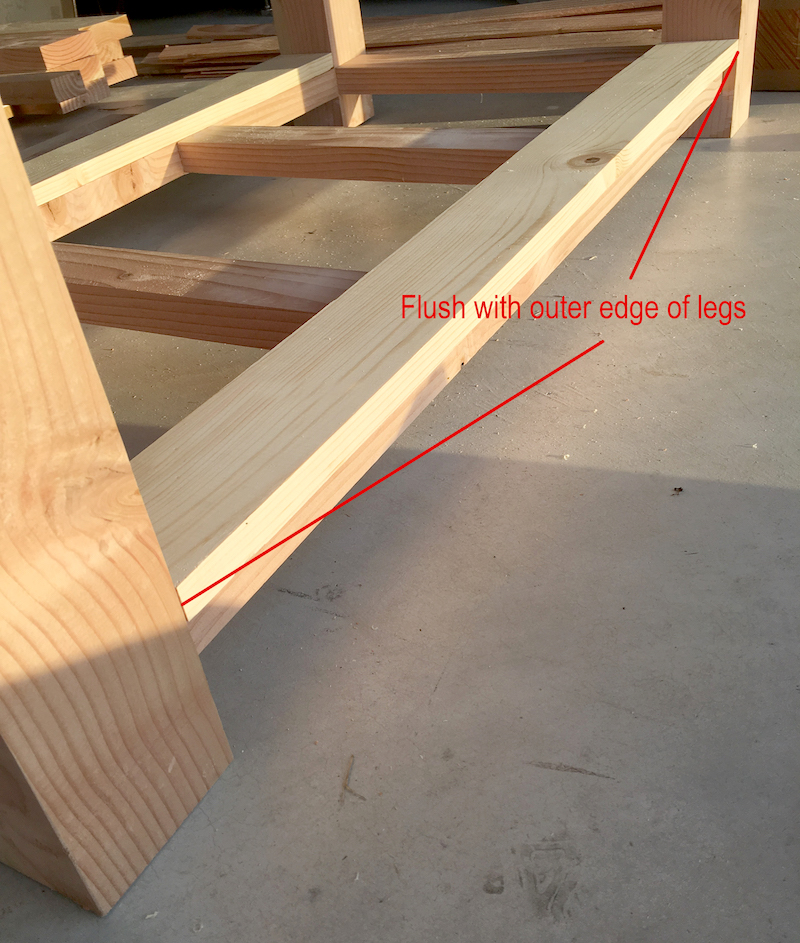
- Take a 1” x 4” x 8’ piece of wood and, using a miter saw, cut two (2) 1” x 4” x 39” pieces. The actual size for these pieces will end up being around 3/4”x 3 ½”x 39”. These two pieces will be the outside pieces of the lower shelf. These will be attached flush with the outside of the table legs – so place them to make sure they fit, and do any adjusting as necessary. You won't mount until Step 20.
- To cover the inside of the lower shelf, use a miter saw to cut a 3/4" x 12" x 8' piece of wood down to two (2) pieces, 3/4" x 9" x 46" each. You won't mount them until Step 20 (with the outer pieces).
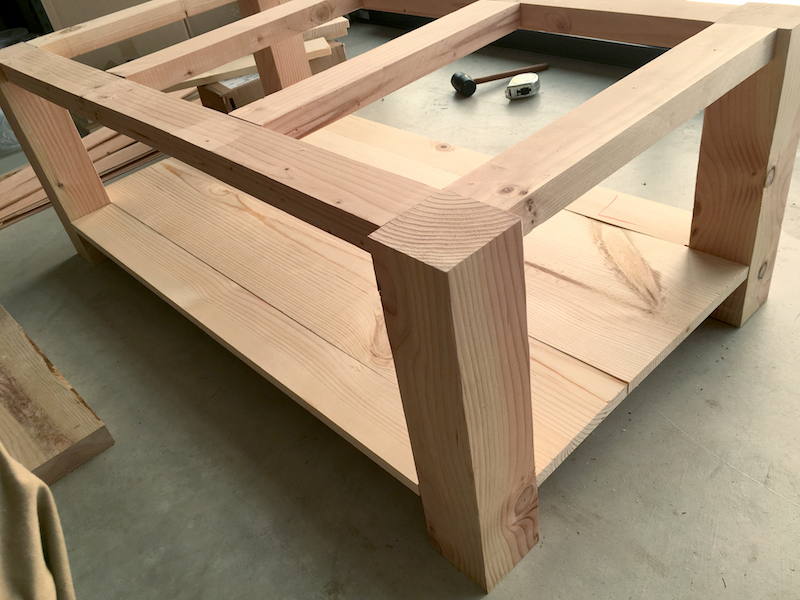
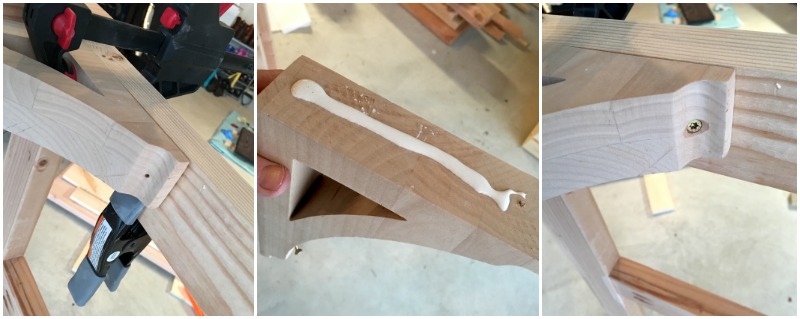
- If you're going to add the corbels, clamp in place (flush with the upper/outer edge of the upper end support pieces). Drill pilot holes at the attachment points on the corbels (this could vary depending on the corbels you select) – for us these were at each end of the corbel. Next use a countersink drill bit on each of the pilot holes. Unclamp the corbel, and put wood glue on each of the contact points; clamp again. Screw into place using two screws per corbel.
- Paint the wood frame as well as the lower shelf pieces from Steps 11 and 12 (figure out which parts of the frame are going to show and only paint those surfaces. This will save time and paint).
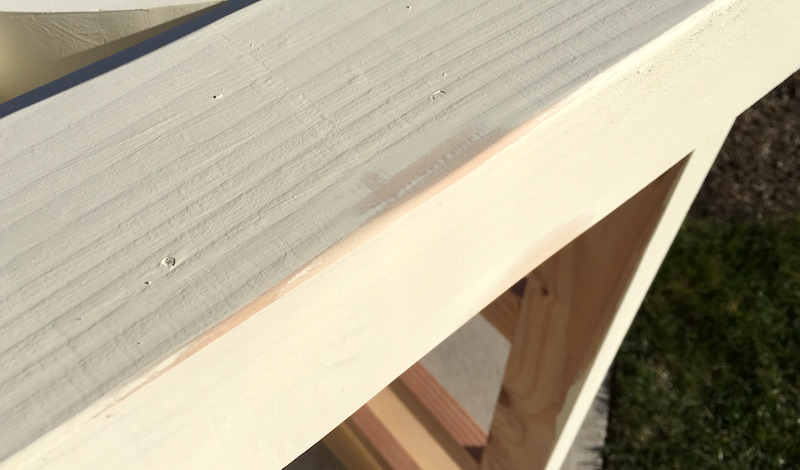
- Using 120-grit sandpaper, distress the table frame and lower shelf boards, making your wood coffee table look worn in various areas.
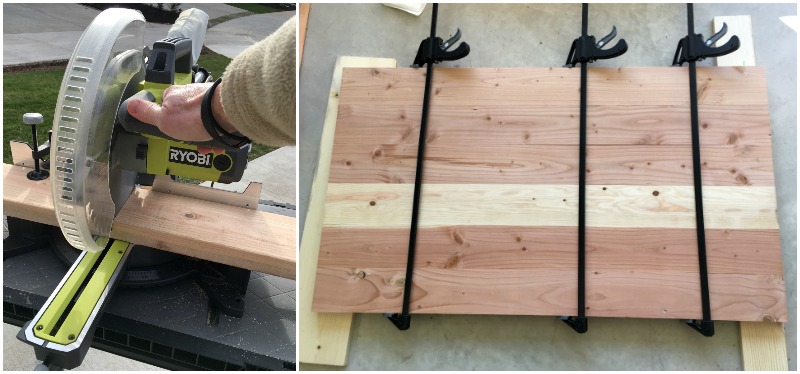
- To make the table top, use a miter saw to cut six (6) 2” x 6” x 6' boards to 50” lengths each. Use a table saw to rip the six (6) 2” x 6” pieces to a 4 3/4” width, removing width from both edges of each board so you get a nice straight edge on both sides of each board. This is where you can use a planer to make the boards smooth as well.
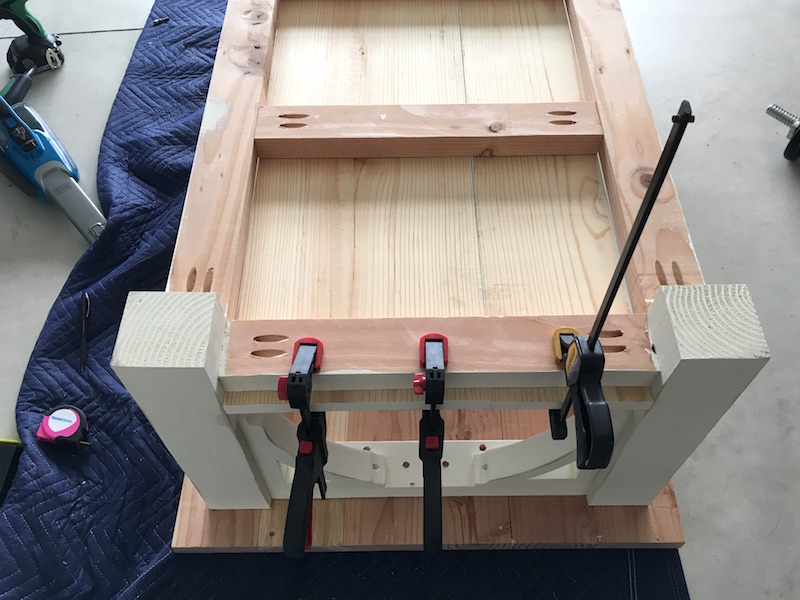
- Use wood glue and bar clamps to glue the boards together. Let dry overnight.
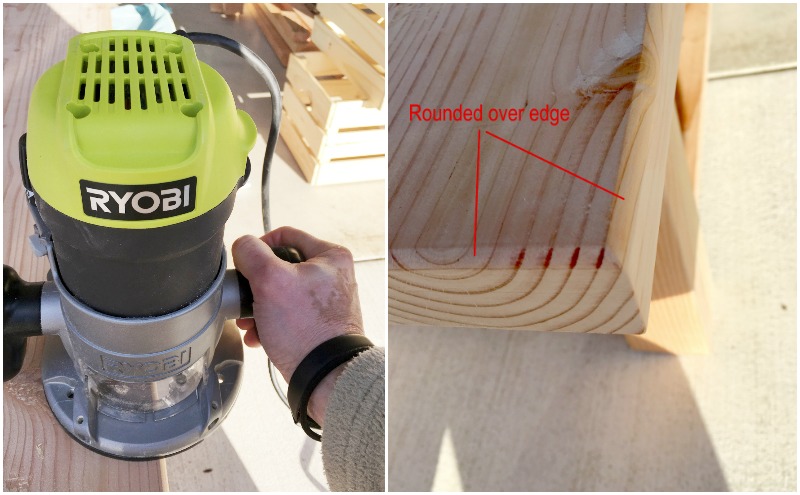
- If desired, use a router and round over bit to round the top of the outside edge of your table top. This just makes it a bit more finished and the edge isn't as sharp for children. Another option (alternative to a router) is to use sandpaper, though it takes a bit of arm muscle.
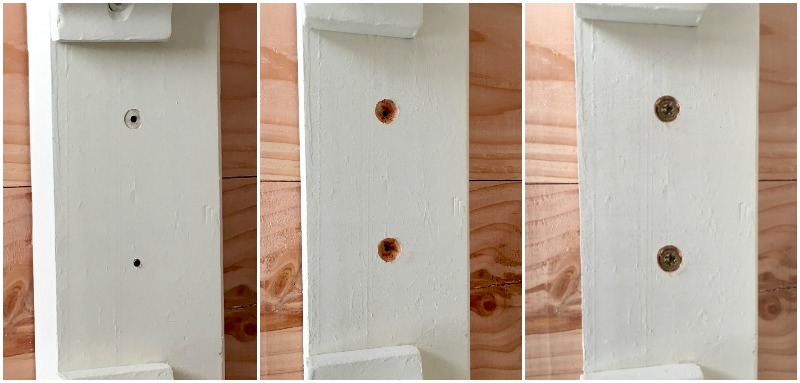
- To attach the top to the frame, place the top face down on a soft surface (ie., a moving blanket). Center the table frame upside down on the top, and drill pilot holes into the underside of the frame. Set your drill bit depth so that it goes almost completely through the frame, falling 1/8” short of the edge. For example, if the frame is 1” thick, drill your pilot hole 7/8” deep. Drill out each hole with a countersink bit. We used 2” wood screws to attach the tabletop. We attached the tabletop to both end rails in several places, both cross support rails, and both side rails. We used five to six screws in each support rail to firmly secure the top to the frame.
- Leaving the table upside down, attach the lower shelf. Clamp the lower shelf into place. Use 1 3/4" wood screws to attach the lower shelf just like the tabletop, making sure to use enough screws to secure it.
- Stain or paint the top of the table, then use a Water Based Satin Polyurethane to seal. Let dry for 24 hours before using.
If you enjoyed this farmhouse coffee table DIY, let me know in the comments! Plus check out some other home decor posts below:
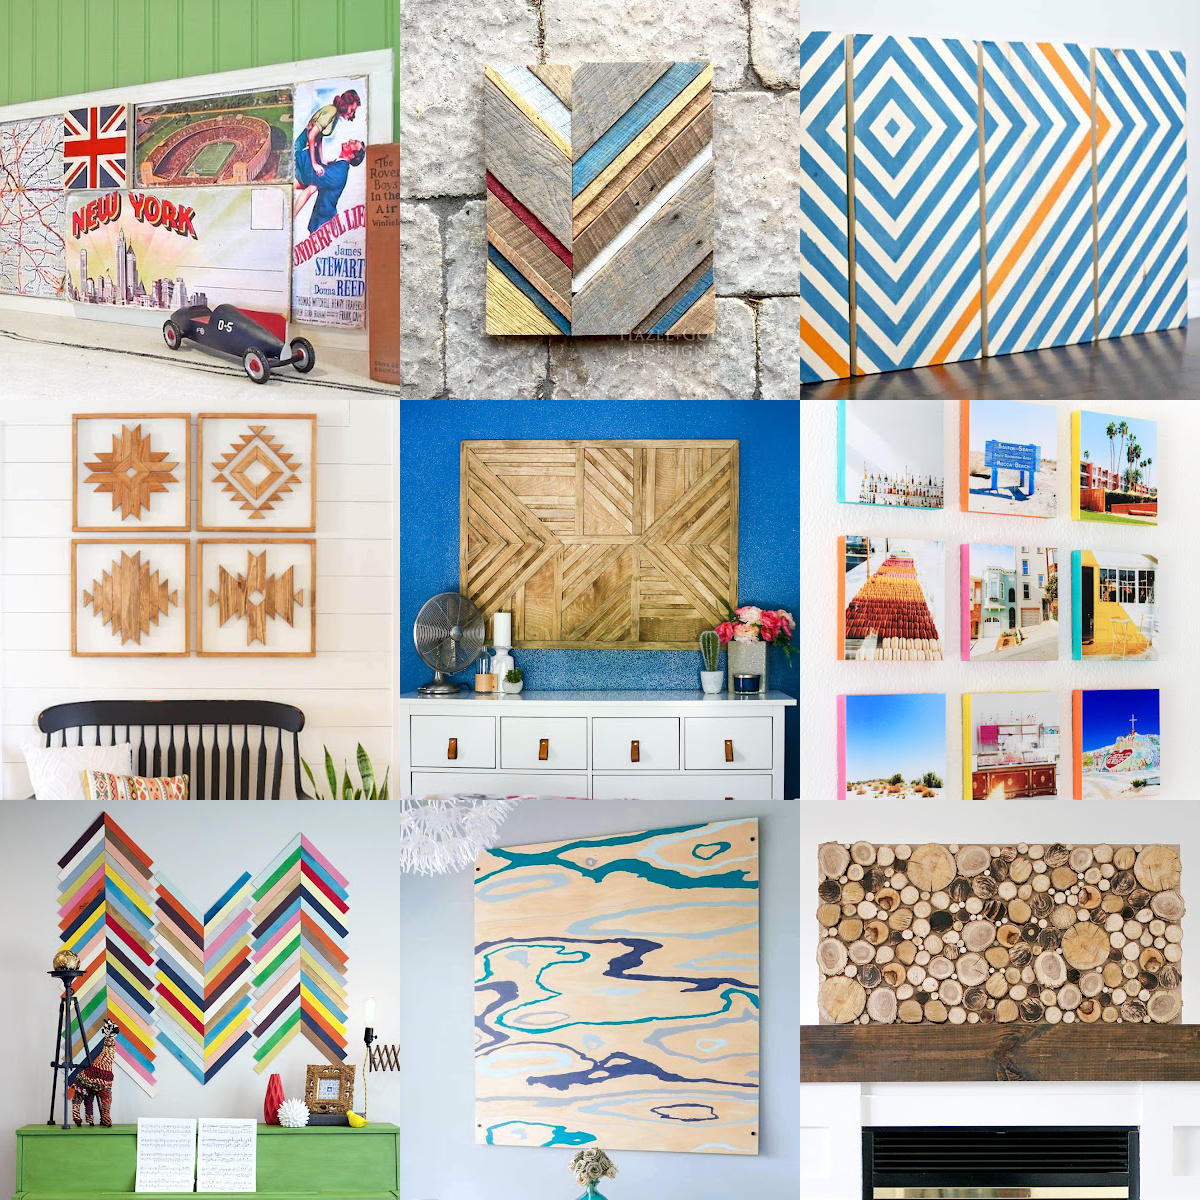
Camper Pallet Art • Coffee Table • 20+ DIY Coffee Tables • Industrial Pipe Shelving • Lack Endtable Hack • Mirror Frame • Modern Headboard • Nolmyra Chair Hack • Pallet Shelf • Platform Bed • Poster Hanger • Stacked Entry Bench • Table Revamp with Vinyl • TV Riser • Wood Slat Doormat • Wood Sign • Wood Step Stool Chair

OMG! This is an amazing design table. It looks very beautiful. It’s really helpful your content about the important coffee table for my woodworking shop but I think, you should also mention how to make its tips so that everyone can get some basic knowledge from your end. But I’m still confused about the size of it. Can you please inform which size will be the choice for a small storage?