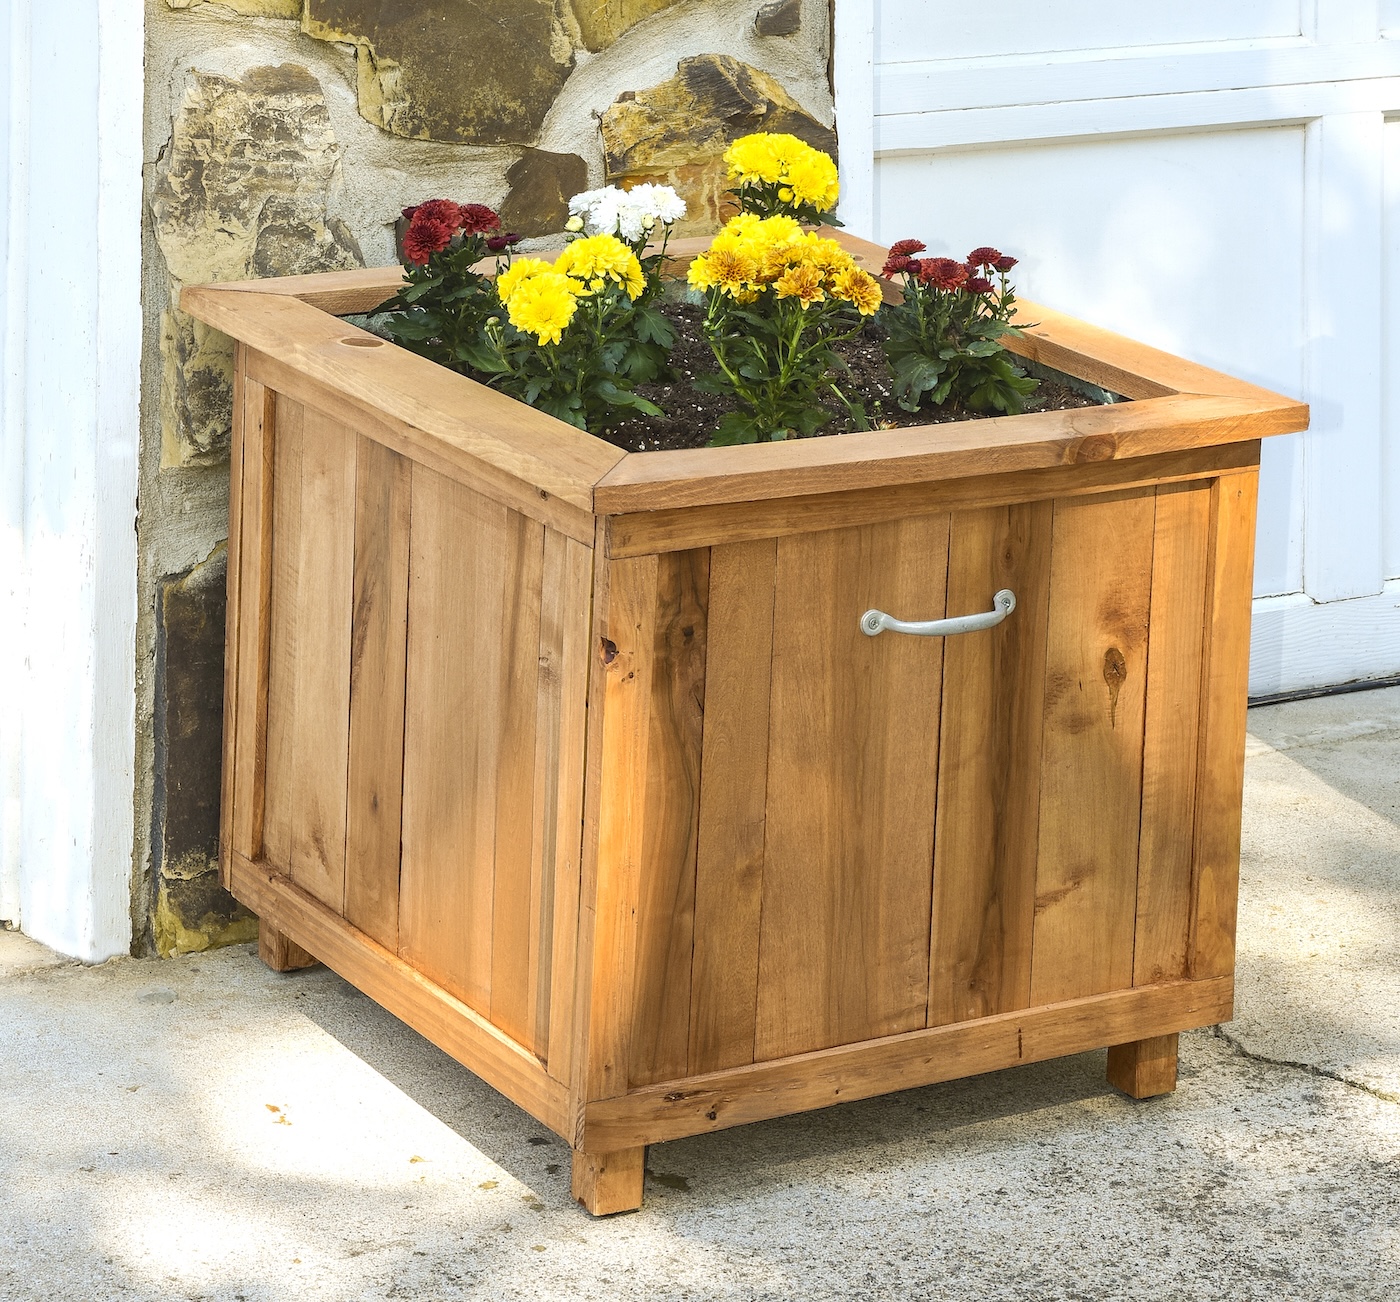
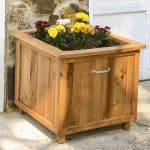
Stylish DIY Garden Hose Holder with Pallet Wood Planter
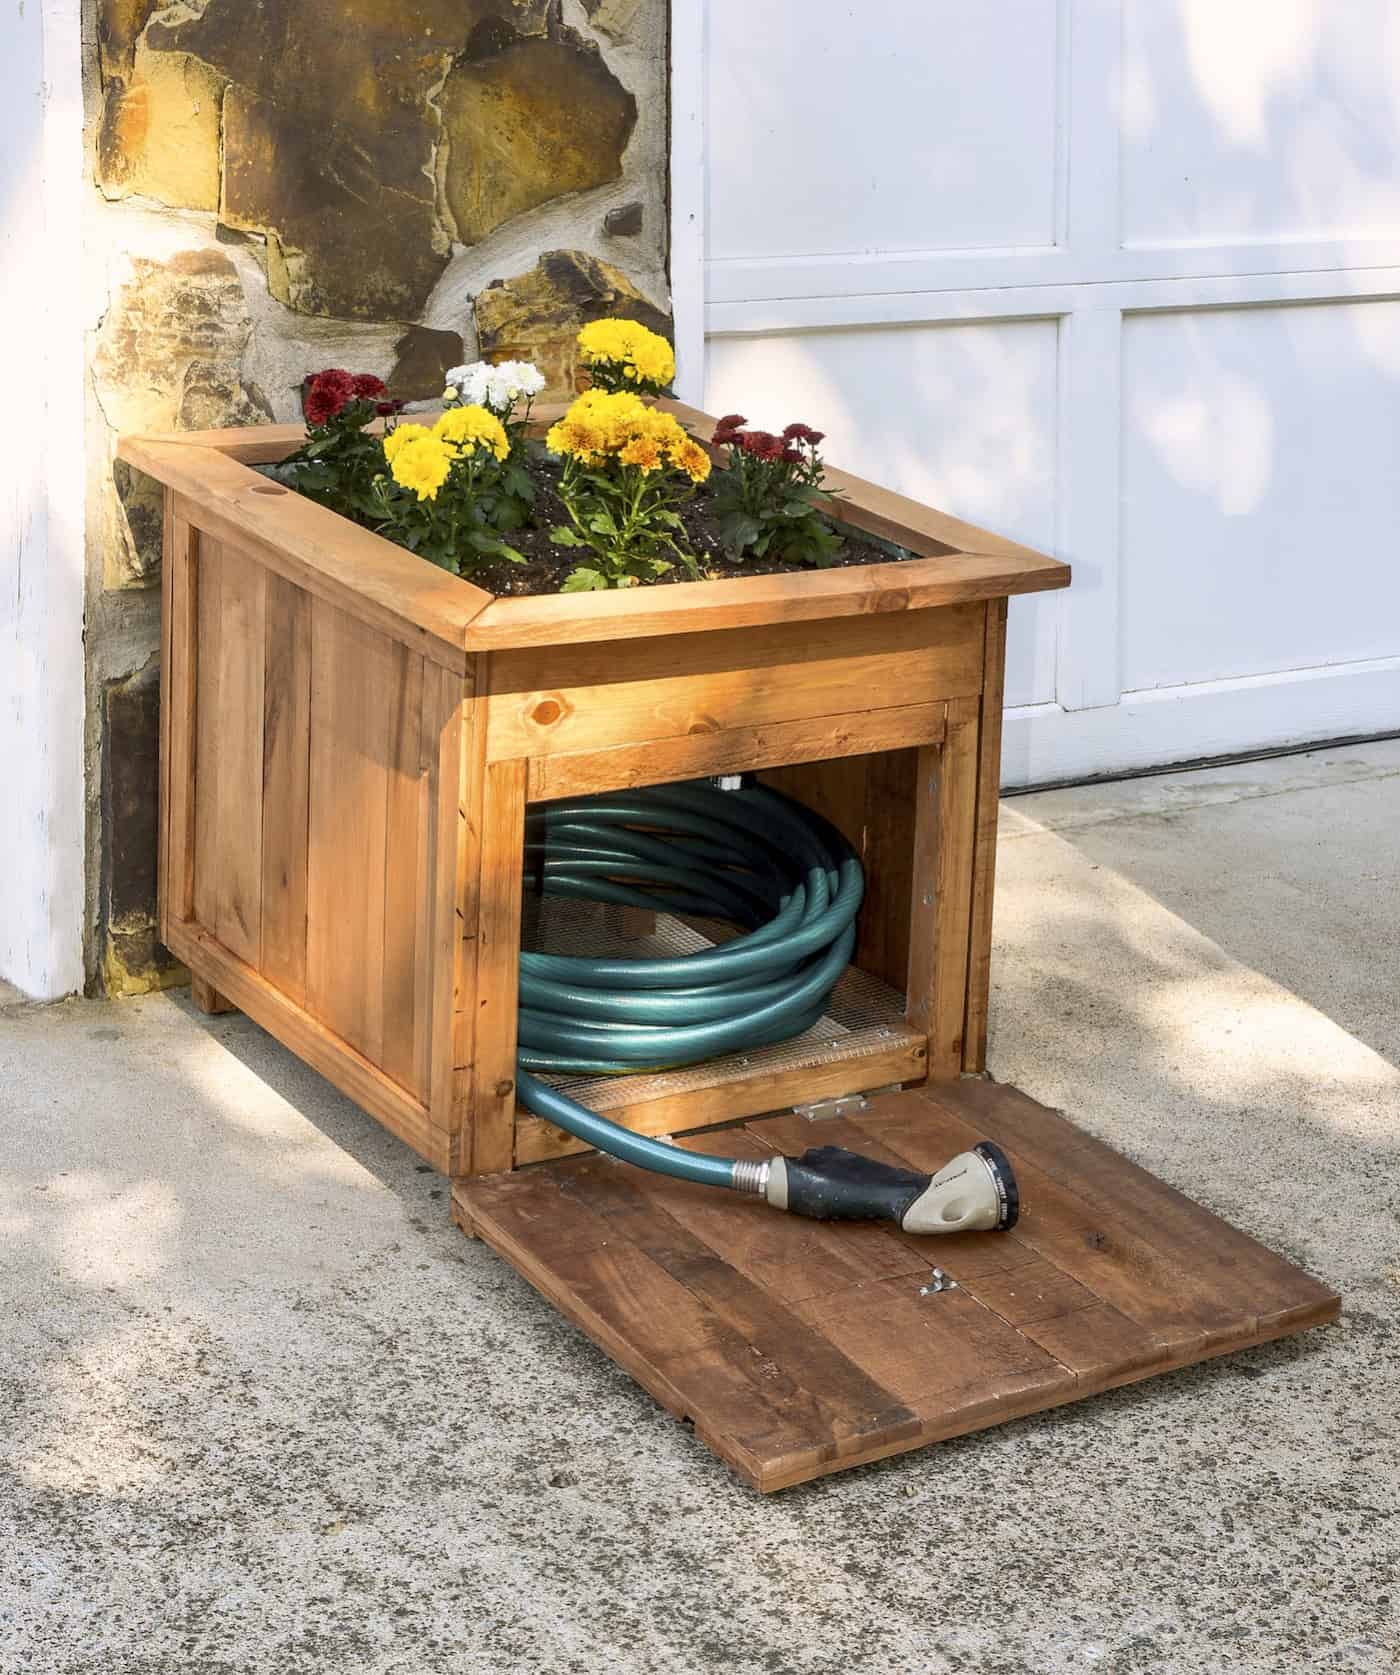
Build a unique DIY garden hose holder and planter using pallet wood! The hose stores in the bottom and flowers can be planted right on top.
Have you ever seen that incredible shrinking hose on late night television commercials? I’ve got a news flash for you . . . they don’t work.
We thought we’d found the answer to our problems and could get rid of a holder but alas, it wasn’t to be. So instead of coming up with ways to get rid of it, we decided instead to build our own out of pallet wood.
Yes – we embraced the idea of hose storage. But we also decided we could make it prettier than a regular hose caddy, and that we could make it out of pallet wood. Which after this table and this art, we had copious amounts of lying around.
Note this project doesn’t HAVE to be pallet wood. You can use any reclaimed wood you like. Pallet wood just happens to be pretty readily available.
Turns out we weren’t the first people to come up with this idea – we found this version and this version online. As any good DIYer does, they make their own version that works for them, and that’s exactly what we did! It’s perfect for holding a hose, and when it’s not in use, it looks so pretty.
As with any project, the supplies and instructions might seem complicated, but they really aren’t. Do a quick read through before you begin, especially because you may need to let the planed wood dry for a few weeks.
CUT LIST
Pallet Wood (all run through the planer)
- 24 pieces (various widths x 17″L x .5″ thick)
- 8 pieces (1.25”W x 20”L x .5” thick)
- 8 pieces (1.25”W x 15.5”L x .5” thick)
- 1 piece (4”W x 18.25”L x .5” thick)
- 2 pieces (24”L x 2.5”W x .5” thick)
- 2 pieces (22”L x 2.5”W x .5” thick)
2x2s
- 4 pieces – 15″ long
- 4 pieces – 17.5″ long
- 4 pieces – 15.5” long
I didn’t include plants in the supplies list because what you plant is up to you. Isn’t it wonderful? Here’s the back.
We are so happy with it! See the hose holder in motion here. Get the printable how to card below!
DIY Garden Hose Holder
Equipment
- Miter saw
- Planer
- Nail gun with 3/4" nails
- Tin snips or wire cutters
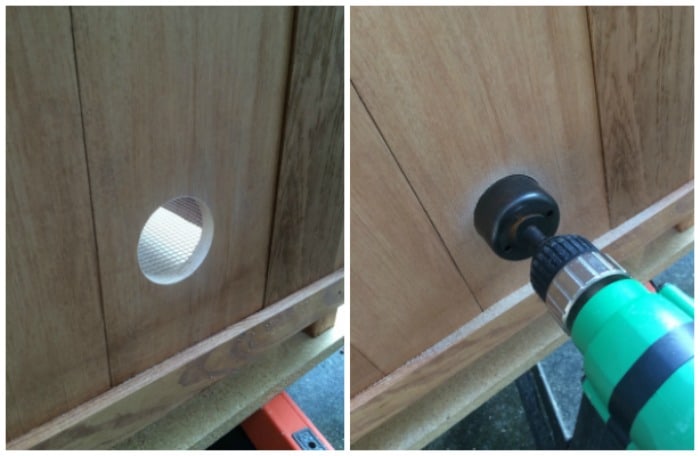
- Drill with drill bits including doorknob attachment and screw bits
- Staple gun
Materials
- 2 Pallets
- 16 feet 2 x 2s or two 8 foot pieces
- 16 1 5/8" Wood screws
- Titebond III
- Thompson’s WaterSeal
- Galvanized hinges
- Small door latch
- 4 L-brackets brackets with screws
- 8 Right angle brackets with screws
- 1 roll Hardware cloth 2' x 5' roll
- 1 roll Landscaping fabric
- 32 1/2" Wood screws
- 30 2" Wood screws 24 to 30
- Metal handle
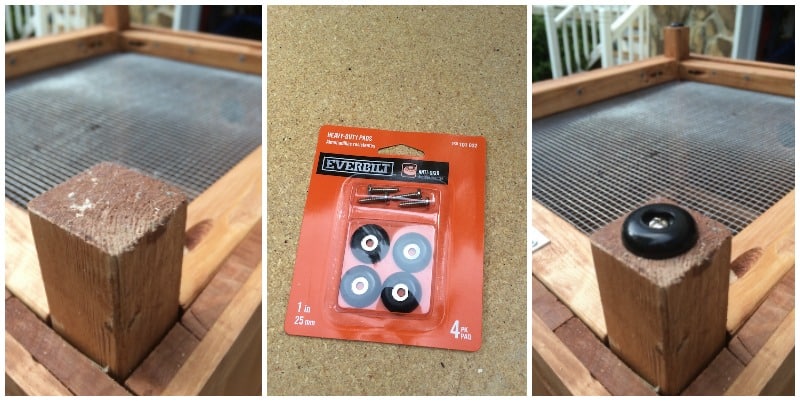
- Everbilt heavy-duty pads 1″ – 4
Video
Instructions
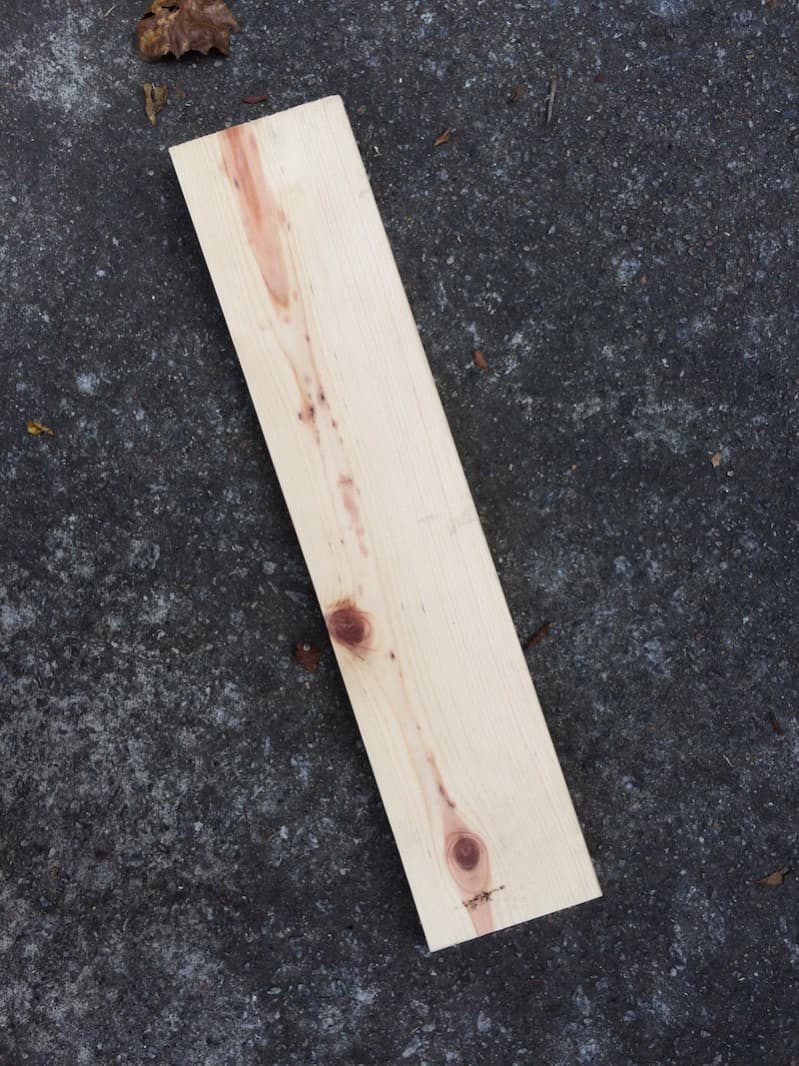
- Gather your pallet wood. Using a planer, plane your pallet wood planks to a uniform thickness; approximately 1/2".IMPORTANT NOTE: after you plane the wood, we highly recommend letting it sit in a dry environment for a few weeks to dry. The wood WILL shrink (we learned from experience)!
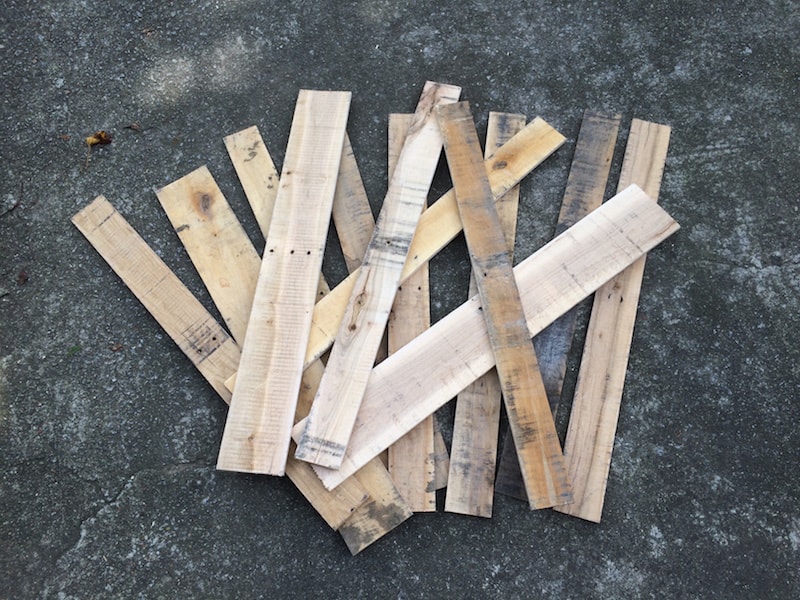
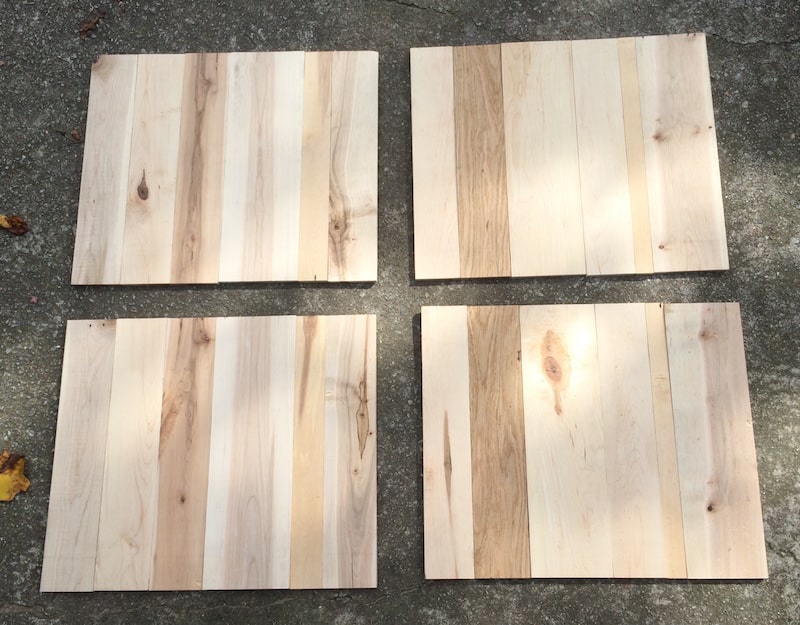
- Use a miter saw to cut your planed pallet planks to 17” lengths. Lay them out – they will be varying widths, which is fine. The goal is to form four 17” x 20” panels with the planks. Do not attach anything yet.
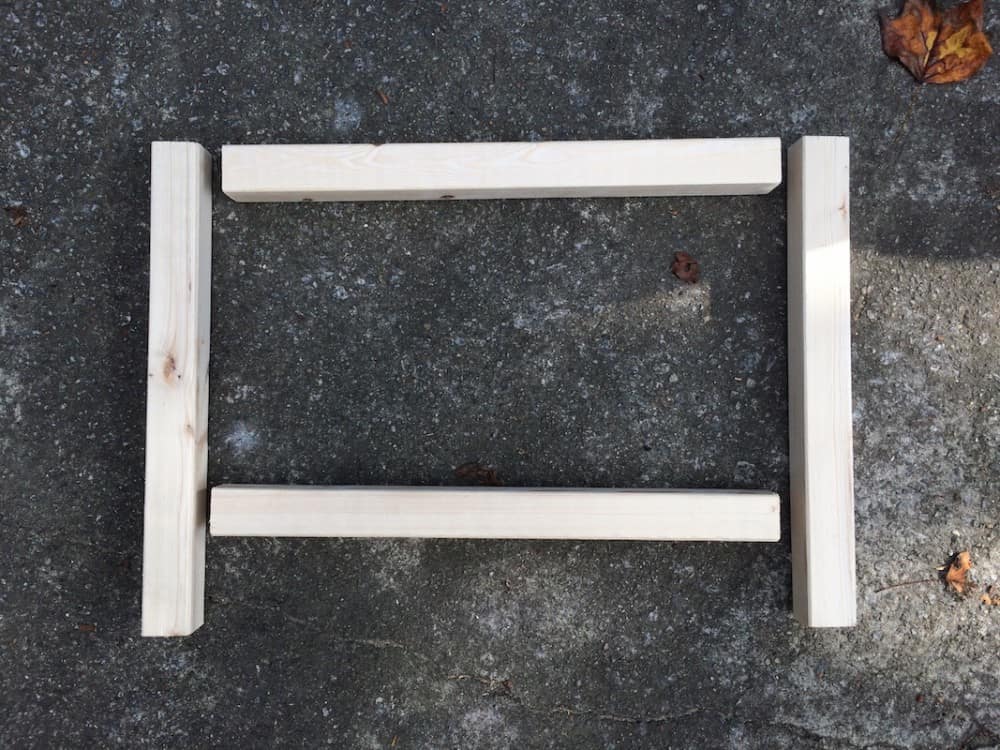
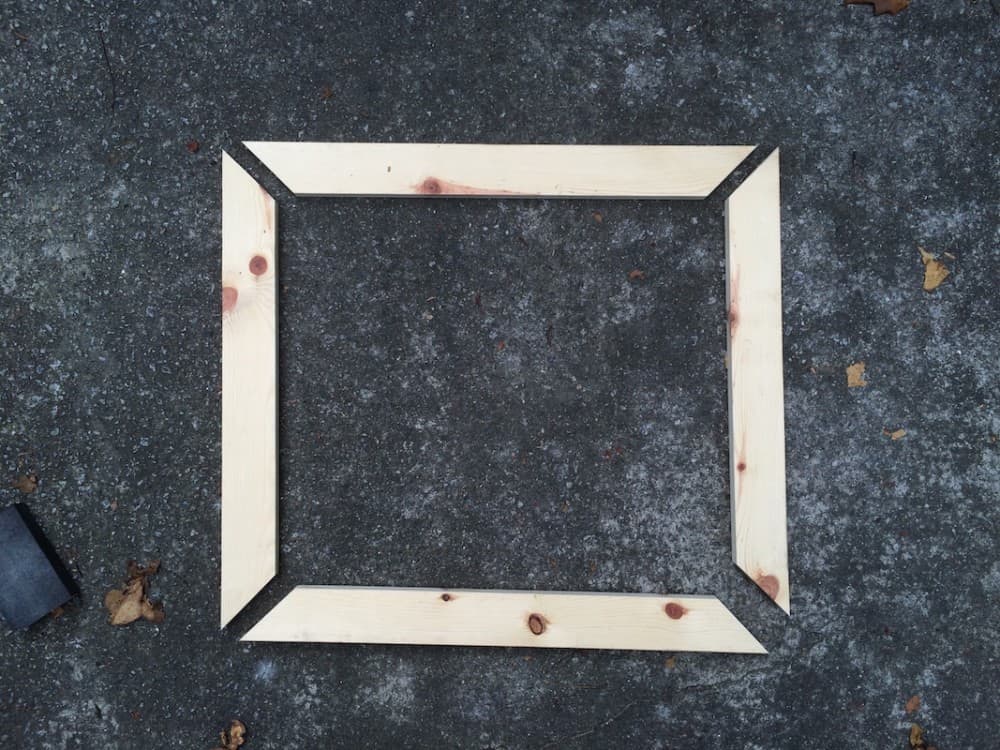
- Make cross pieces for the top and bottom. Use a miter saw to cut some of the remaining pallet wood into the top and bottom panel trim pieces (1.25”W x 20”L x .5”T). You’ll need eight pieces total.
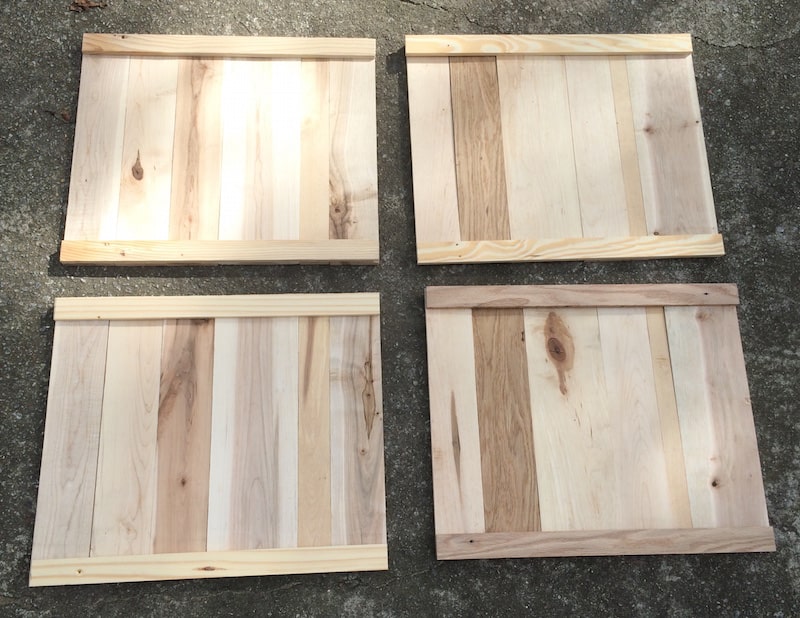
- Finish out the frame for each panel with additional side trim pieces. Use a miter saw to cut additional pallet wood your side panel trim pieces (1.25”W x 15.5”L x .5”T) – you’ll need eight pieces.
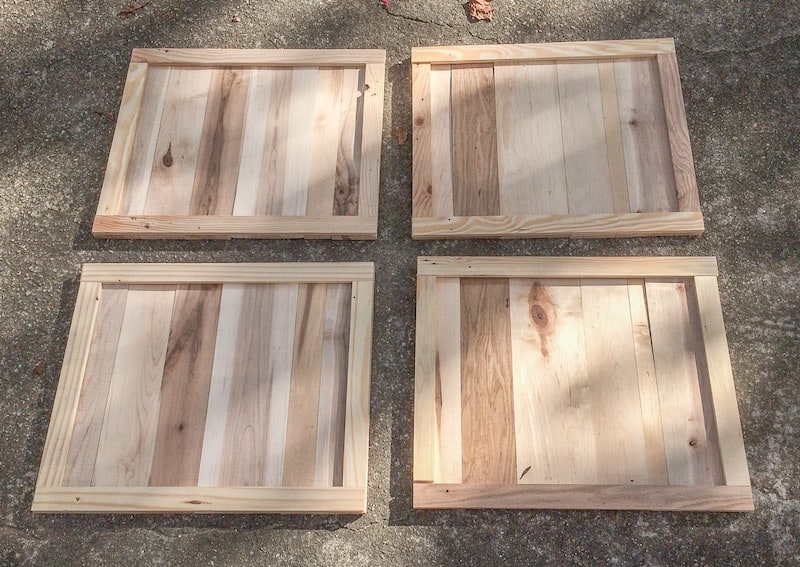
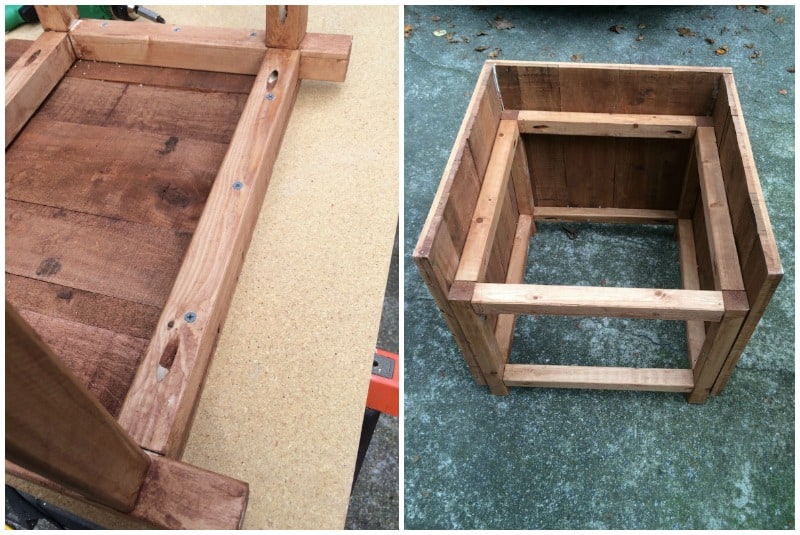
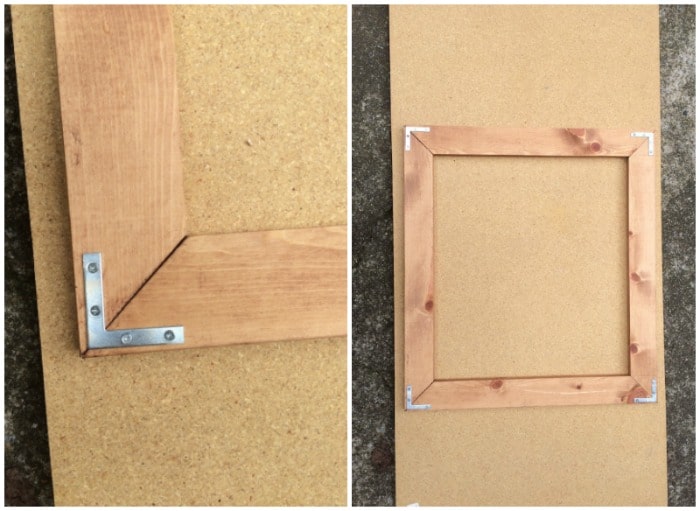
- Assemble all four frames with the wood pieces. Do this by laying out one frame face down as shown on the upper left. Add wood glue around the exterior, then place the pallet wood pieces face down on top to secure. Complete one panel and then finish the other three.
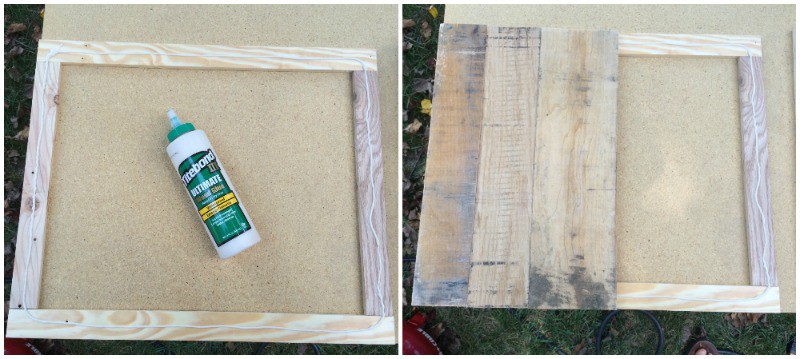
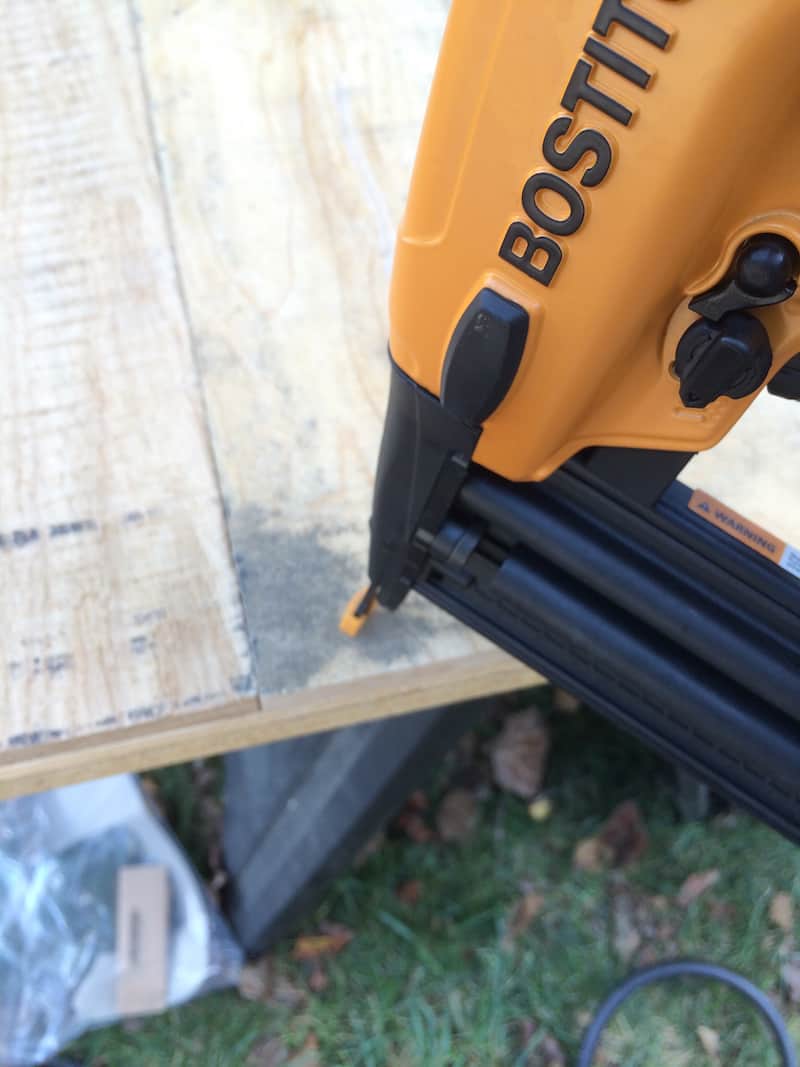
- Use a nail gun to reinforce the panels you just glued. Use 3/4" nails. Let the external panel pieces dry.
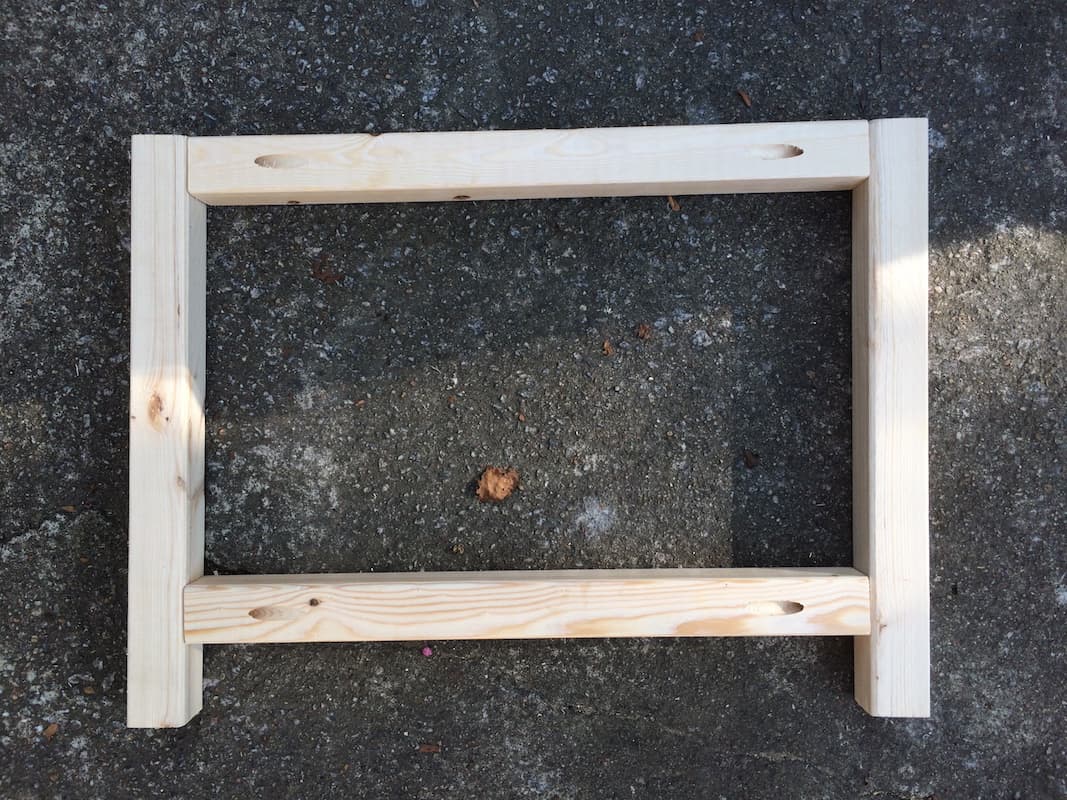
- Start cutting the internal frame pieces using 2x2s and a miter saw. Cut four pieces 15" long, four pieces 17.5" long, and four pieces 15.5" long.
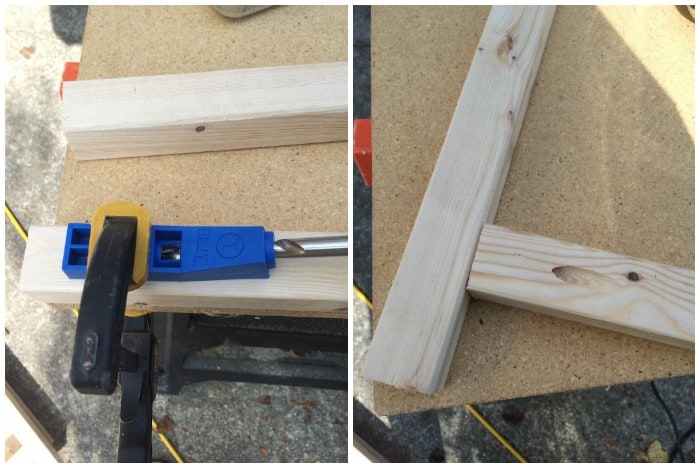
- Grab two 15" pieces and two 17.5" pieces to start assembling the sides. Use a Kreg Jig to drill angled pilot holes on the inside back of the horizontal pieces for attaching screws.
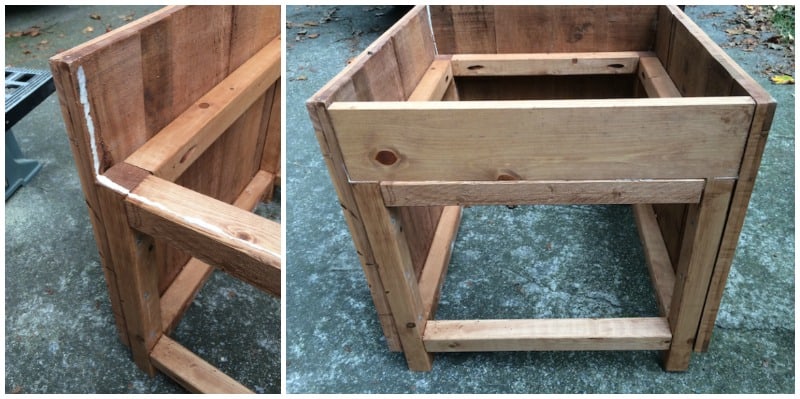
- Make two of these. THEN use the four 15.5" pieces to attach the two frames, repeating the Kreg Jig instructions. This is the "skeleton" for the panels and the planter box on the top.
- On the front side of the planter, there is a piece behind the door. For now, use the miter saw to cut a piece of planed pallet wood to 4”Wx18.25”Lx.5”T.
- Cut the top frame that will go around the planter box area. Use a miter saw to cut four pieces of planed pallet wood: two pieces 24”L x 2.5”W x .5” thick and two pieces 22”L x 2.5”W x .5” thick. Cut a 45º angle at each end.
- Before assembly, stain all your components. Follow the instructions on your stain container for best application. Let dry.
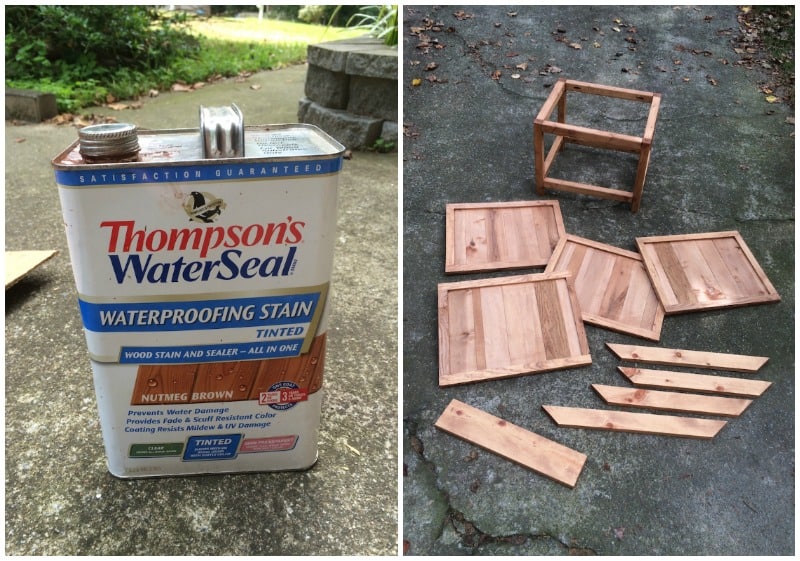
- Start assembling the caddy. Decide which side is the front. On the other three sides, glue the panels on and then screw in with 2" wood screws. Let the wood glue dry.
- On the front, glue in the panel. Add a little nail gun action to the sides to secure. Let dry.
- Attach the hinges to the last panel. Attach these hinges to the hose holder.

- Attach the female part of the door latch to the top of the door opening in the center. Attach the male part of the door latch to the corresponding spot on the inside of the front door. Attempt opening and closing before securing down completely.`
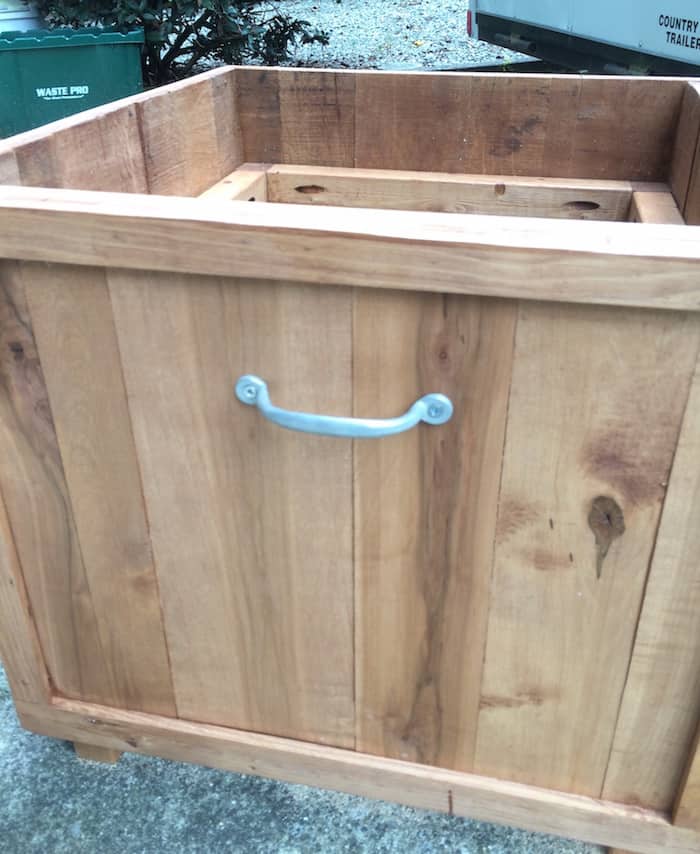
- Attach a handle to the front of the door.
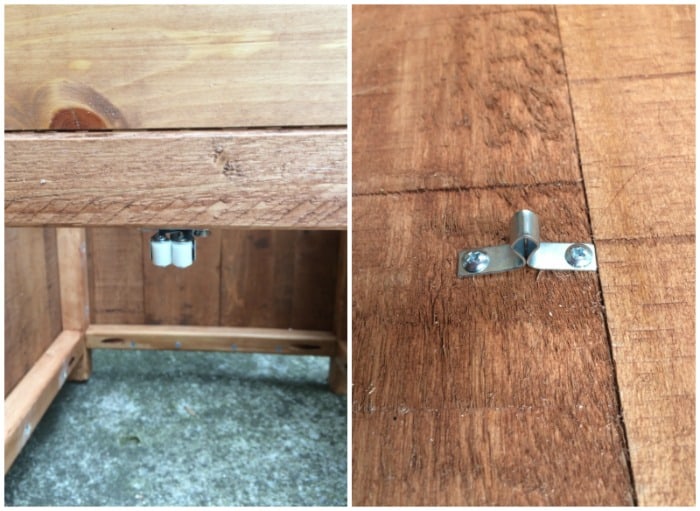
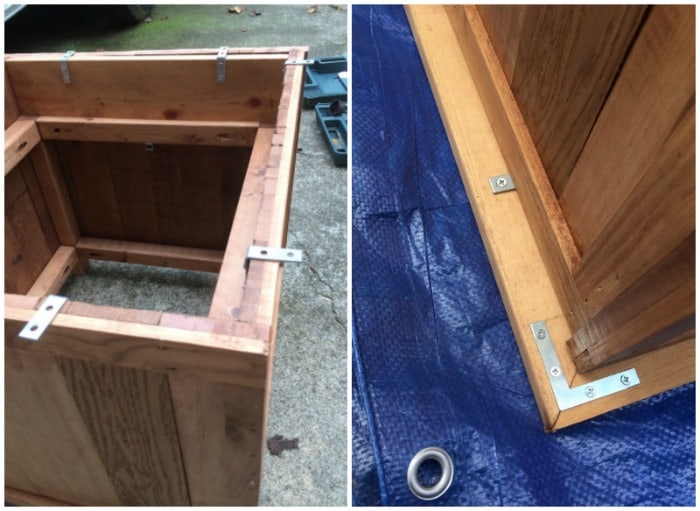
- Secure the remaining pieces of wood together with your four L-brackets (packets come with screws).Attach eight right angle brackets (two on each side) to the panels of your hose caddy as shown above on the left (brackets come with screws).
- Flip the entire holder over and center it on the frame held together by L-brackets. Screw the right angle brackets into that top frame.
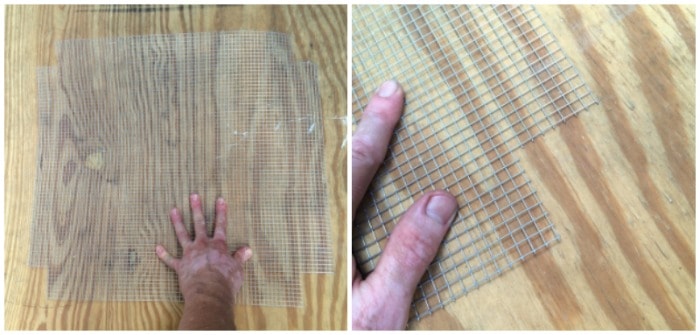
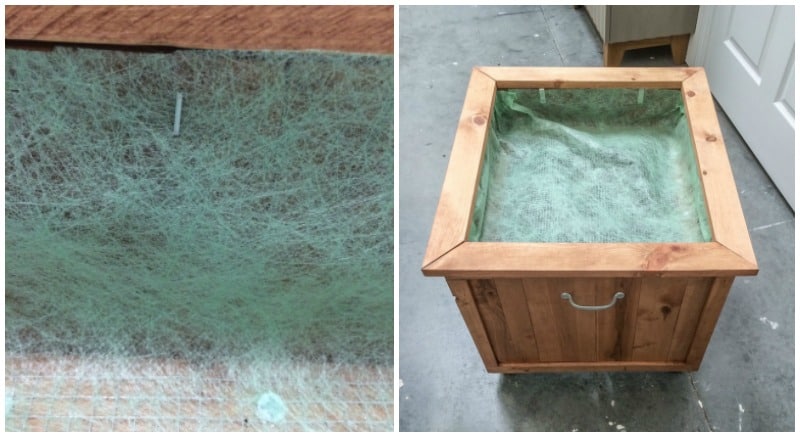
- Cut two pieces of ¼” mesh hardware cloth into 18.25” x 20” sheets. Cut 2” out of all of the corners of one piece – this will be the inside bottom. The uncut piece will be the inside top.
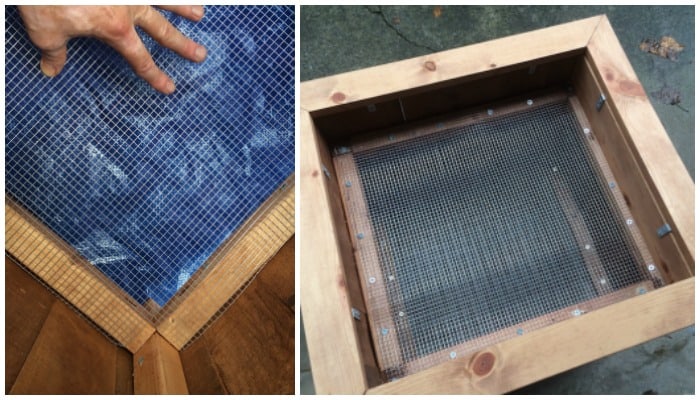
- Take the piece of hardware cloth with the corners cut and place it in the inside bottom. Use ½” wood screws to attach it. Do the same with the uncut piece on the inside top.
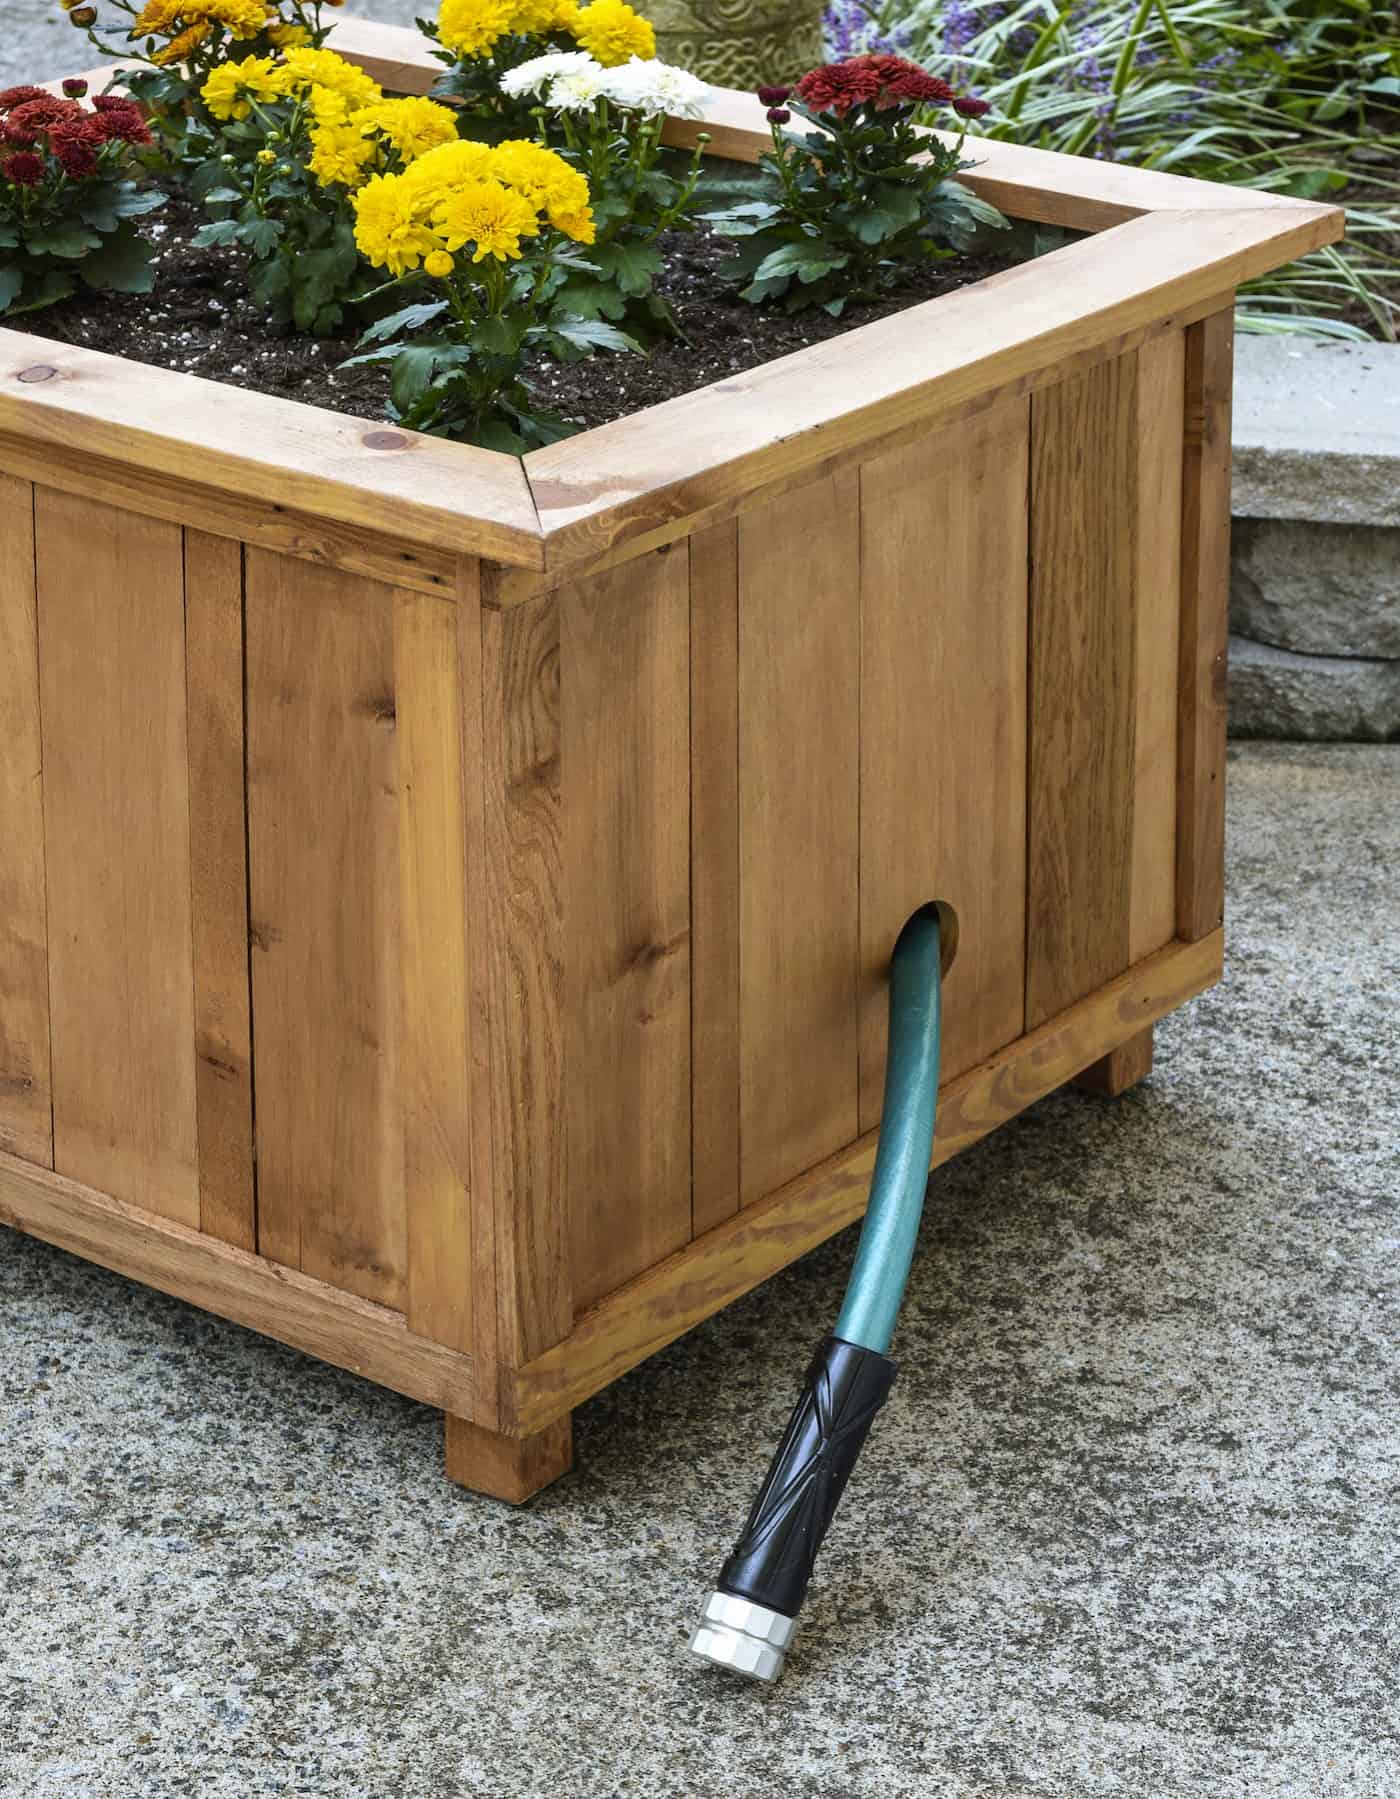
- Use a doorknob hole jig to drill out a hole in the center of the lower back panel; this is where the hose will come through.
- On the bottom of the feet, use heavy duty plastic foot pads if it is going to sit on a driveway or other paved surface. It will also keep the feet from sitting directly in water.
- Take landscaping cloth, cut it, and staple it on top of the top piece of hardware cloth. Use two layers and be sure to cover the sides as well. The top is ready for planting.
Notes
CUT LIST
Pallet Wood (all planed)- 24 pieces (various widths x 17″L x .5″ thick)
- 8 pieces (1.25”W x 20”L x .5” thick)
- 8 pieces (1.25”W x 15.5”L x .5” thick)
- 1 piece (4”W x 18.25”L x .5” thick)
- 2 pieces (24”L x 2.5”W x .5” thick)
- 2 pieces (22”L x 2.5”W x .5” thick)
2x2s
- 4 pieces – 15″ long
- 4 pieces – 17.5″ long
- 4 pieces – 15.5” long
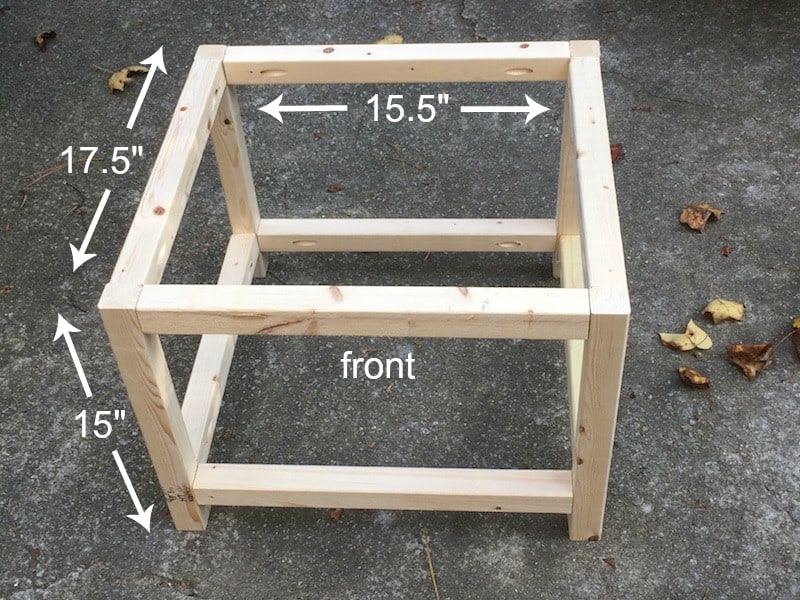 This is your “skeleton” for the panels and the planter box on the top.
Let me know what you think of this project in the comments! Also check out some of our other DIYs:
Coffee Table with Storage • Industrial Pipe Shelving • Lack Endtable Hack • Mirror Frame • Modern Headboard • Nolmyra Chair Hack • Outdoor Bench • Outdoor Table • Pallet Shelf • Paver Planter • Platform Bed • Stacked Entry Bench • Table Revamp with Vinyl • TV Riser • Wood Slat Doormat • Wood Step Stool Chair


Hello, I am making this to hold our lab specimen box at work. Do you know what the door opening measurement is?
Loved these plans ! Just finished one except I used a block of cherry and mahogany that weren’t being used. Didn’t stain it, but did put several coats of outdoor poly. Plans were easy to follow, except for that one measurement that was off and posted by David earlier. ?
Definitely for an intermediate or higher wood worker. All of our kids have asked for one now ????
Adding it to the list! Great project
Great design! I have plans on making it slightly taller and adding a crank system to it. I’ll post it on here when I finish it.
Brittany I can’t wait to see it! Yes, please share.
It’s so pretty Amy! Will try to make one someday. Love it.