Unicorn Slime is Fluffy and Fun!
Discover the magic of unicorn slime! A sparkling, fun guide for creating enchanting, colorful slime that captivates kids and adults alike.
Skills Required: None. You’re mixing ingredients in a container and adding food coloring. No crafting skills are required for this project.
The mystical, magical world of unicorns is a fun place where everything sparkles, rainbows abound, and even the poop is worth talking about! Haha.
Today I’m going to show you how to make unicorn slime, or as the cool kids (and adults too cool to admit it) like to call it, “unicorn poop slime.”
Let’s face it, anything unicorn-related automatically ups the ante on coolness, but when you add the word “poop” into the mix, you’ve got something that’s not only Instagram-worthy but also gives you bragging rights at the next PTA meeting.
And you probably already have the ingredients.
This fluffy slime is crafted from things you probably have lying around the house: glue (the magic potion’s base), shaving cream (for that cloud-like texture), contact lens solution (the secret activator), water, food coloring (because unicorns aren’t just any old color), and glitter (no explanation needed).
Making unicorn slime is like hosting a rave in your very own kitchen – minus the loud music and questionable fashion choices. We’re aiming for a gooey, stretchy, sparkly delight that not only looks magical but feels otherworldly too.
In a world where everyone is glued to their screens, there’s something profoundly satisfying about getting your hands dirty (literally) and creating something tangible.
Plus, it’s a great way to add a dash of magic into your life, and let’s be honest, who couldn’t use a little more magic these days?
With the tutorial below, you’ll be whipping up your own batch of unicorn poop slime in no time. Scroll down to embark on this gooey journey with me – it’s going to be a sparkly ride!
Tips for Making Slime
If you’ve never made slime before, here are some great tips you might be interested in. If you don’t need them, head on down to the recipe.
Measure Ingredients Precisely
The key to perfect slime is in the details. Measuring your ingredients as accurately as possible can make the difference between slime that’s just right and a recipe that’s too sticky or too brittle.
Add Mix Ins Slowly
If you’re adding color, glitter, or other fun elements, add them slowly and mix thoroughly to see the effect. You can always add more, but you can’t take it out once it’s in there.
Adjust Texture as Needed
If your slime is too sticky, add a little more activator (like borax solution, liquid starch, or saline solution). If it’s too stiff, add more glue or a bit of water. Do this gradually!
Use Supplies You Don’t Mind Getting Messy
Slime can get everywhere, and while it’s usually easy to clean up, it’s best to use tools (bowls and utensils) and surfaces you’re not worried about.
Use Your Hands
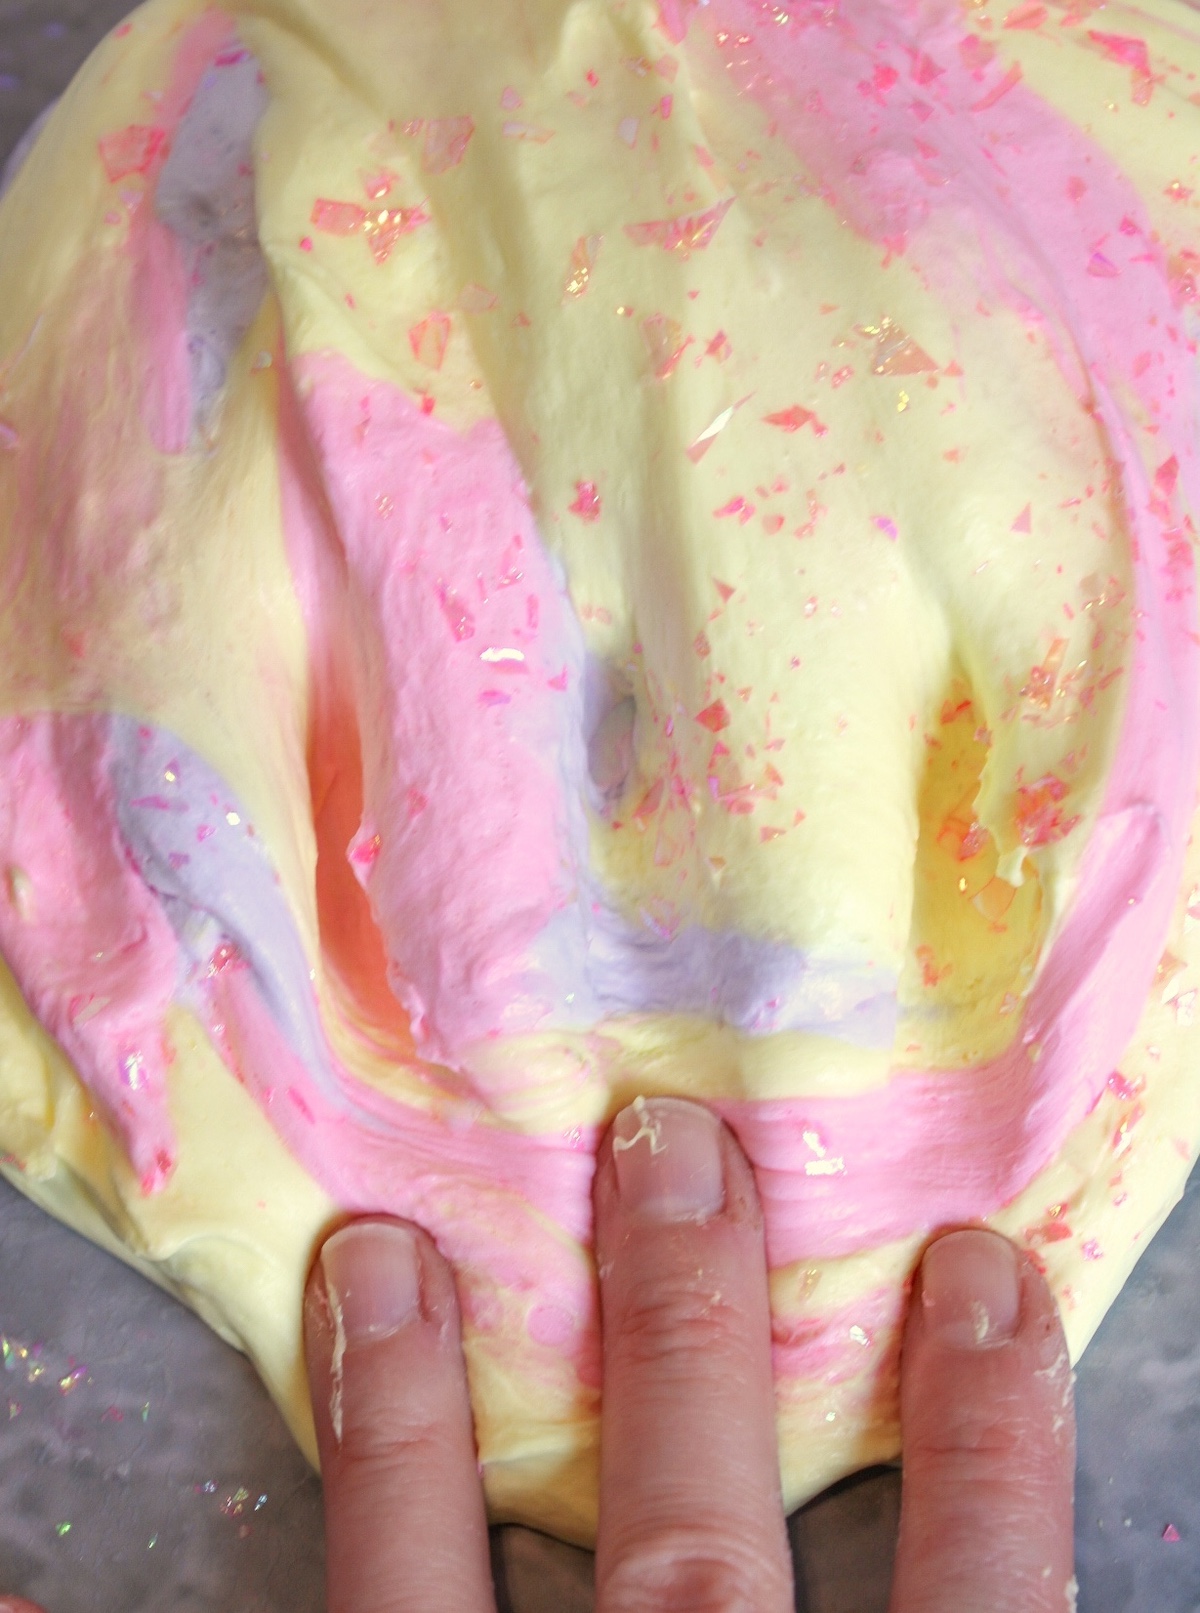
Once the slime begins to form, use your hands to knead it. This helps improve the texture and mix everything evenly. Don’t be afraid to get a little messy!
Storage is Key
Keep your slime in an airtight container when not in use. This will help it last longer and prevent it from drying out.
Safety First
Always use safe, non-toxic ingredients, and if you’re crafting with younger kids, make sure they’re supervised, especially with ingredients like borax.
Slime making is all about experimenting and having fun, so don’t be afraid to try new things and see what works best for you. Enjoy your crafting! Here’s what you’re going to need:
Gather These Supplies
- 6 oz Elmers white school glue
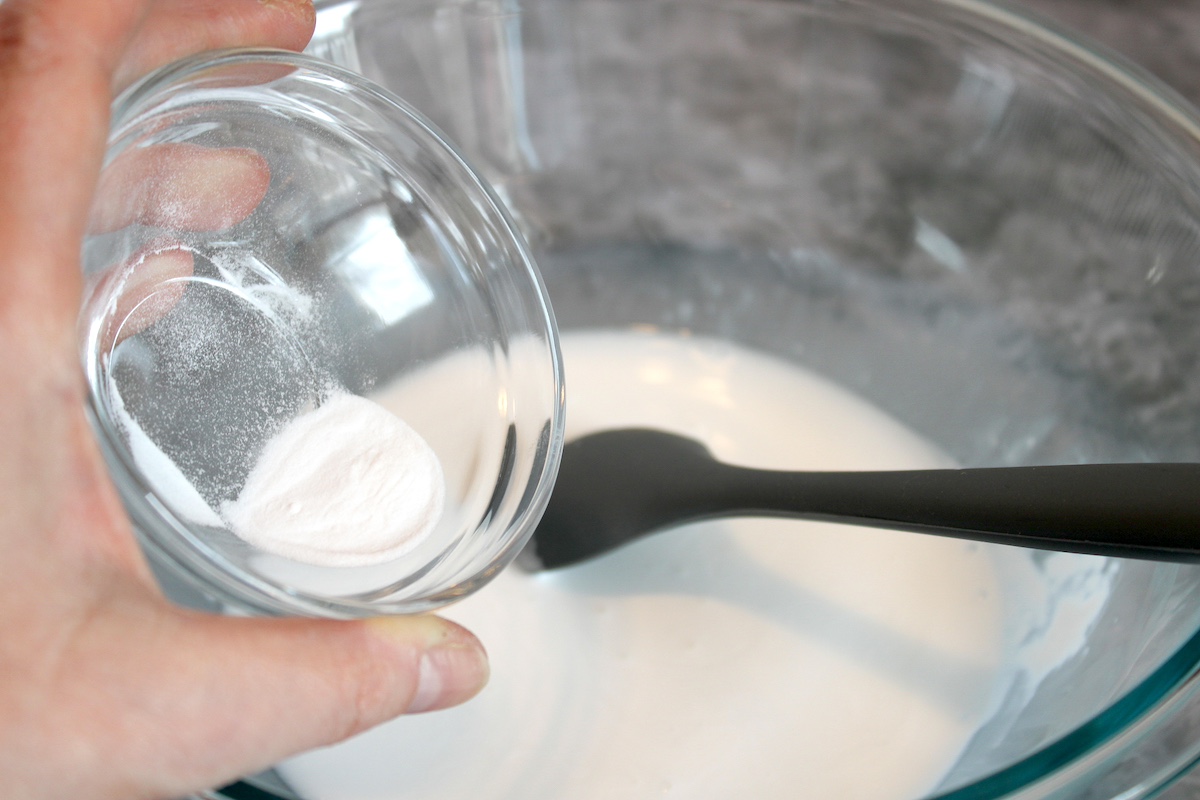
- 1/2 tsp baking soda
- 1/4 C water
- 3 C foam shaving cream (NOT GEL)
- 3 Tbsp contact lens solution – separated (must contain boric acid and sodium borate)
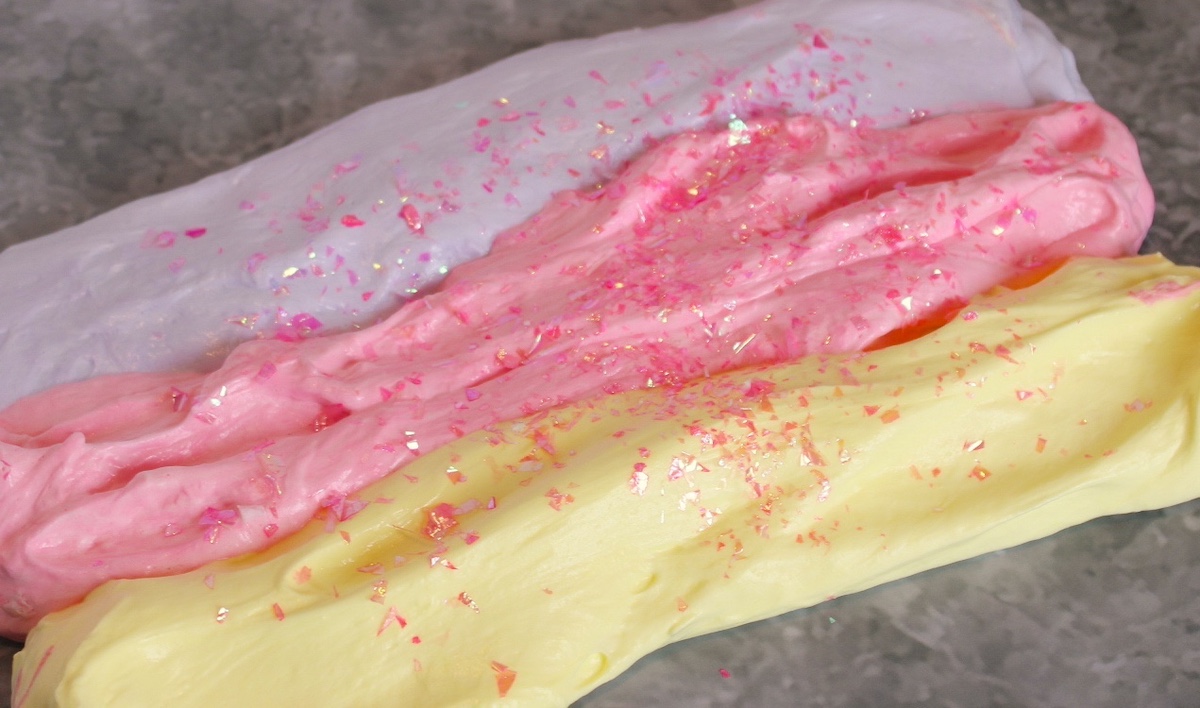
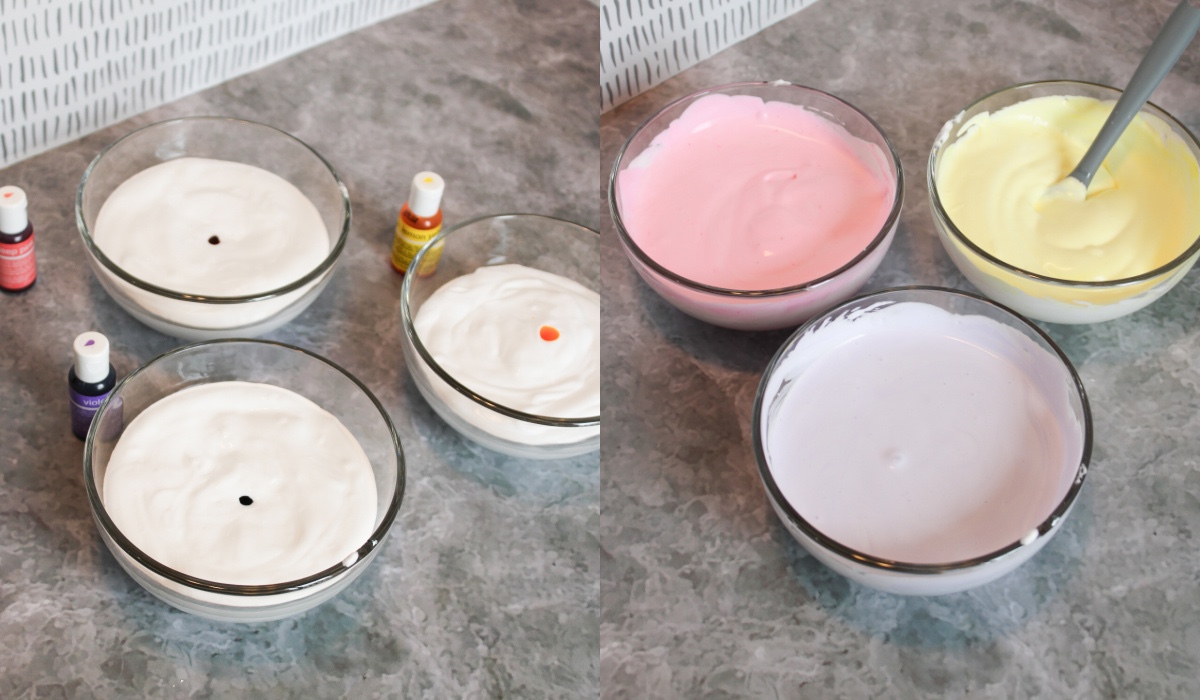
- Food coloring – pink, purple, yellow (or colors of your choice)
- Glitter (optional)
Tips and Thoughts for This Craft
Store your slime in an airtight container or baggie. If your slime gets stiff, you can try to add a little water – lotion – hand sanitizer – or even a bit more glue to soften and reactivate it.
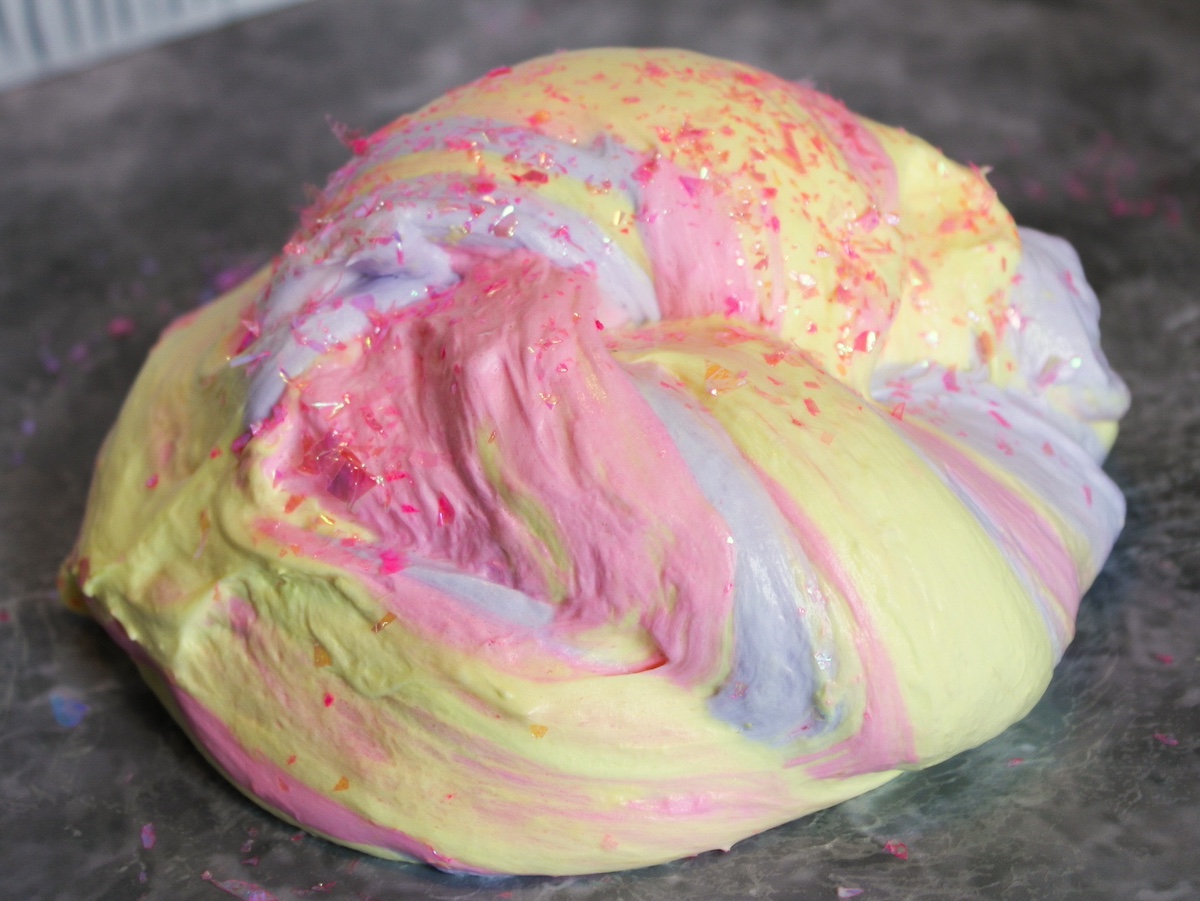
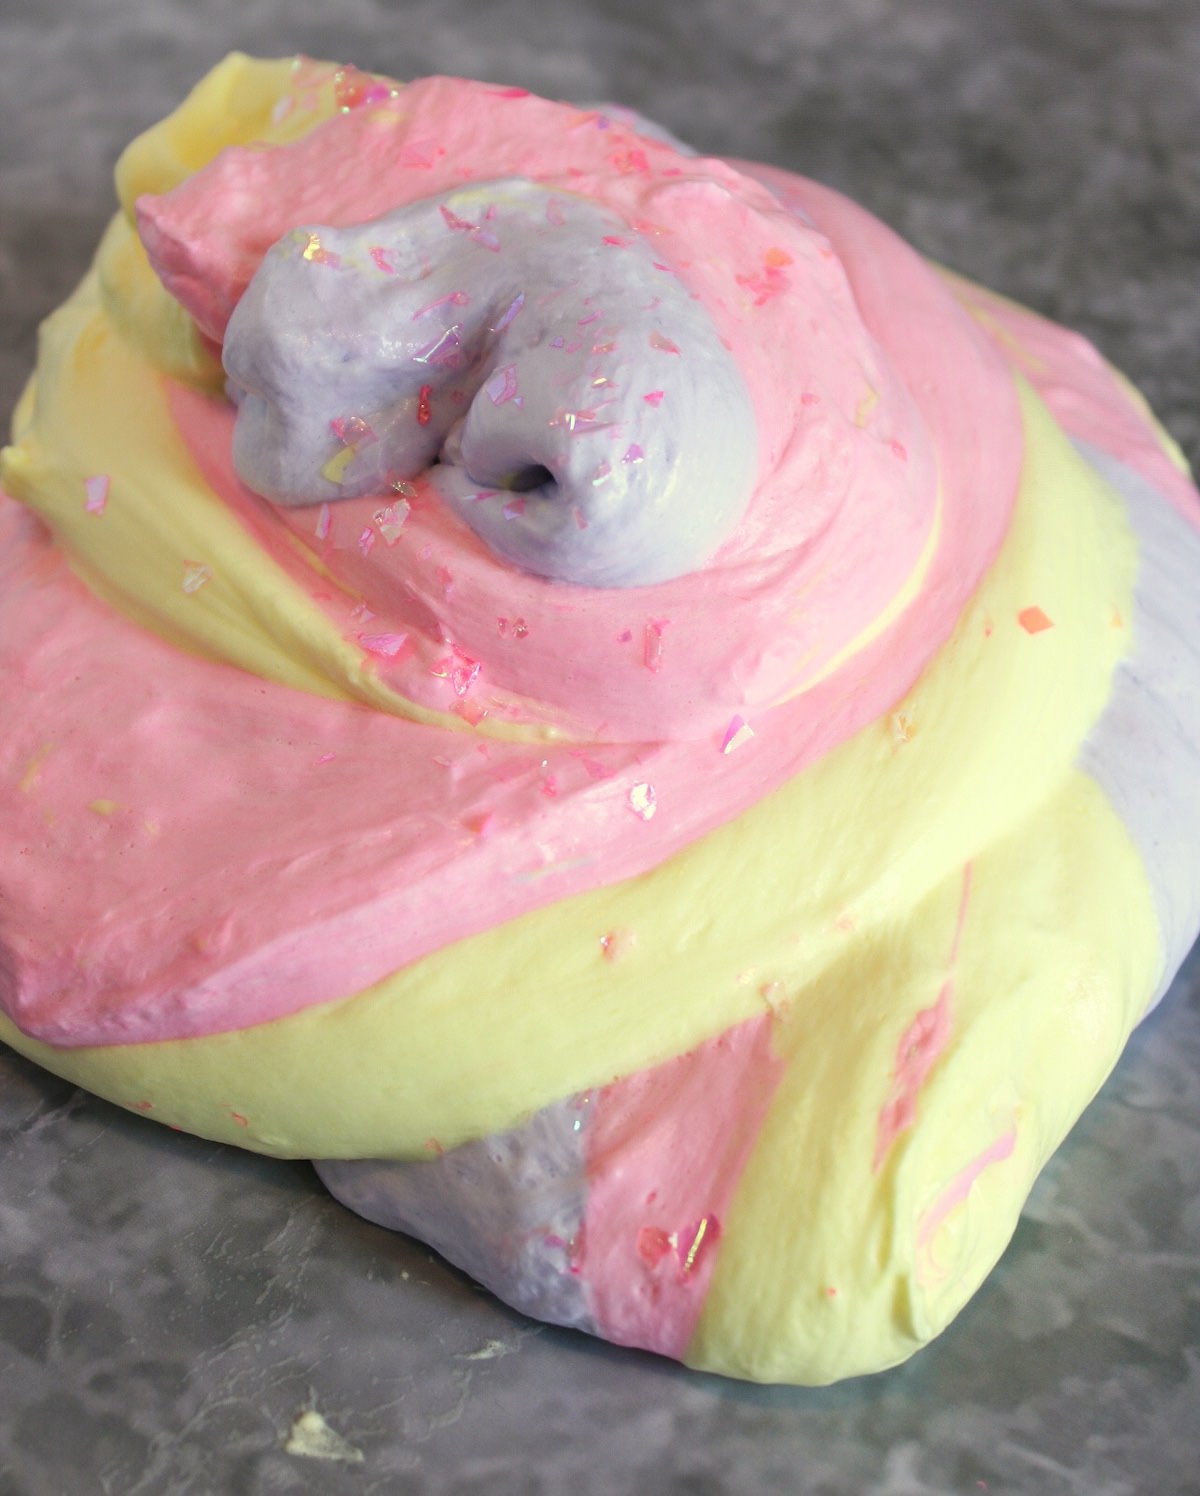
Colors will continue to mix as slime is played with. It may eventually become one color.
Get the recipe below:
Unicorn Slime
Equipment
- Bowl(s)
- Stir stick or spoon
Materials
- 6 oz Elmer’s school glue
- 1/2 tsp baking soda
- 1/4 C water
- 3 C foam shaving cream NOT GEL
- 3 Tbsp contact lens solution separated
- Food coloring pink, purple, yellow (or colors of your choice)
- Glitter optional
Instructions
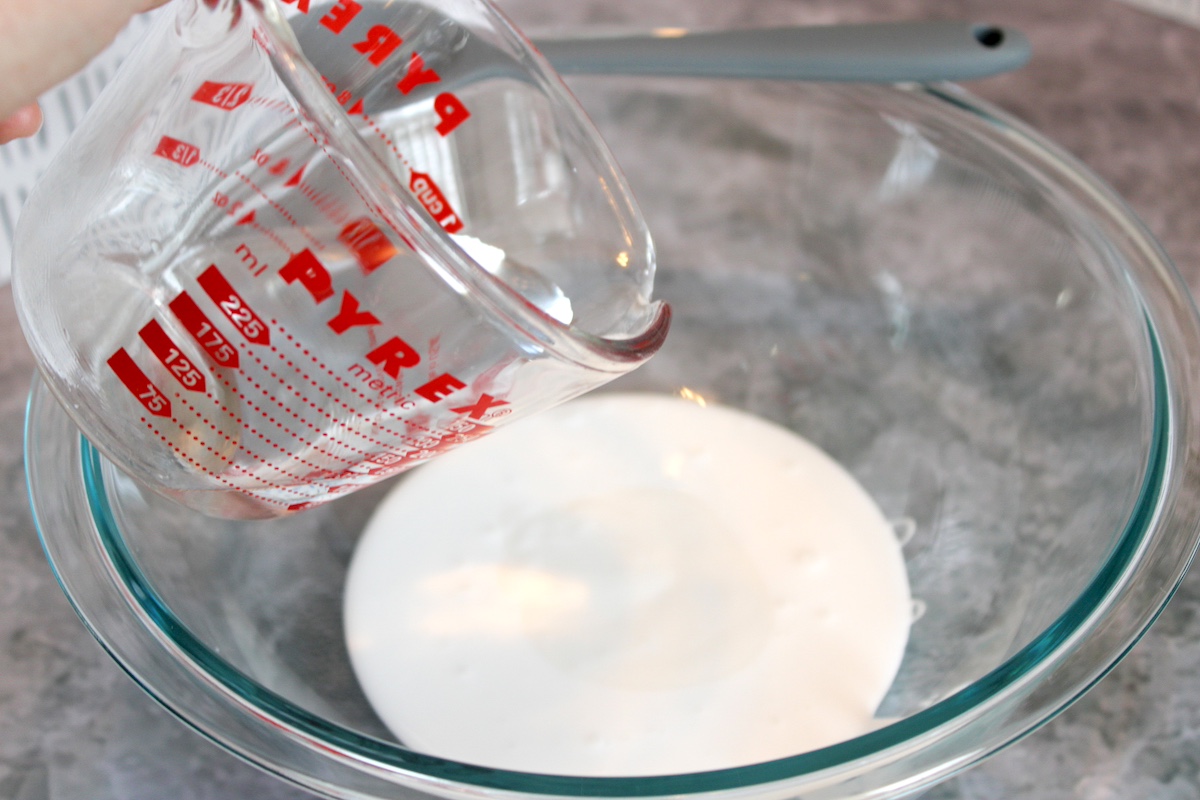
- Add glue and water to the bowl and stir to mix.
- Add in baking soda and stir to combine.
- Add the foam shaving cream to the glue mixture. Stir to mix all ingredients well.

- Separate the mixture evenly into three bowls. Add 1 – 2 drops of food coloring to each bowl and stir to combine.
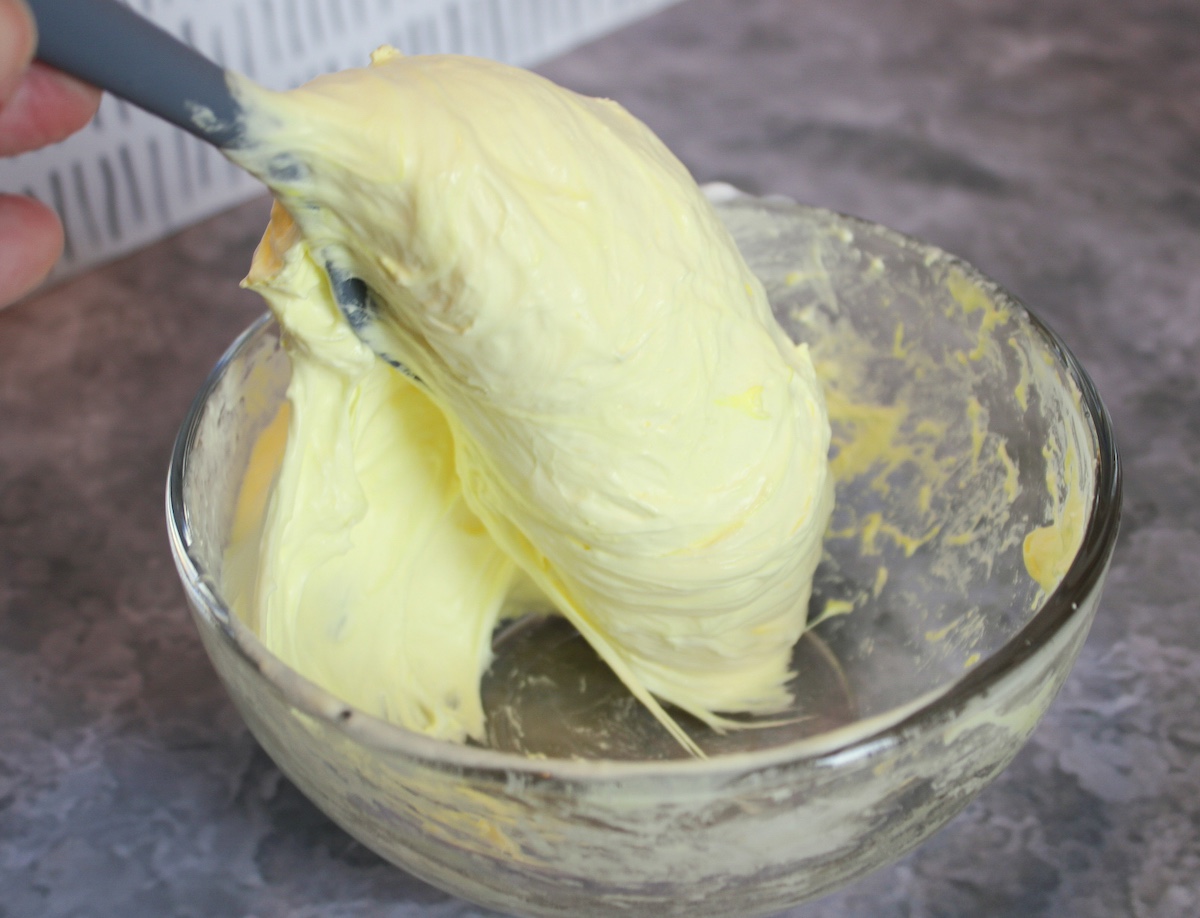
- Add 1 Tbsp of contact solution to each bowl and mix with the spoon until slime forms and pulls away from the sides of the bowl. Knead with your hands to help incorporate the contact solution into the slime.
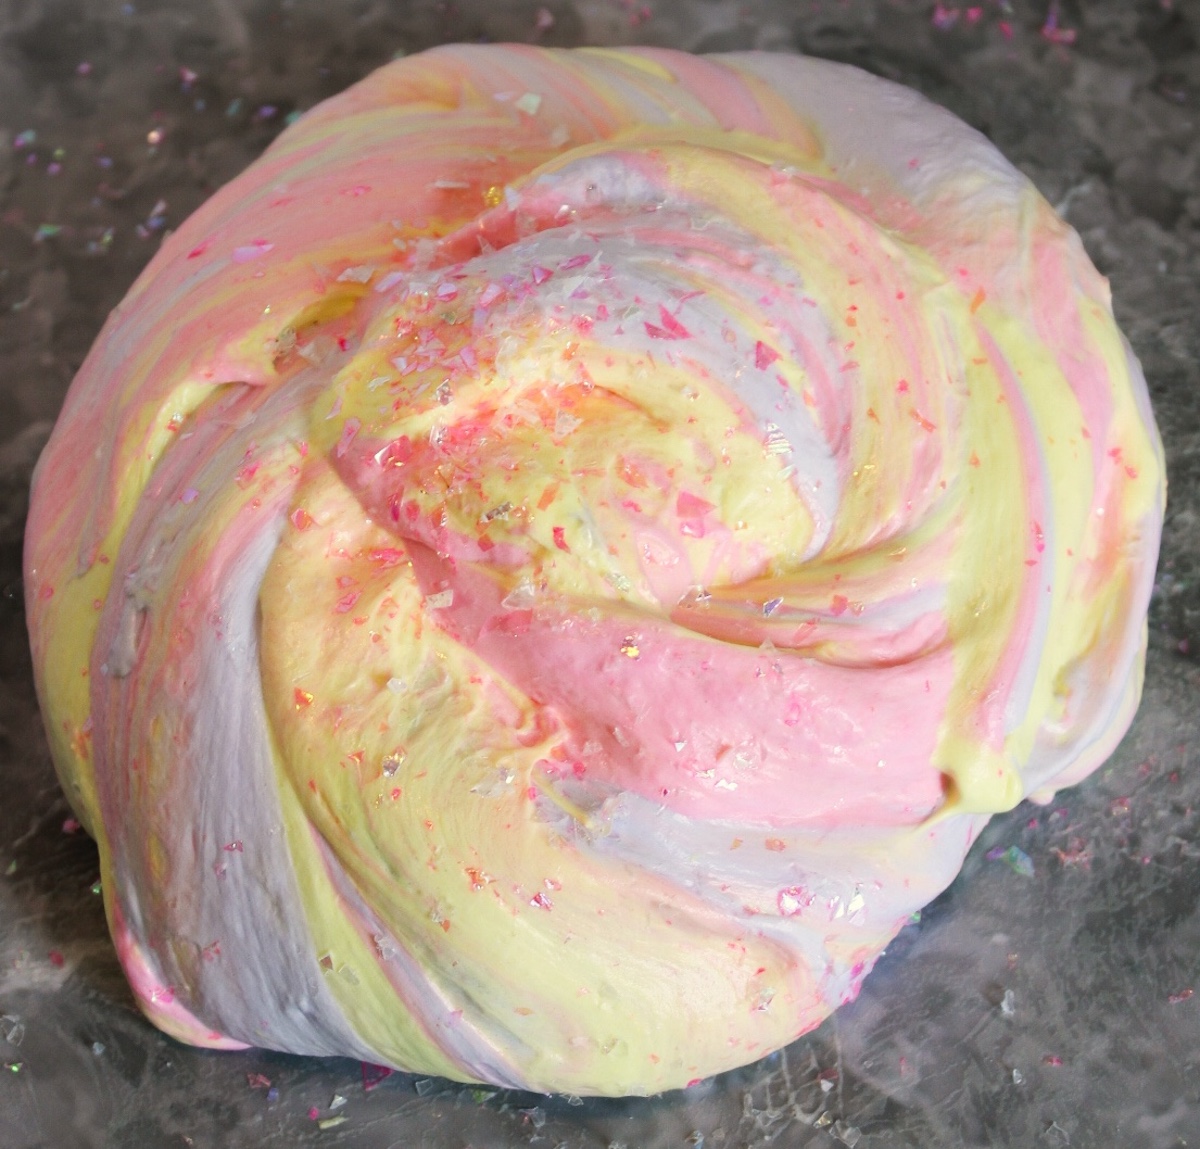
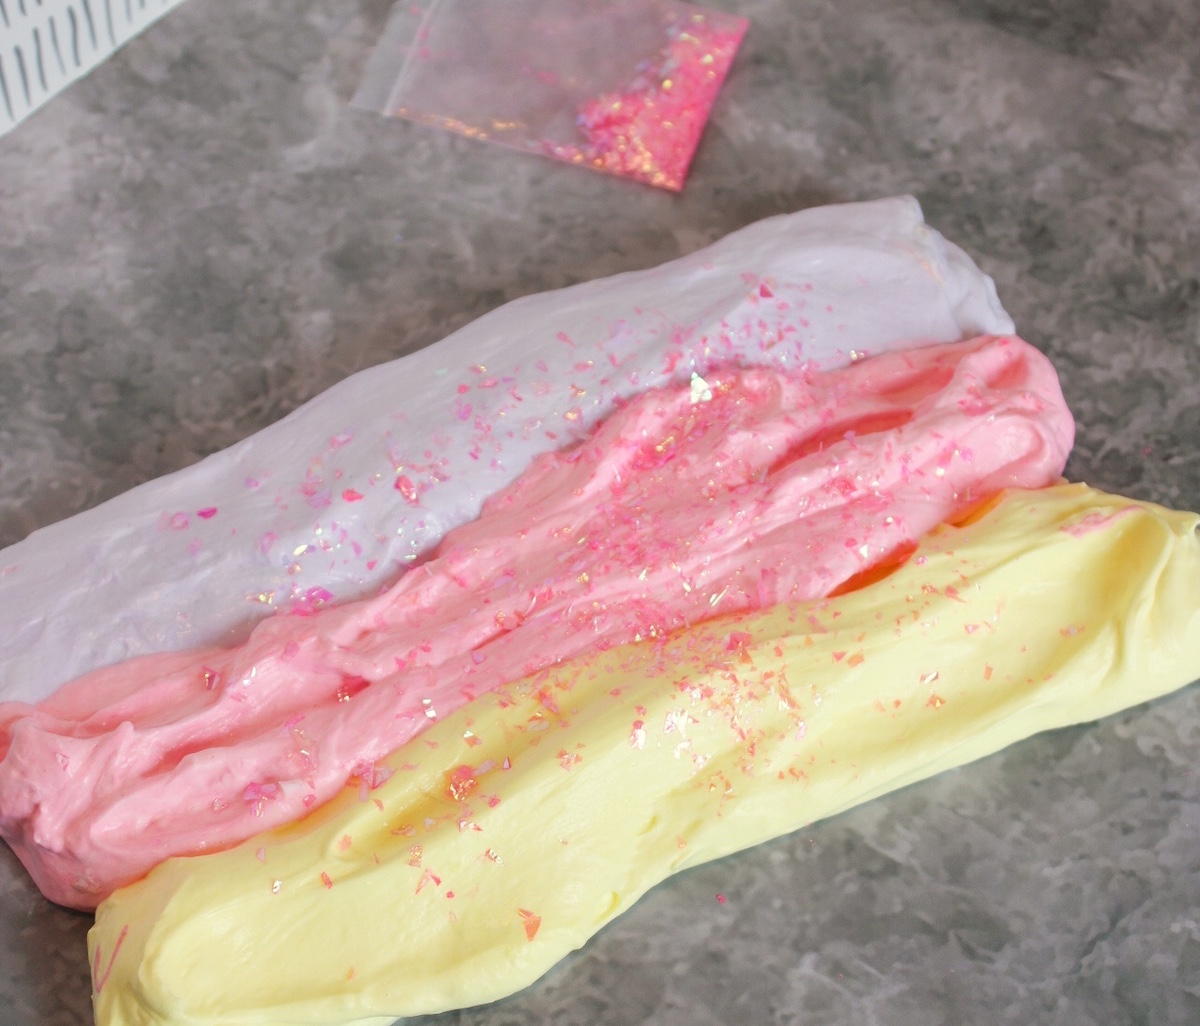
- Place the three colors next to one another (add glitter if using) and twist to incorporate the colors.
Notes
I hope you enjoyed this fun activity! Please let me know what you think in the comments. I’d love it if you’d go check our other slime posts:
Clay • Clear • Cloud • Color Changing • Crunchy • Edible • Galaxy • Green Booger • Laundry Detergent • Glitter • Glow in the Dark • Halloween • Play Doh • Rainbow • Sand • Slime Shops