Bubble Wrap Painting: A Fun DIY Art Project
Discover a fun and easy way to create unique art with this DIY bubble wrap painting tutorial! Perfect for all ages, this craft project brings creativity and color to any paper or canvas.
Who knew that something as simple as bubble wrap could turn into a fantastic tool for creating art?
Whether you’re looking for a fun activity to keep the kids entertained or a unique way to add texture to your next masterpiece, bubble wrap painting is a playful and creative project that anyone can enjoy.
With just a few basic supplies and a little imagination, you can transform those leftover packing materials into vibrant works of art.
This project is perfect for all ages, offering endless possibilities for experimentation with colors and patterns. So, grab your bubble wrap and let’s start painting!
Bubble Wrap Painting
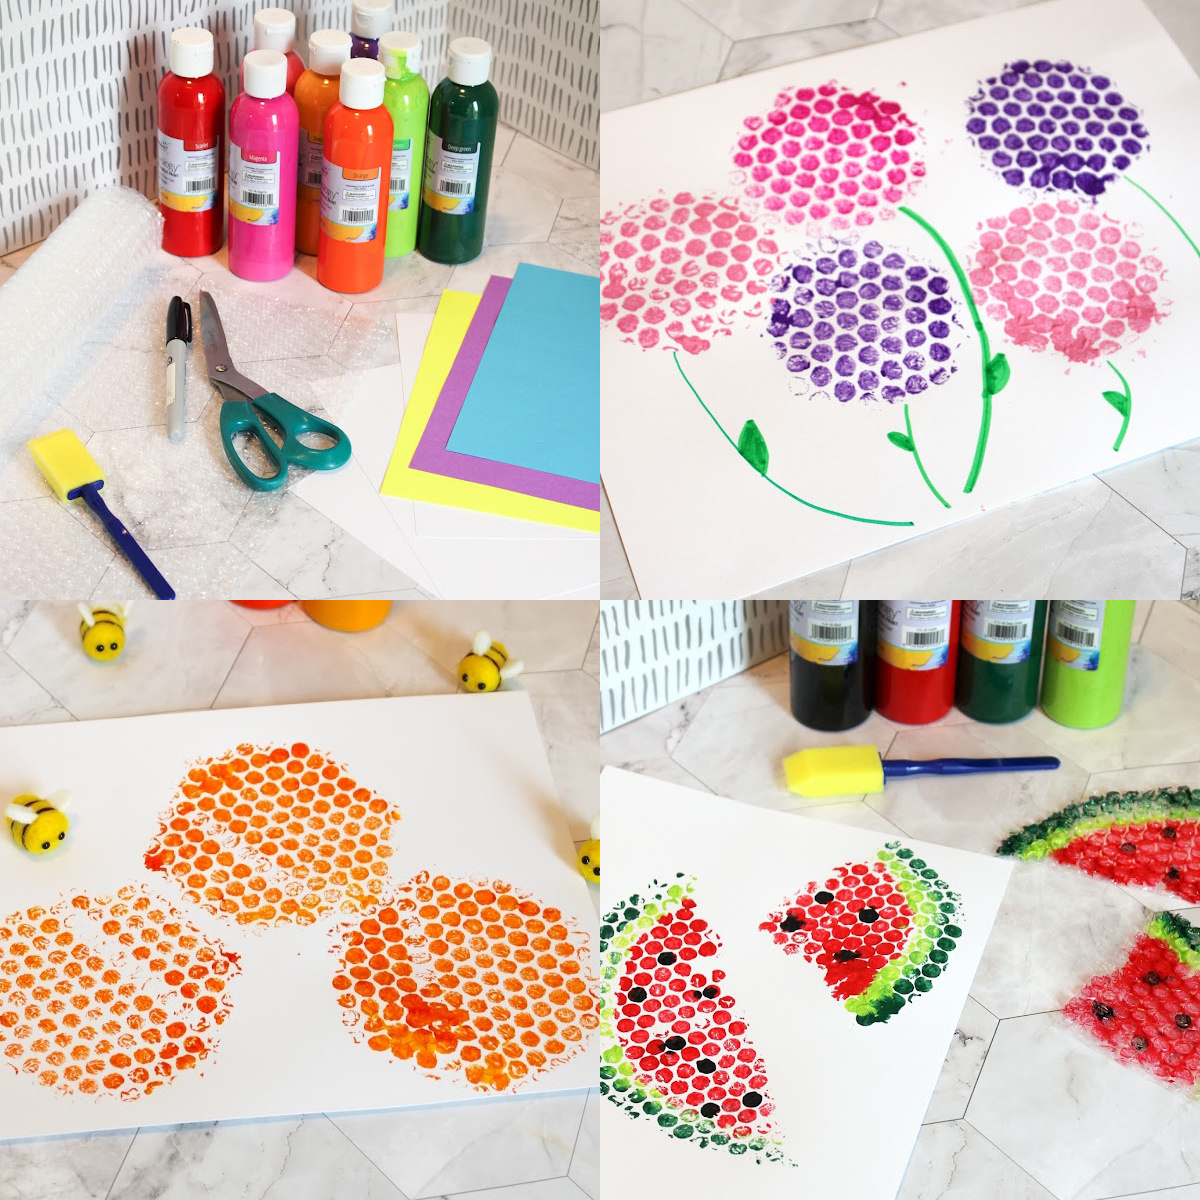
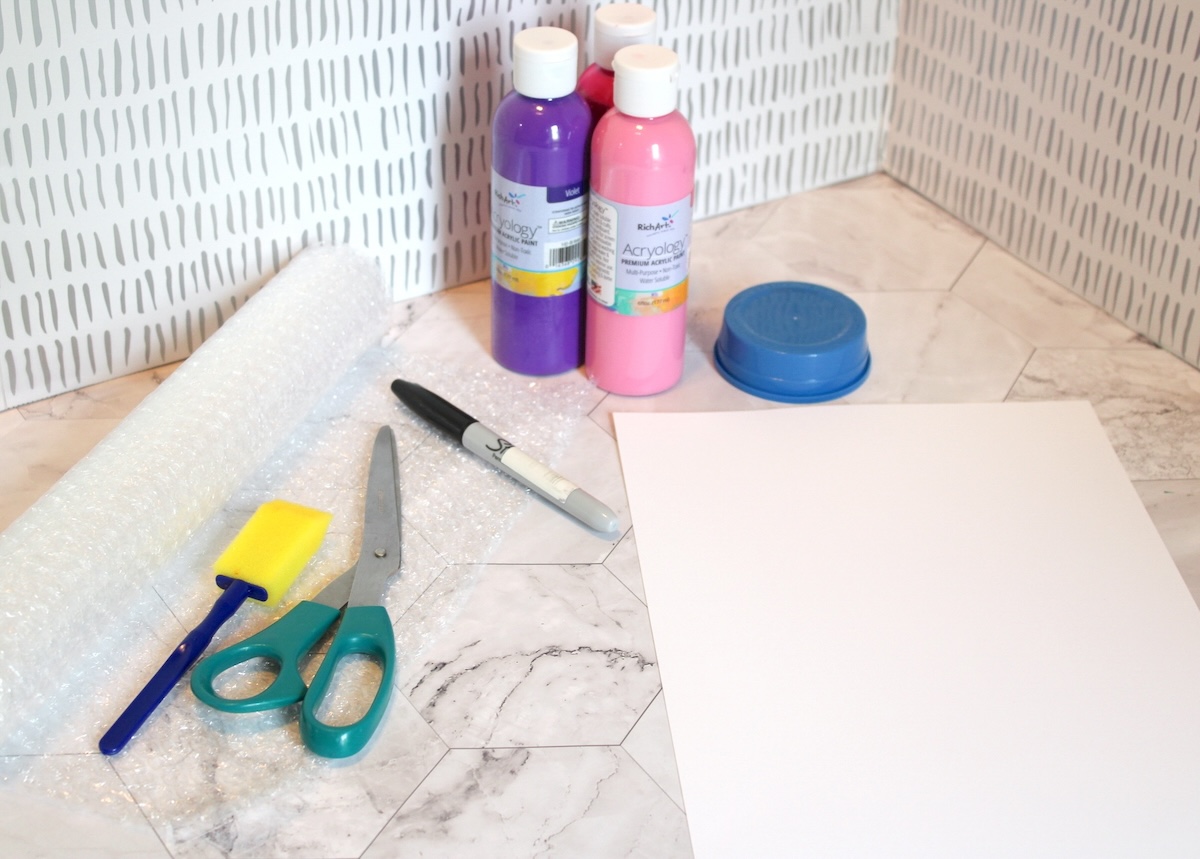
Gather These Supplies
- Bubble wrap
- Paper
- Paint – kid friendly
- Scissors
- Markers in various colors
- Foam brush
- Items for shapes – cups, cookie cutters, etc
Choose Your Wrap
You can get all of your supplies from the dollar store! Including the bubble wrap, but hopefully you can go into the recycling bin for that.
Larger bubbles create bolder, more textured patterns, while smaller bubbles offer more detailed designs. Experiment with both to see which effect you like best.
Draw a Shape Onto the Wrap
Choose a household item like a lid or cookie cutter and trace it onto the bubble wrap.

Cut Out the Shapes
Cut out the shapes you’ve traced with scissors.
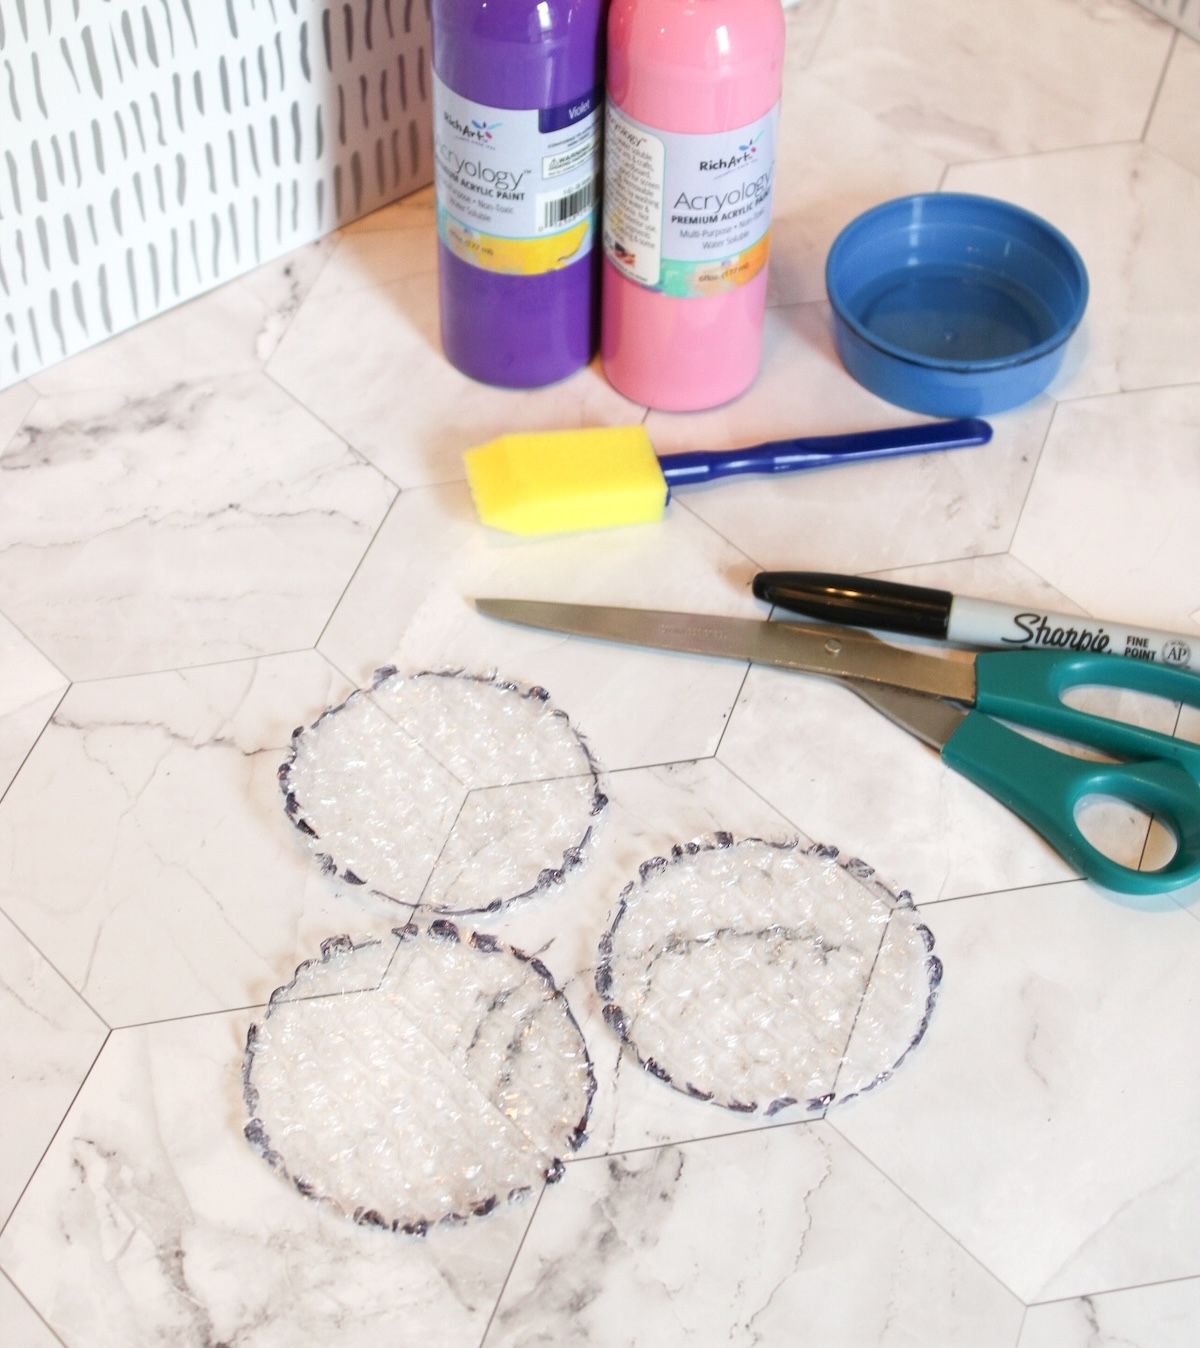
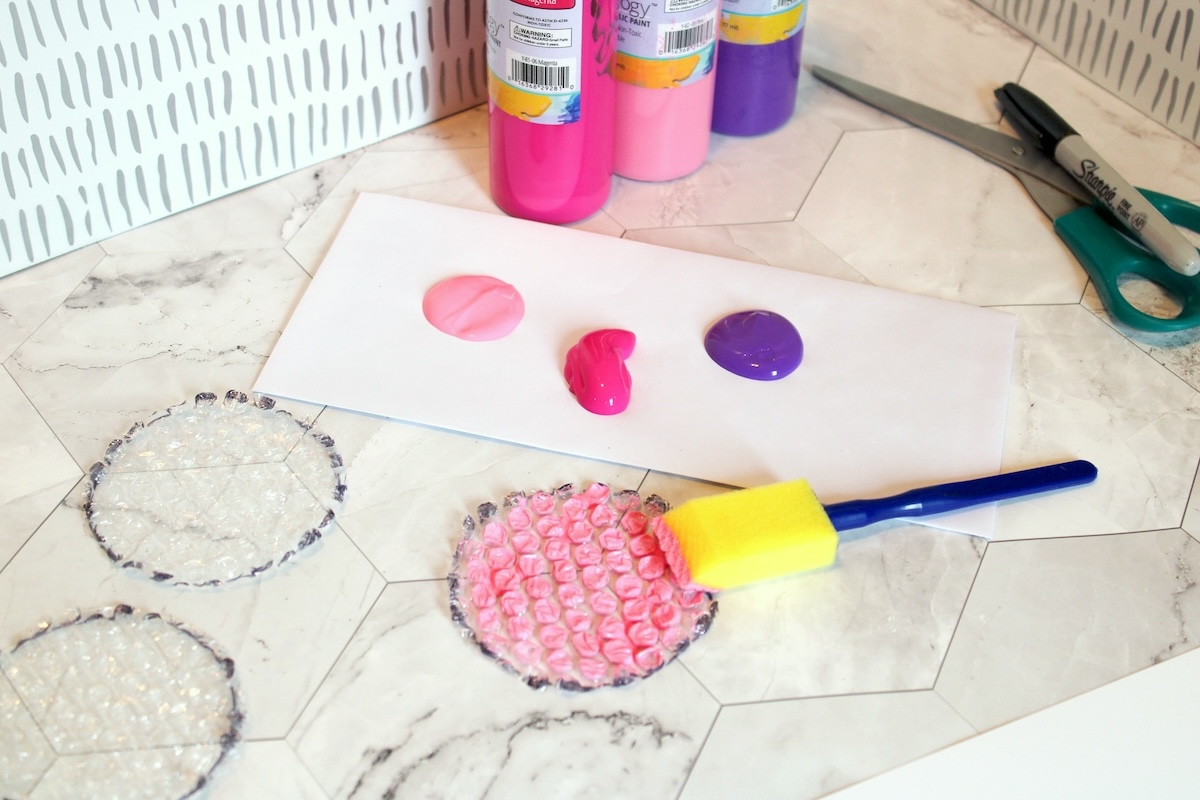
Apply Paint to Bubble Wrap
Use a foam brush, roller, or sponge to apply paint evenly over the bubble wrap. Too much paint can create a smudgy print, while too little may not transfer well.
Tip: If you have smaller kids, tape the bubble wrap down to your workspace with painter’s tape on the back before painting. This will keep it from shifting on them.
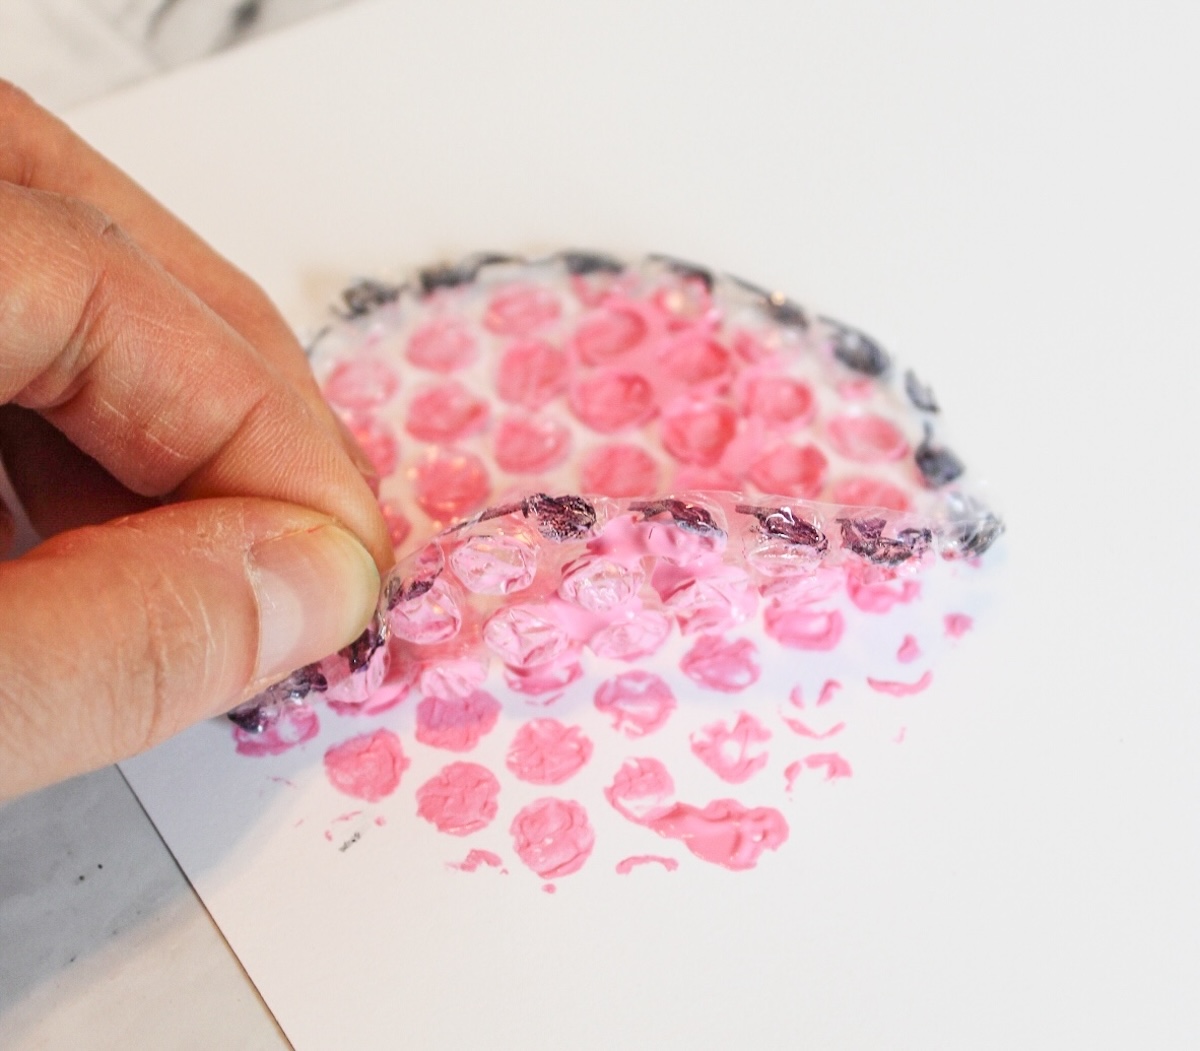
Press Onto the Surface
Press your painted wrap onto the paper. Your stamp doesn’t need to be pushed too hard, or there will just be one giant blob of paint on the paper. Press gently and on every part of the wrap.
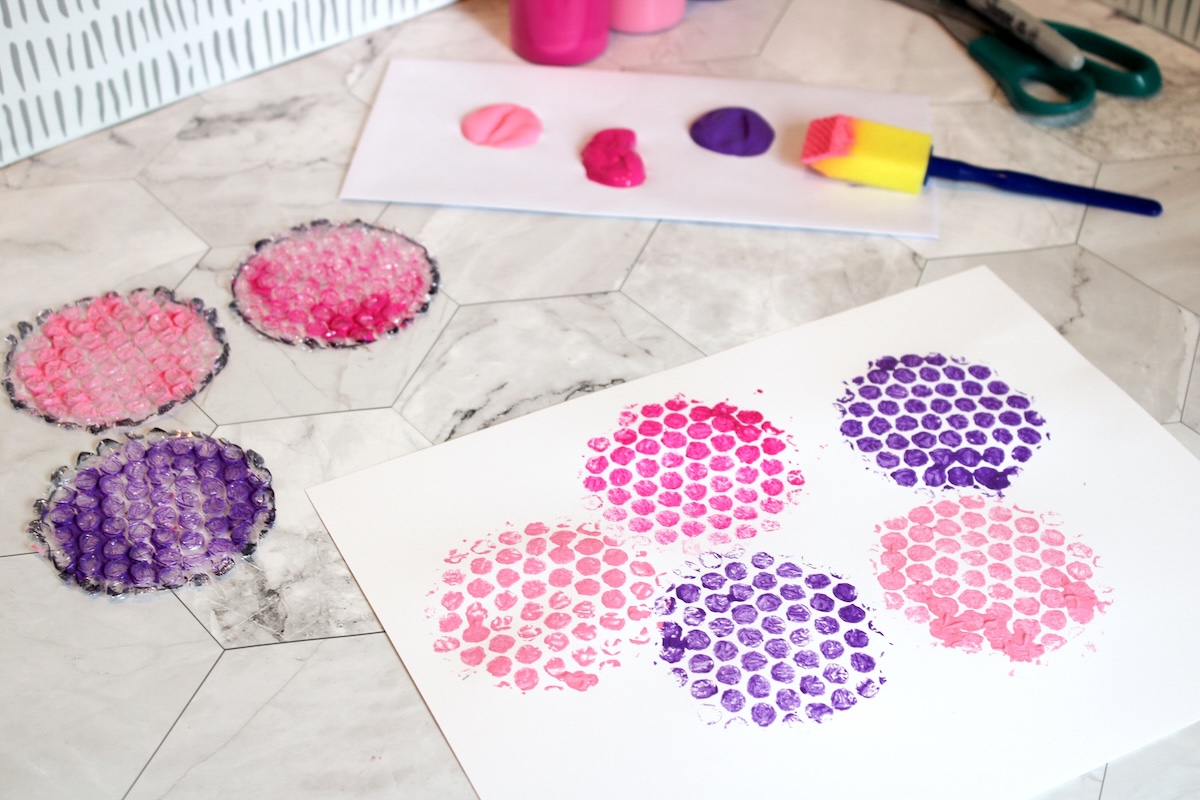
Use Multiple Colors
Try using multiple colors on the same piece of bubble wrap to create interesting gradients and patterns. You can apply the colors in stripes, dots, or swirls for different effects.
Add Marker Details
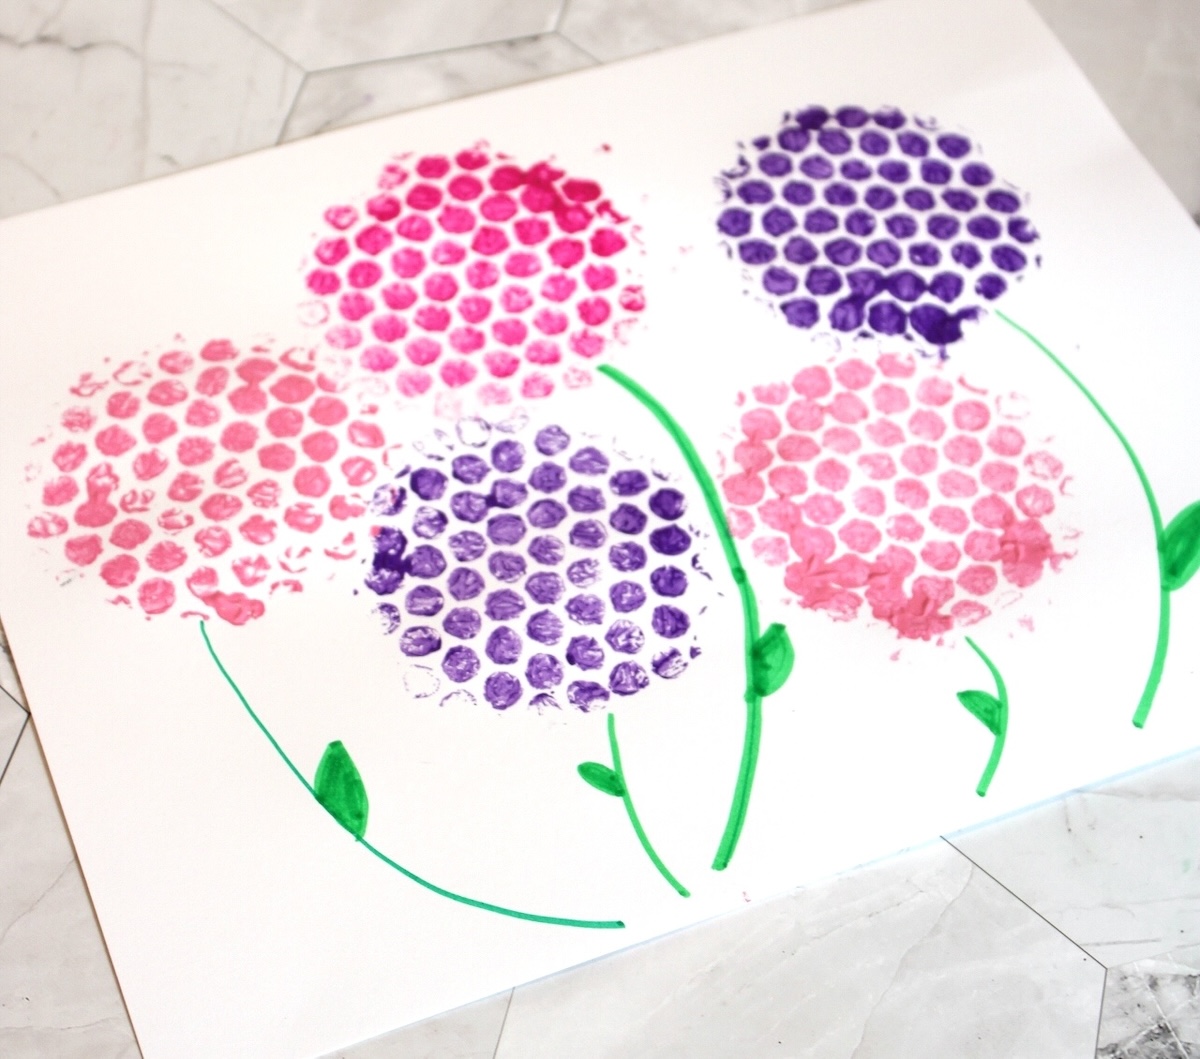
We used marker to turn the stamped designs into flowers by adding green stems! So cute.
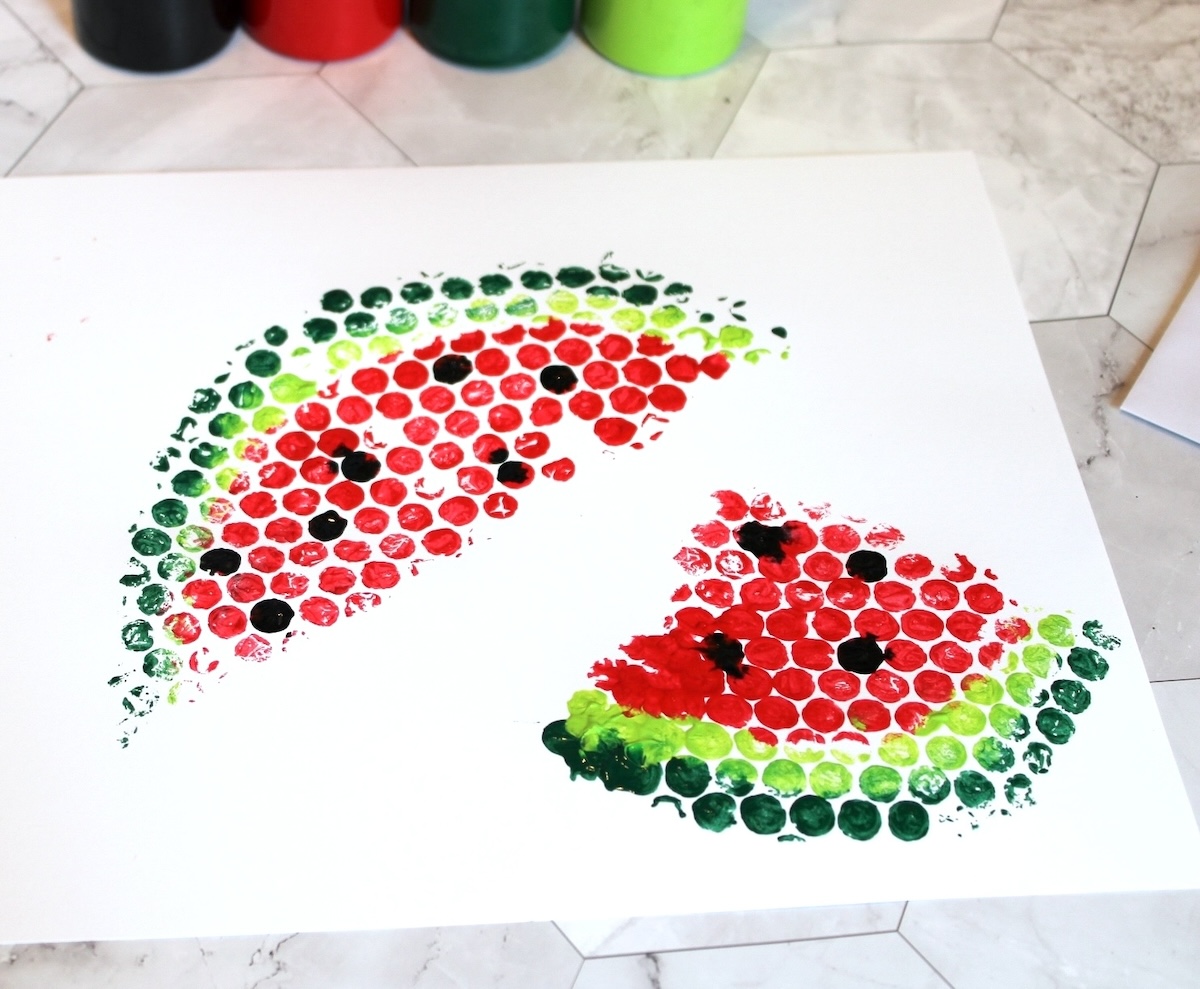
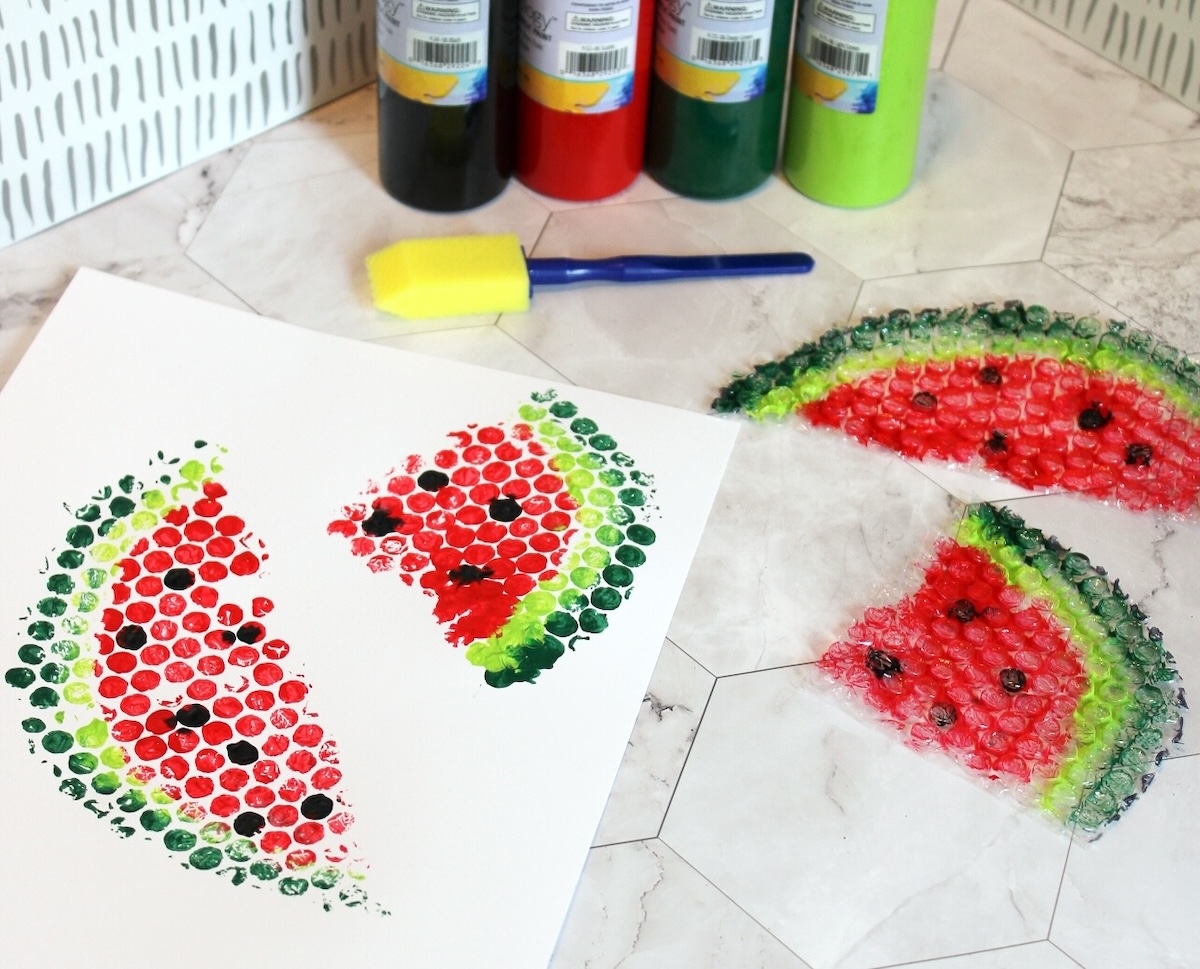
The flowers weren’t our only creation. We also did watermelons:
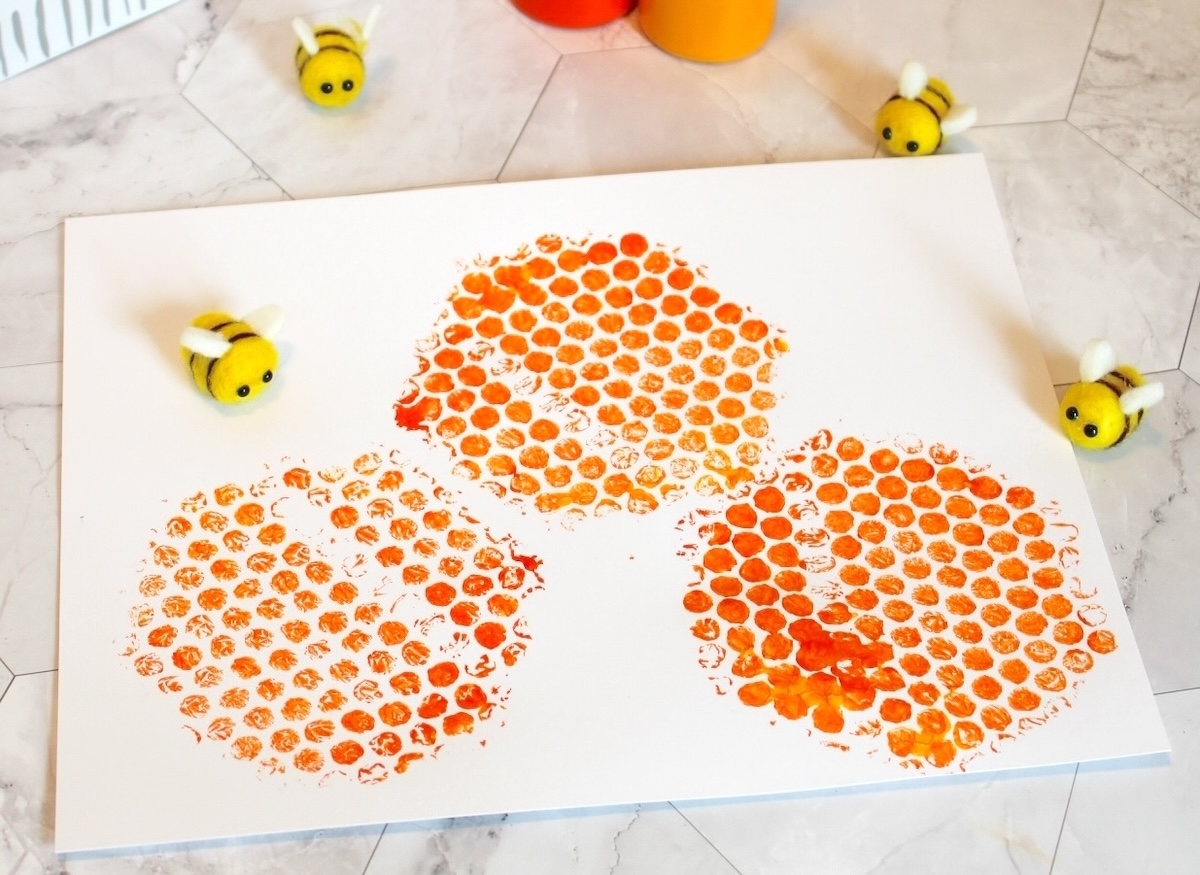
And also honeycomb:
Let dry completely to finish.
Bubble wrap prints make fantastic backgrounds for other art projects. You can layer drawings, stencils, or additional paint on top to create a mixed media piece.
If you enjoyed this craft, let me know in the comments! I’d also love for you to check out the following ideas for littles:
Beaded Suncatchers • Bean Art Mosaics • Blow Painting • Borax Crystals • Cat Bookmarks • Cloud Dough • Coffee Filter Flowers • Food Coloring Art • Glow in the Dark Playdough • Homemade Playdough • Jello Play Dough • Kinetic Sand • Moon Sand • Paper Chain • Pencil Toppers • Perler Beads • Sidewalk Chalk Paint • Spin Art • Weaving for Kids • Wine Cork Stamps