Legend of Zelda Perler Beads (35+ Free Patterns)
Dive into nostalgia with over 35 free Legend of Zelda perler bead patterns! Perfect for crafting fans and gamers alike, these designs celebrate the classic 1986 video game. Relive your childhood and share the magic of Hyrule with each pixel-perfect creation.
Just saying “The Legend of Zelda” out loud makes me want to grab a sword, hold it awkwardly above my head, and start questing for heart containers.
Whether you were part of the 80s crew who experienced it as cutting-edge tech, or you discovered it later on, the call of Hyrule is irresistible. And honestly, who hasn’t wanted to rescue Princess Zelda at least once?
I remember being a kid when Zelda hit the scene – though full disclosure, I wasn’t exactly battling Ganon back then. It was like peering into another world, pixelated and mysterious, where every bush could hide rupees or, even better, a secret passage.
Let’s just say that my early attempts to play weren’t heroic. My strategy? Wander around, get lost, repeat. Thank goodness for game guides and more patient relatives!
But something about that game, with its haunting melodies and endless secrets, hooks you deep. It’s no wonder that “The Legend of Zelda” isn’t just a game, it’s a landmark in many of our childhoods.
And now, you’ve probably guessed what I’m leading up to: Zelda perler beads. I’ve scoured the corners of Hyrule (and the internet) to bring you over 35 free perler bead patterns themed with the classic 1986 “Legend of Zelda” video game.
Whether you’re a fan of the old school 8-bit adventure or you just appreciate a good crafting challenge, these patterns are ready to transport you back to those golden gaming days.
From the iconic Triforce to Link in his various poses (because, let’s face it, the hero of time has many looks), and even that sneaky Princess Zelda herself—each pattern is designed to spark nostalgia and maybe a bit of that old adventurous spirit.
So grab those beads, fire up your iron, and let’s get crafting. And hey, if you’ve got any requests or want to share your epic Zelda perler bead creations, drop a comment below.
I’m always on the lookout for new patterns to add, and seeing your masterpieces is like getting a thumbs up from Zelda herself. Let’s keep the legacy alive, one pixel at a time!
Legend of Zelda Perler Beads
-A few of these patterns are larger than a 29 x 29 pegboard, so you’ll either need a extra large pegboard (49 x 69 tall) or to put multiple square peg boards together to form a larger “canvas.”
-You’ll see a couple of the pattern backgrounds below aren’t white – that’s simply to give contrast so you can see where all the white beads should go. You don’t need to add the background (but you can if you want to).
Classic Link
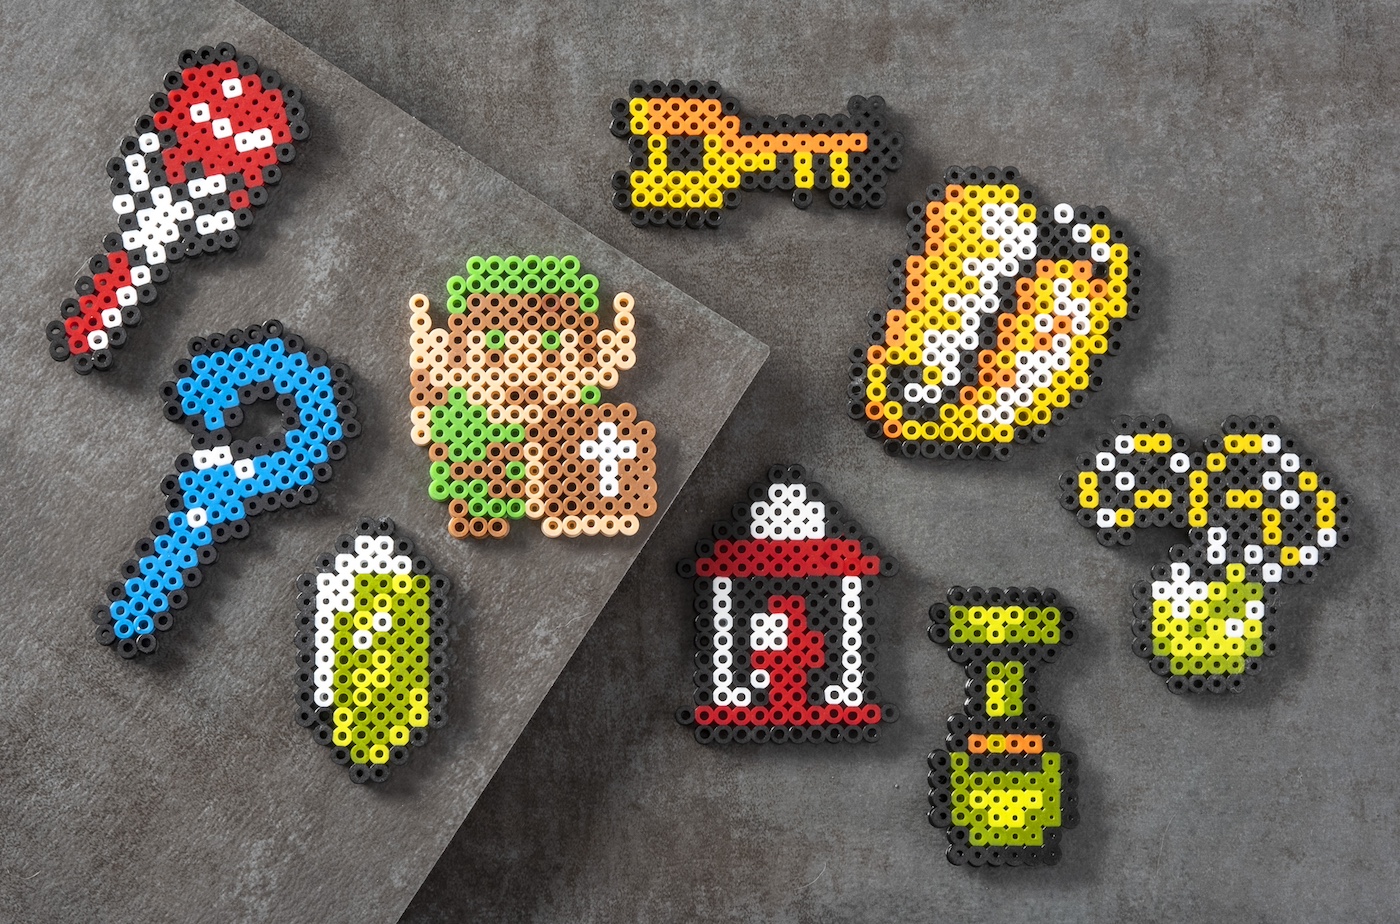
These small patterns are great for magnets, keychains, and more.
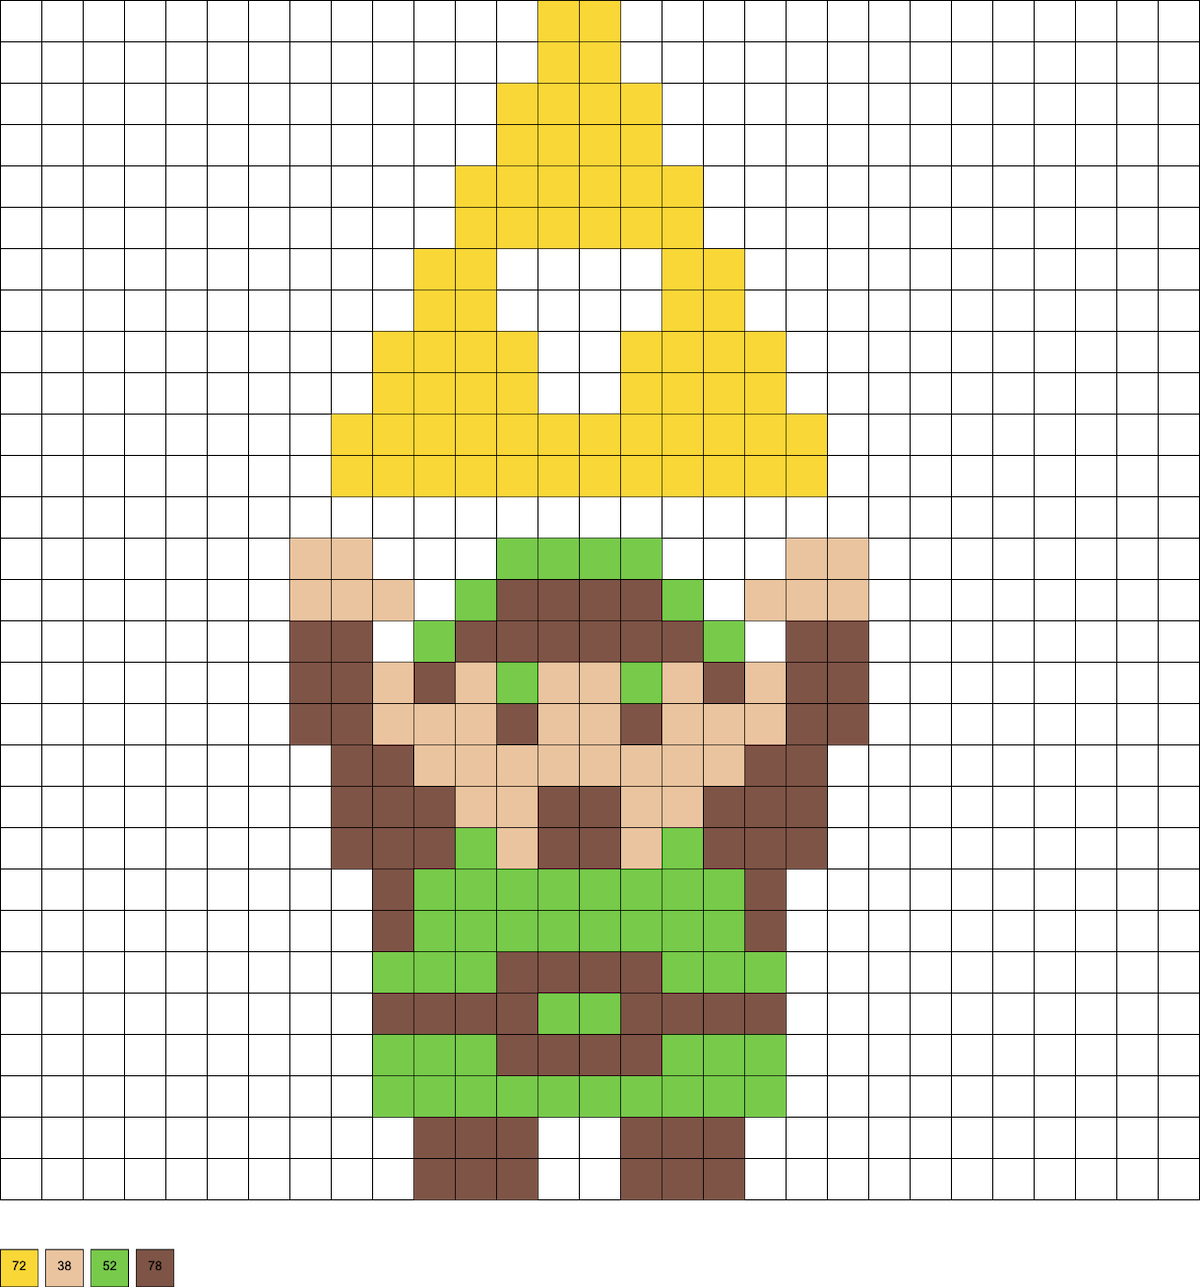
Link Holding a Triforce
This pattern uses 72 yellow, 38 sand, 52 kiwi lime, and 78 gingerbread beads.
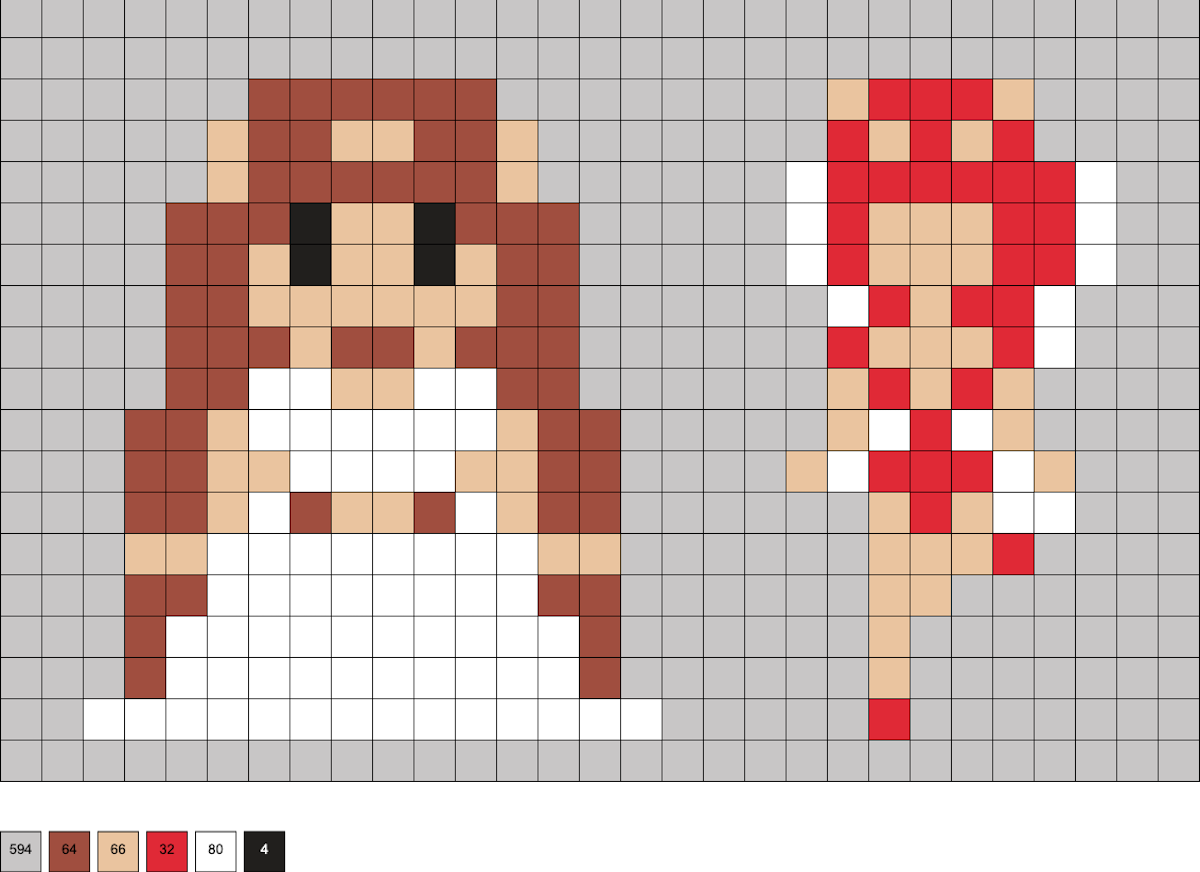
Princess Zelda and a Fairy
These patterns use 64 rust, 66 sand, 32 red, 80 white, and 4 black beads.
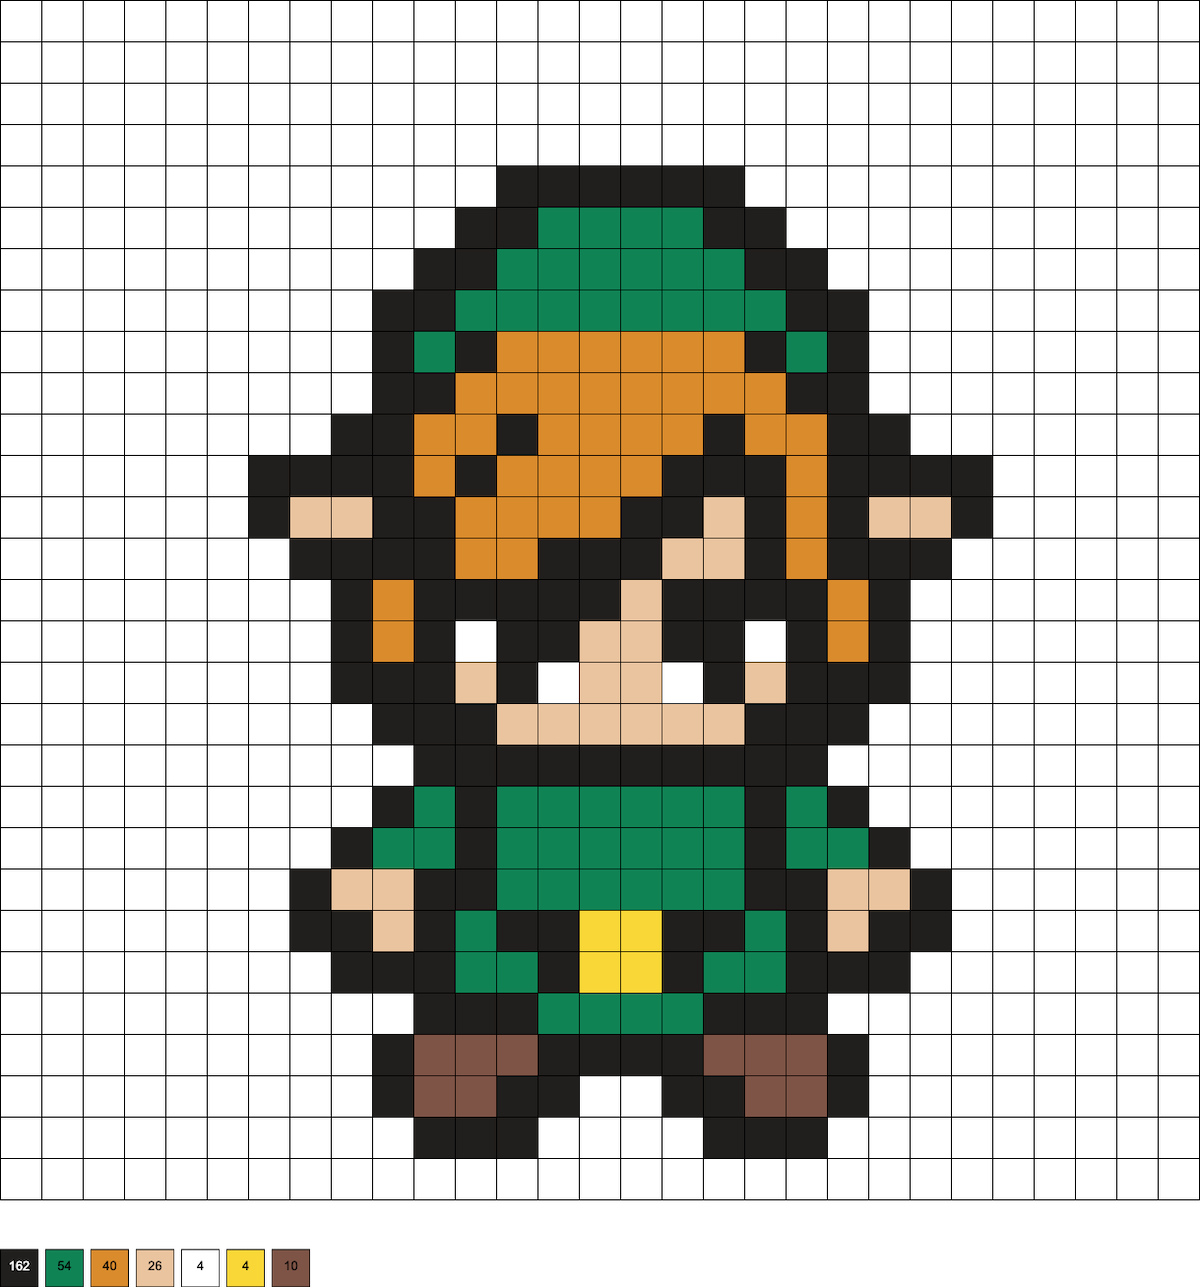
Front Facing Link
This pattern uses 162 black, 54 shamrock, 40 honey, 26 sand, 4 white, 4 yellow, and 10 brown beads.
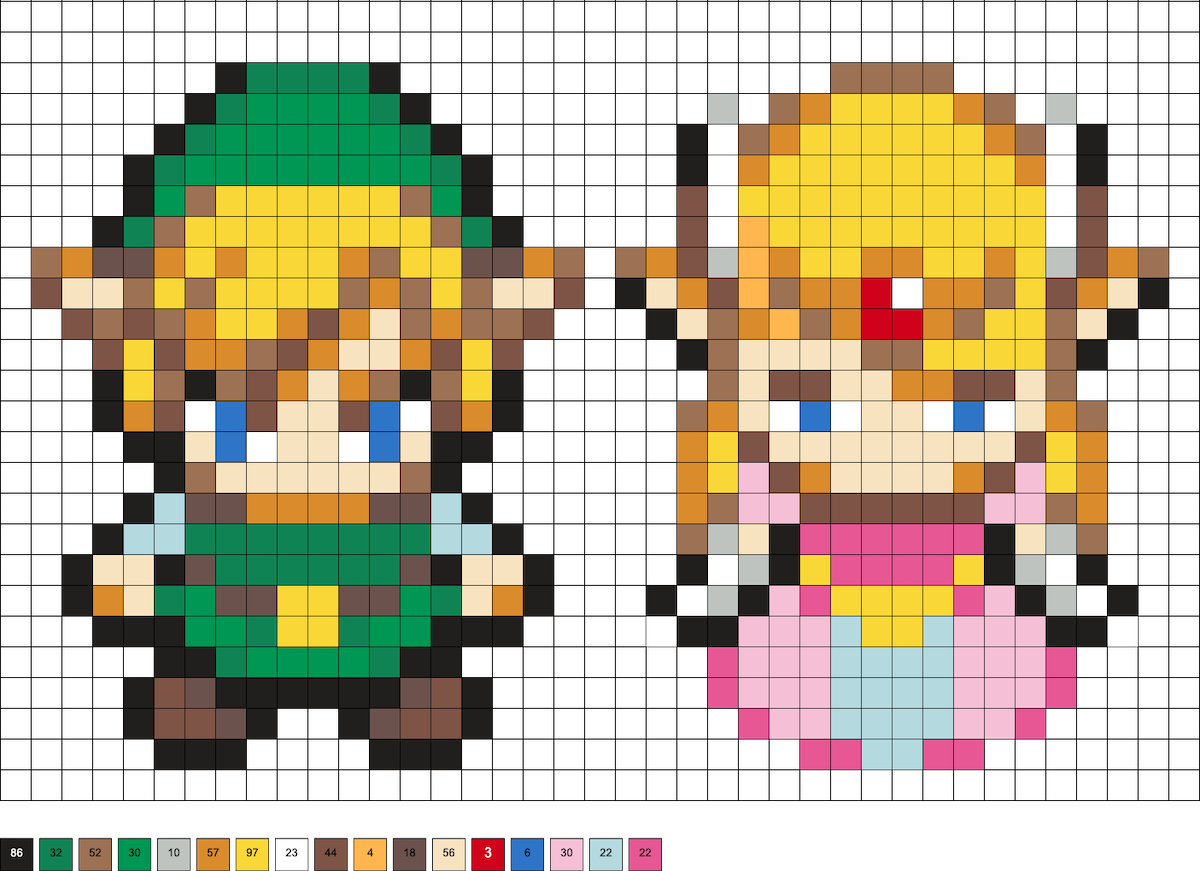
Link and Princess
These patterns use 86 black, 32 dark green, 52 light brown, 30 shamrock, 10 light gray or silver, 57 honey, 97 yellow, 23 white, 44 gingerbread, 4 cheddar, 18 brown, 56 toasted marshmallow, 3 red, 6 light blue, 30 flamingo, 22 robin’s egg, and 22 pink beads.
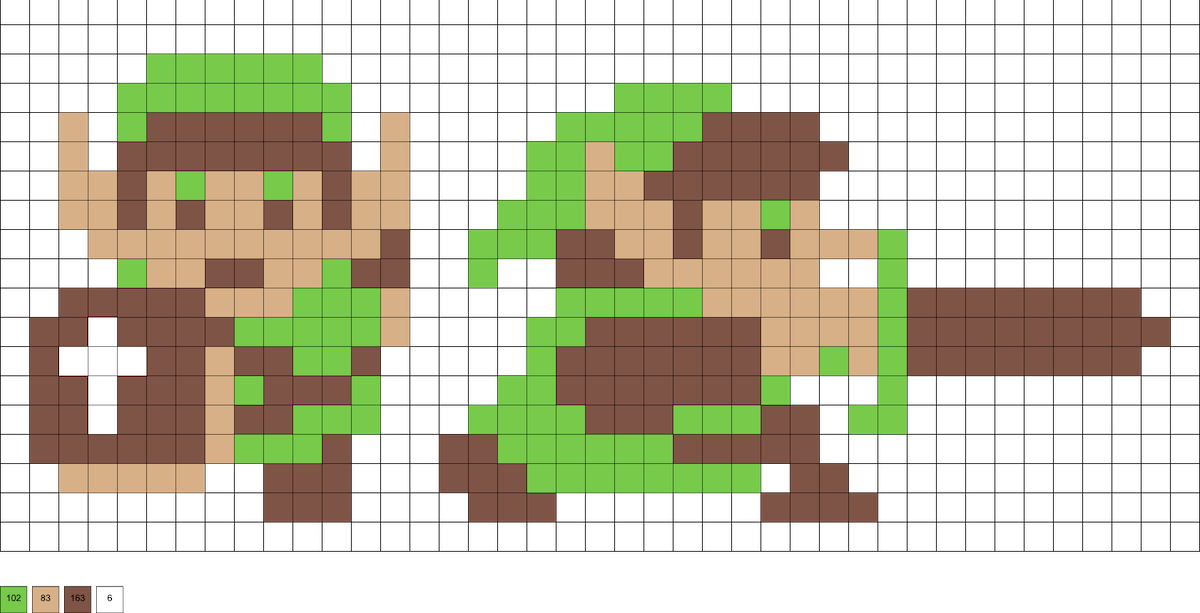
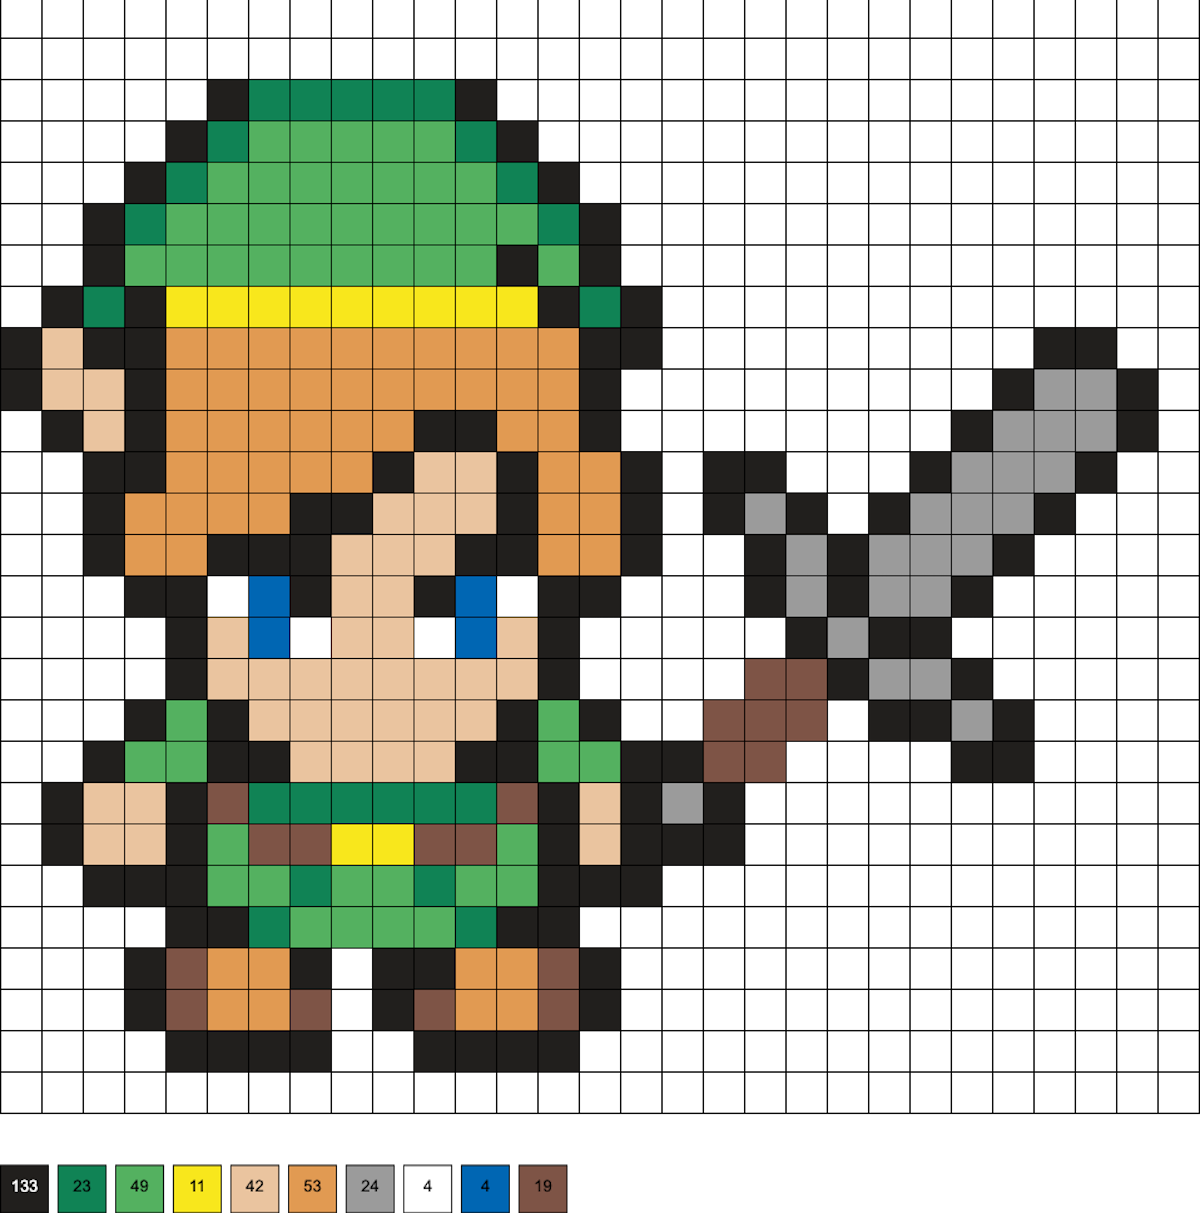
Link with Sword
This pattern uses 133 black, 23 shamrock, 49 bright green, 11 yellow, 42 sand, 53 butterscotch, 24 gray or pewter, 4 white, 4 cobalt, and 19 brown beads.
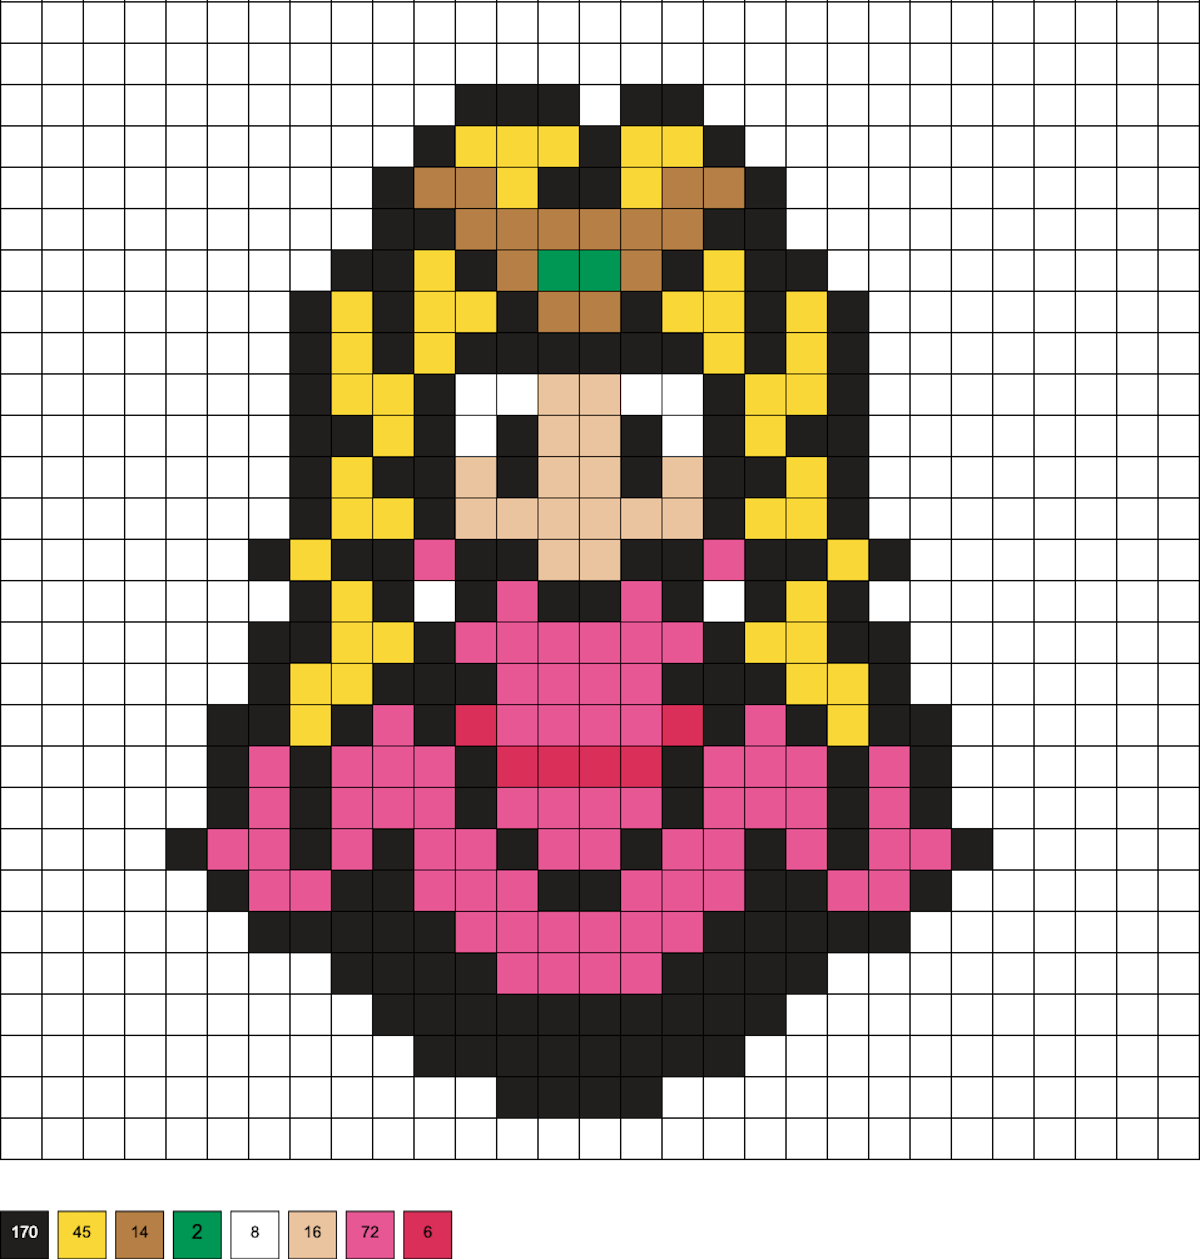
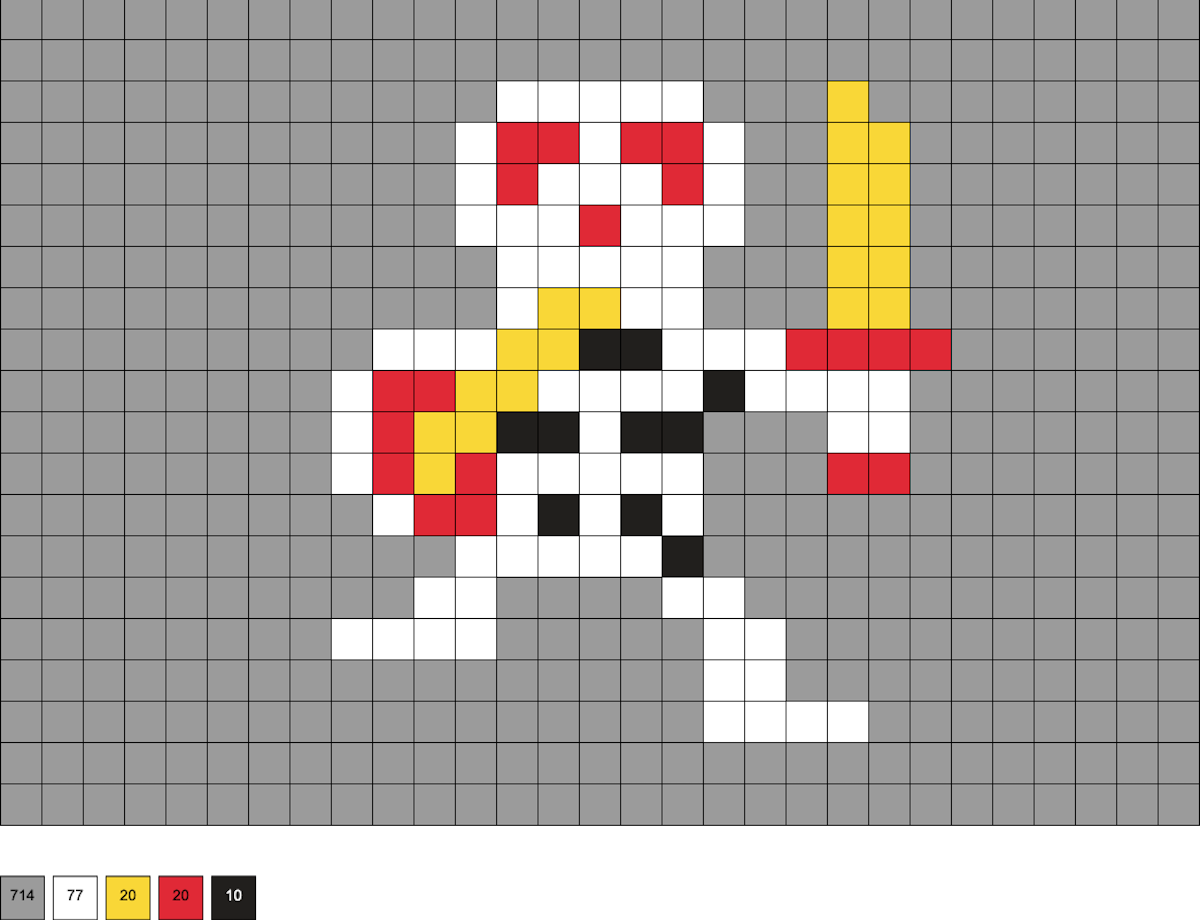
Zelda with Crown
This pattern uses 170 black, 45 yellow, 14 gold, 2 shamrock, 8 yellow, 16 sand, 72 pink, and 6 magenta beads.
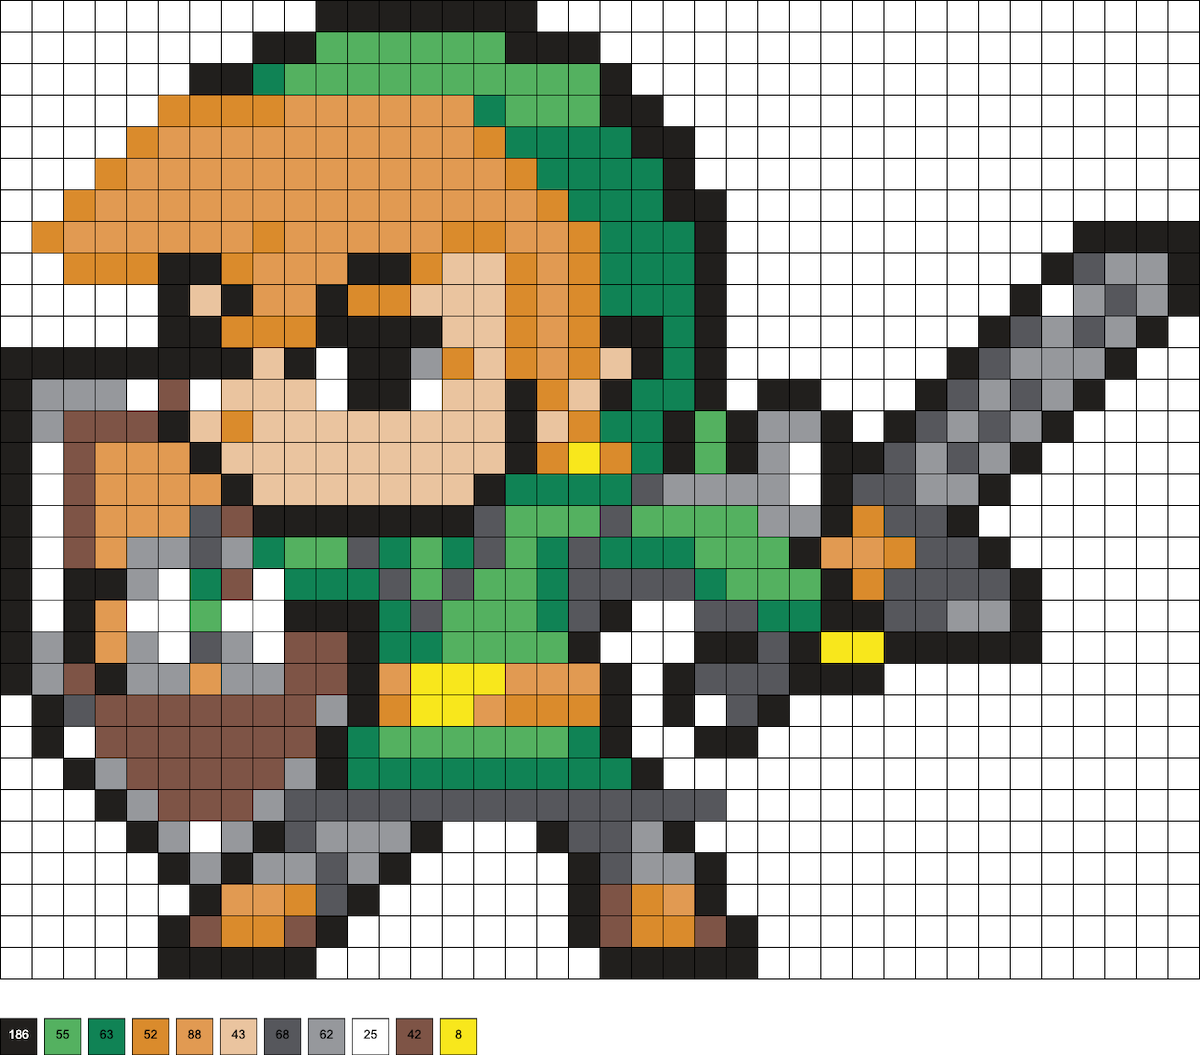
Link with Sword and Shield
This pattern uses 186 black, 63 shamrock, 55 bright green, 8 yellow, 43 sand, 88 butterscotch, 52 honey, 68 dark gray, 62 gray or pewter, 25 white, and 42 gingerbread beads.
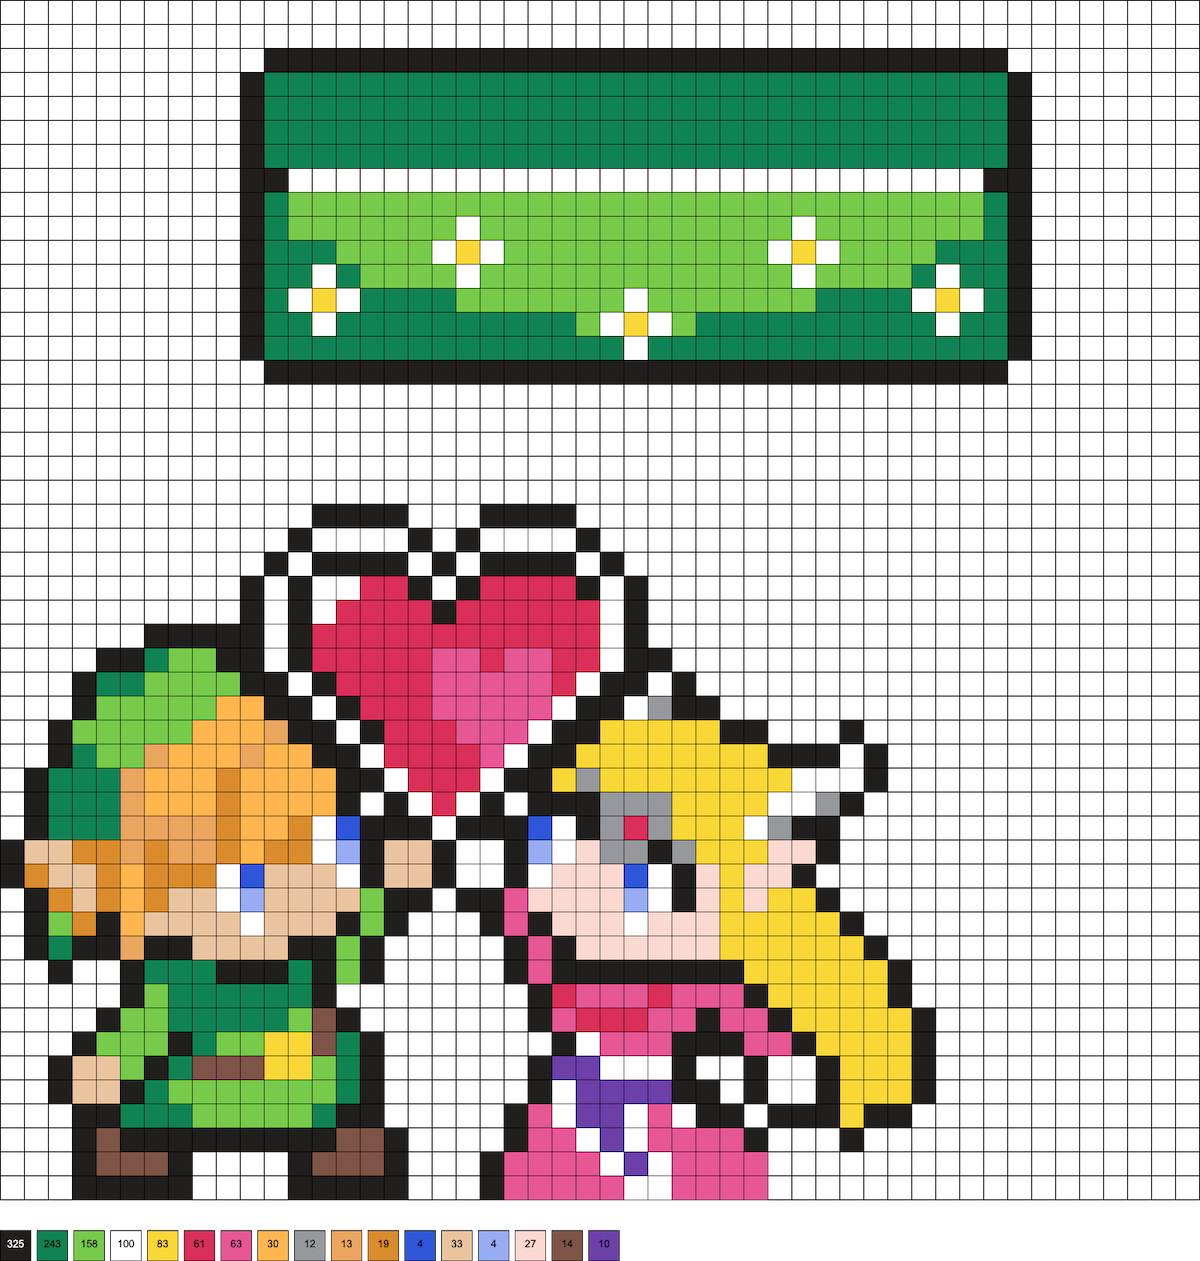
3D Link and Princess
This pattern uses 325 black, 243 shamrock, 158 kiwi lime, 100 white, 83 yellow, 61 fruit punch, 63 pink, 30 cheddar, 12 gray, 13 butterscotch, 19 honey, 4 cobalt, 33 sand, 4 light lavender, 27 peach, 14 brown, and 10 grape beads. Once complete, you can insert the Link and princess in the stand.
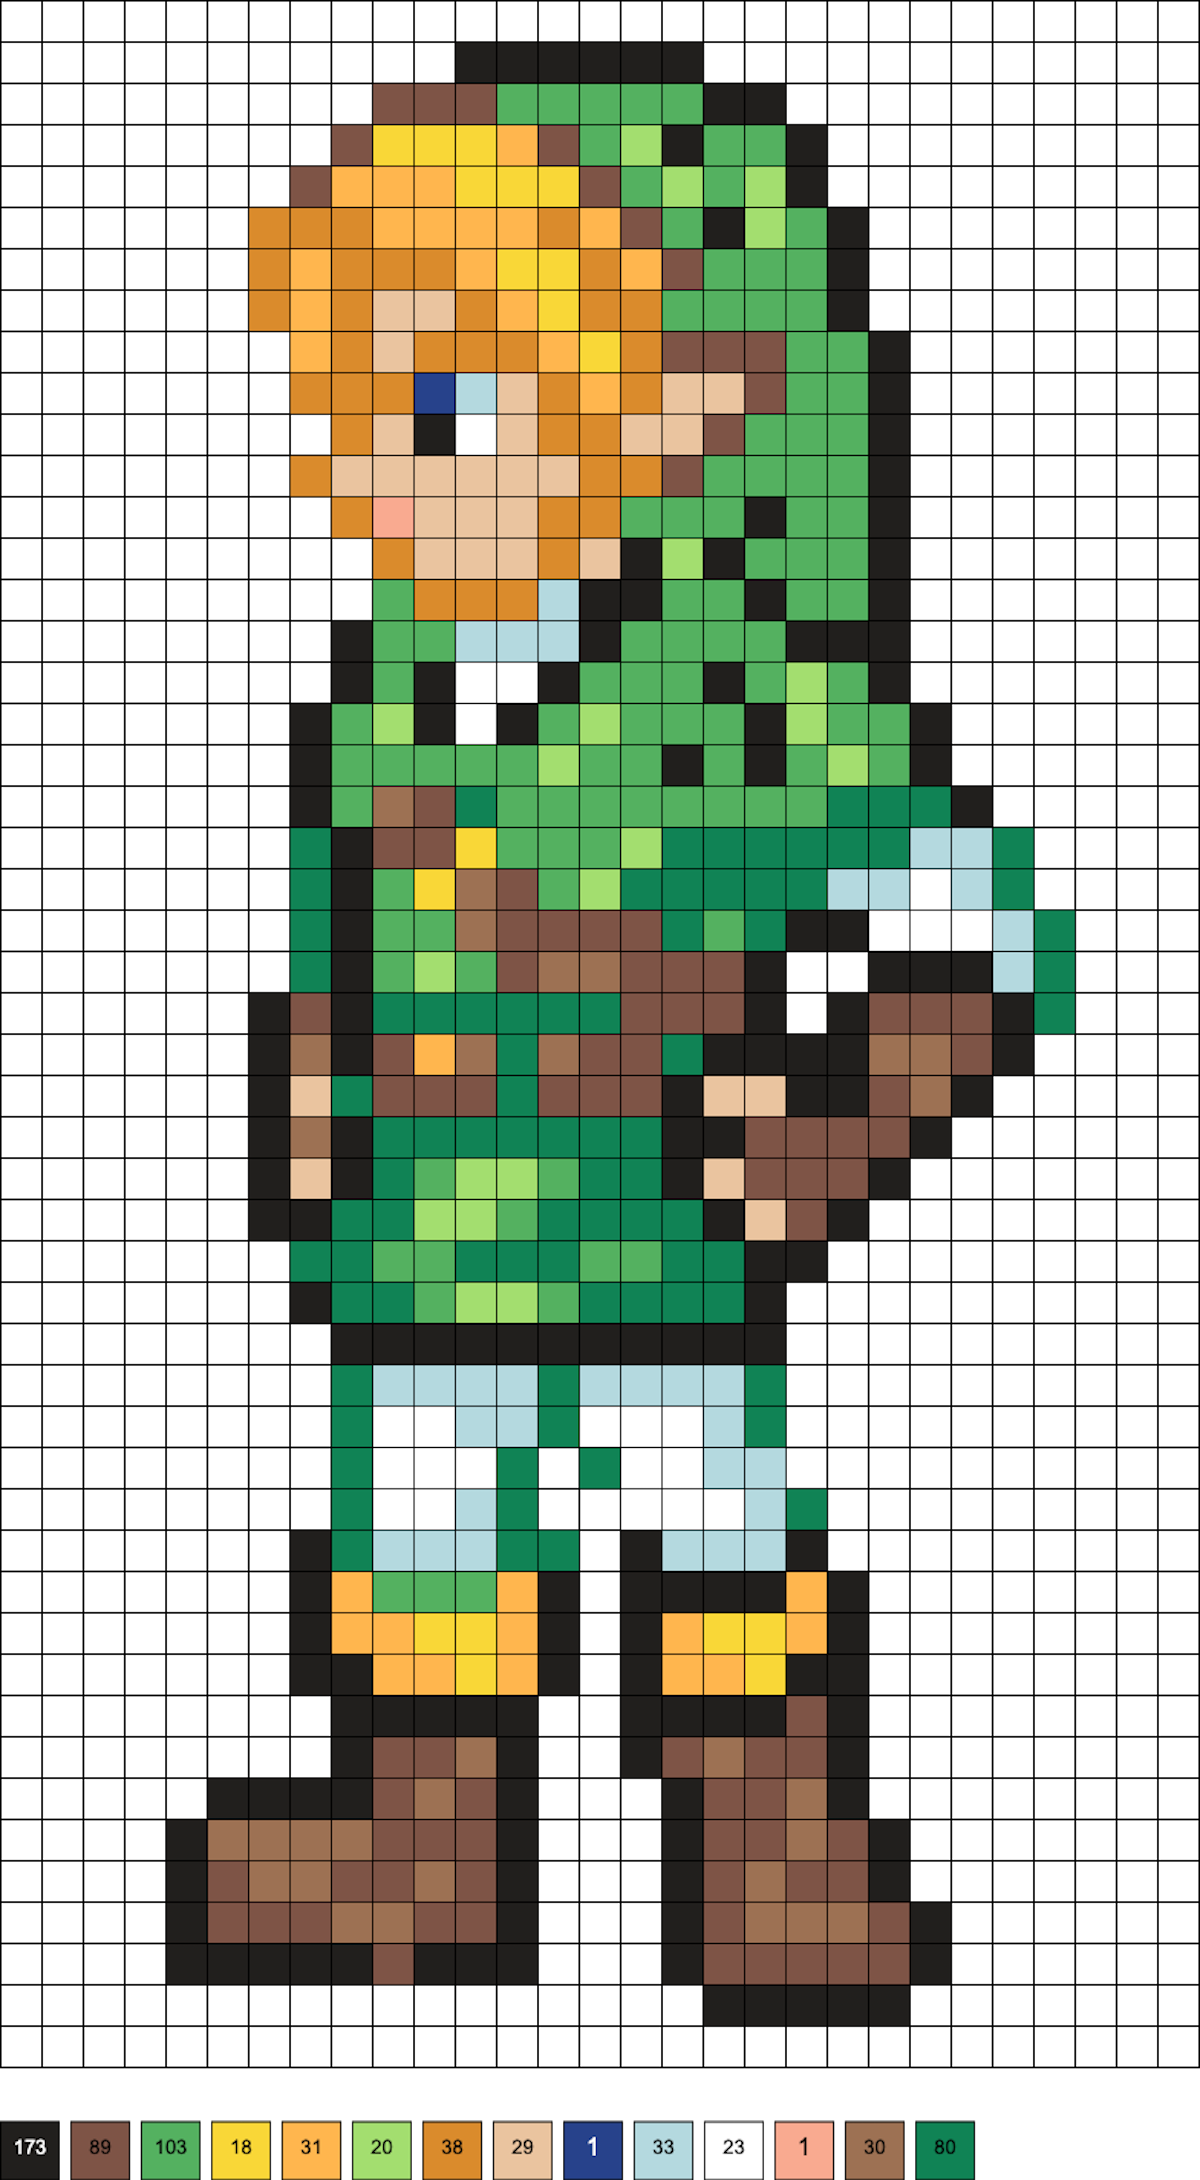
Large Standing Link
This pattern uses 173 black, 89 brown, 103 bright green, 18 yellow, 31 cheddar, 20 sour apple, 38 honey, 29 sand, 1 dark blue, 33 robin’s egg, 23 white, 1 blush, 30 light brown, and 80 shamrock beads.
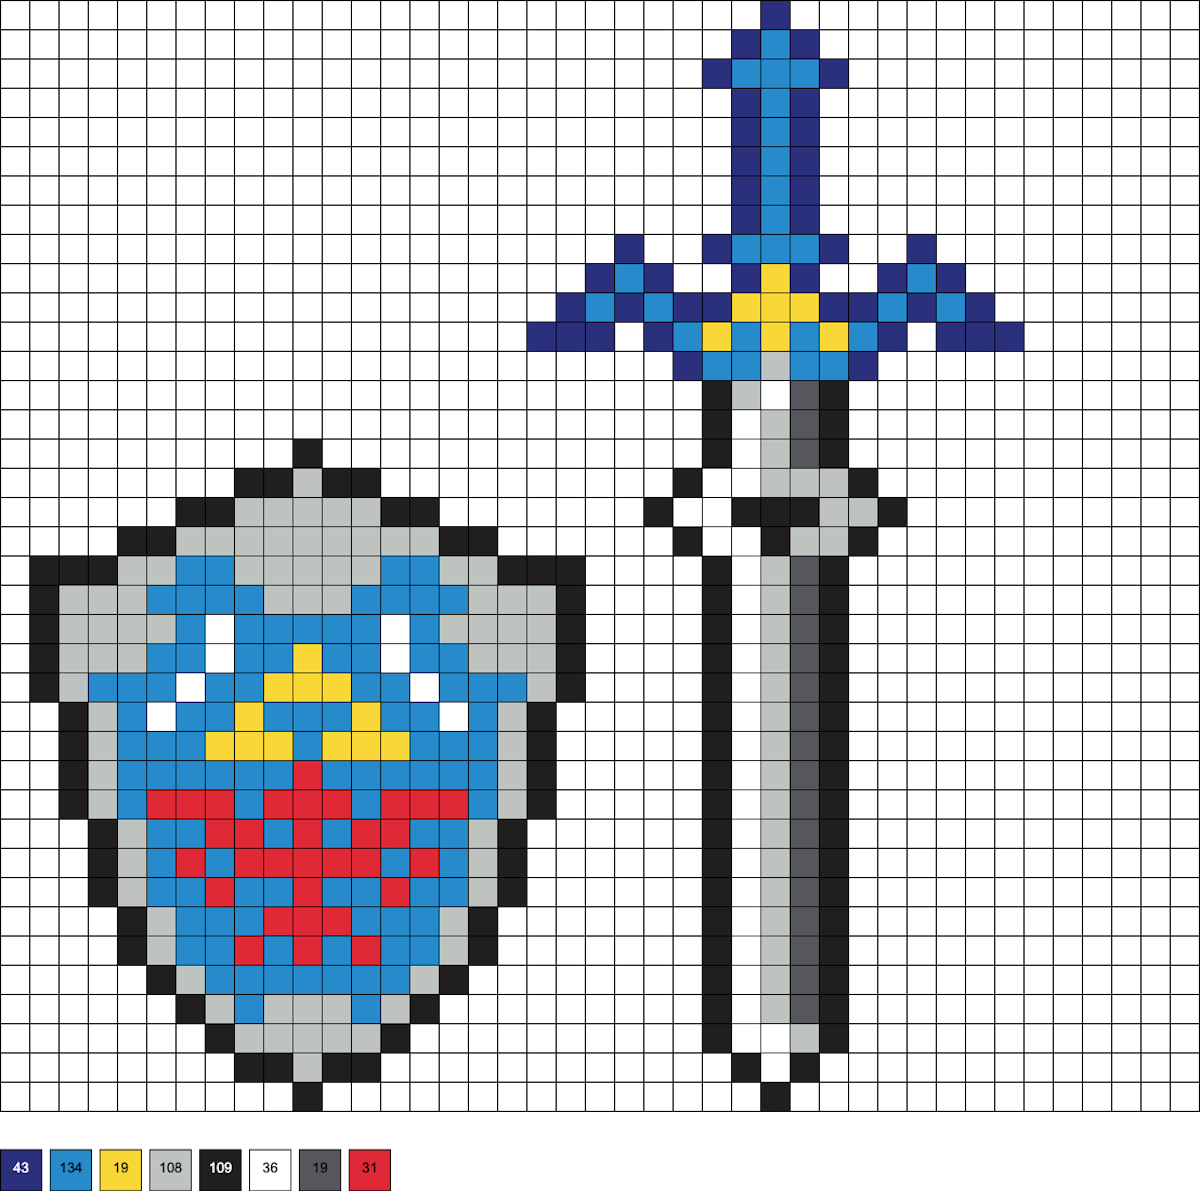
Sword and Shield
These patterns use 43 dark blue, 134 light blue, 19 yellow, 108 light gray, 109 black, 36 white, 19 dark gray, and 31 red beads.
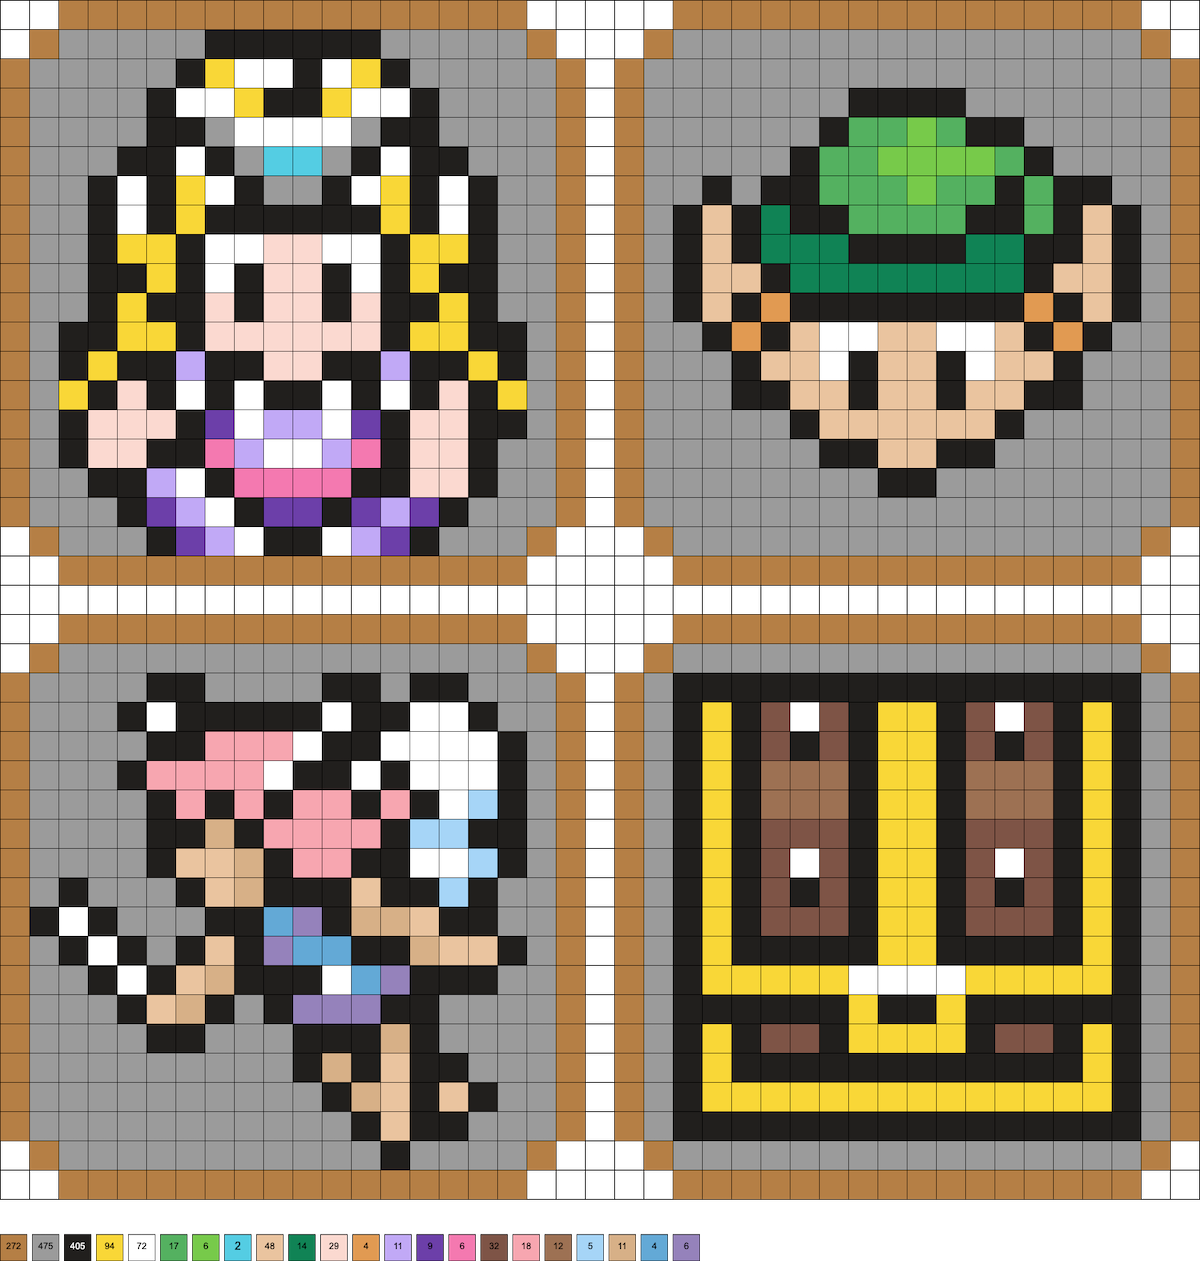
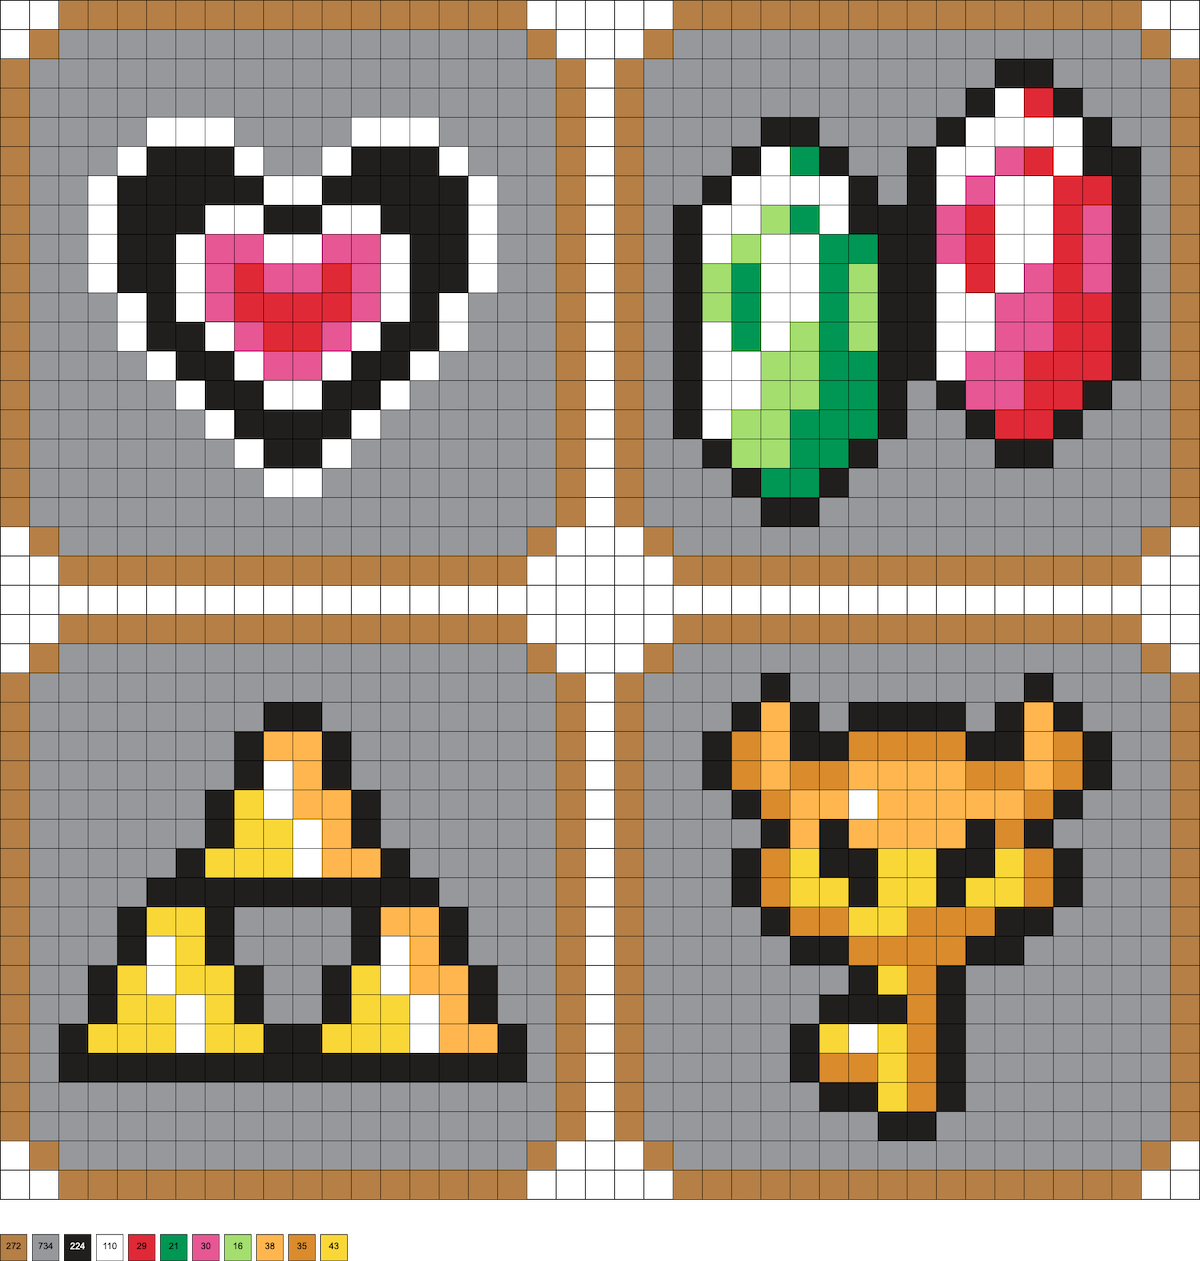
Legend of Zelda Coasters
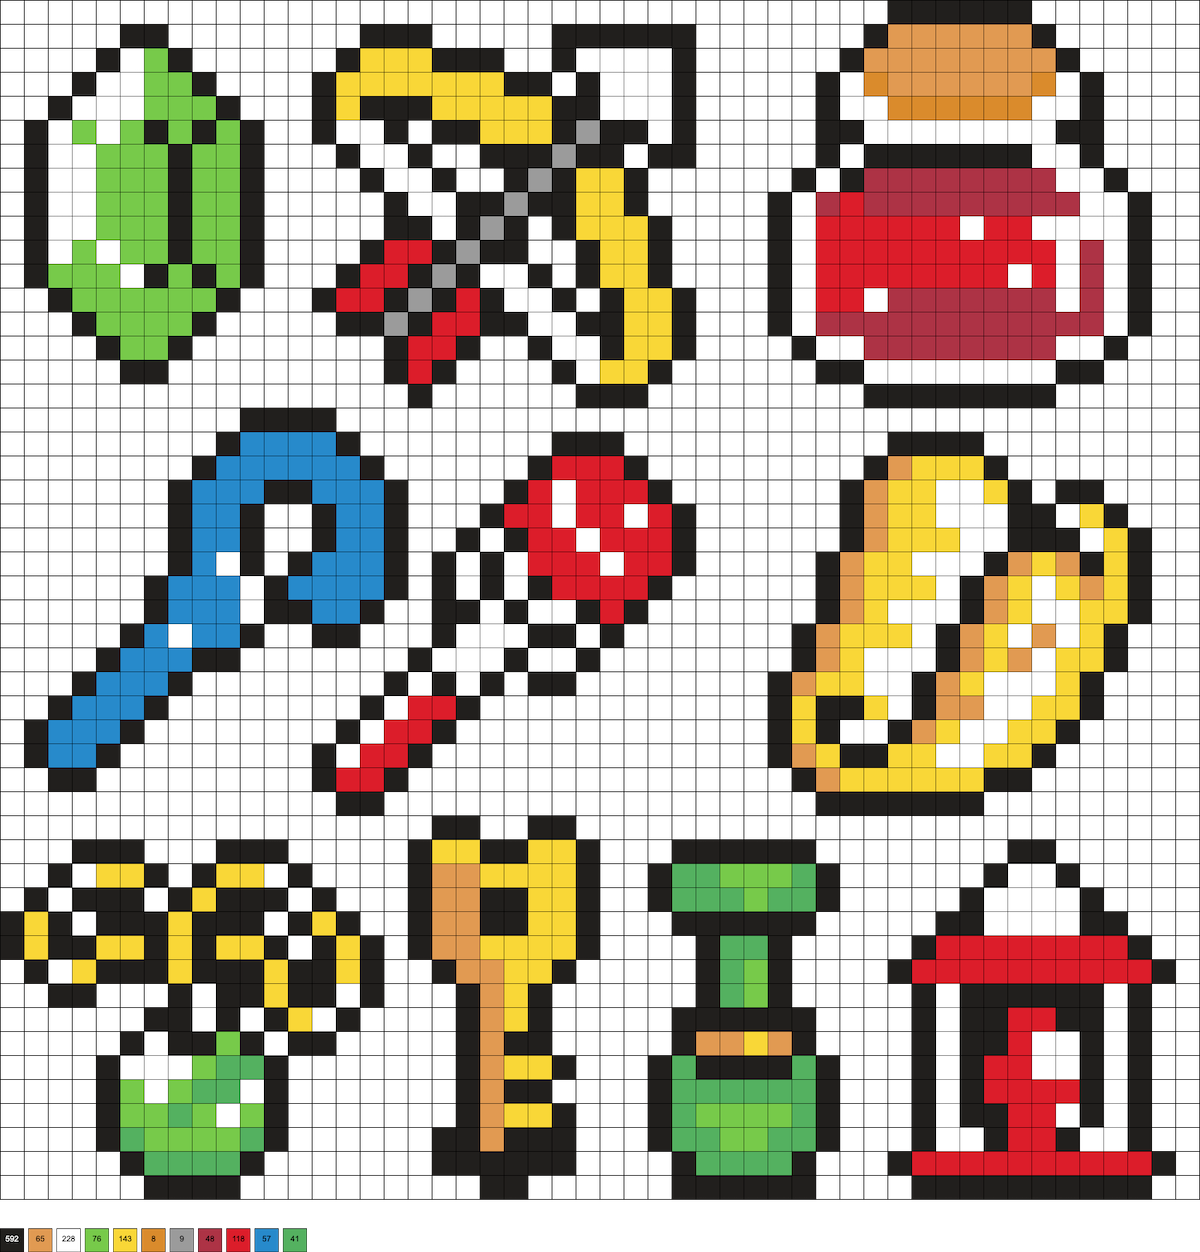
Icons & Weapons
Old Man & Old Woman
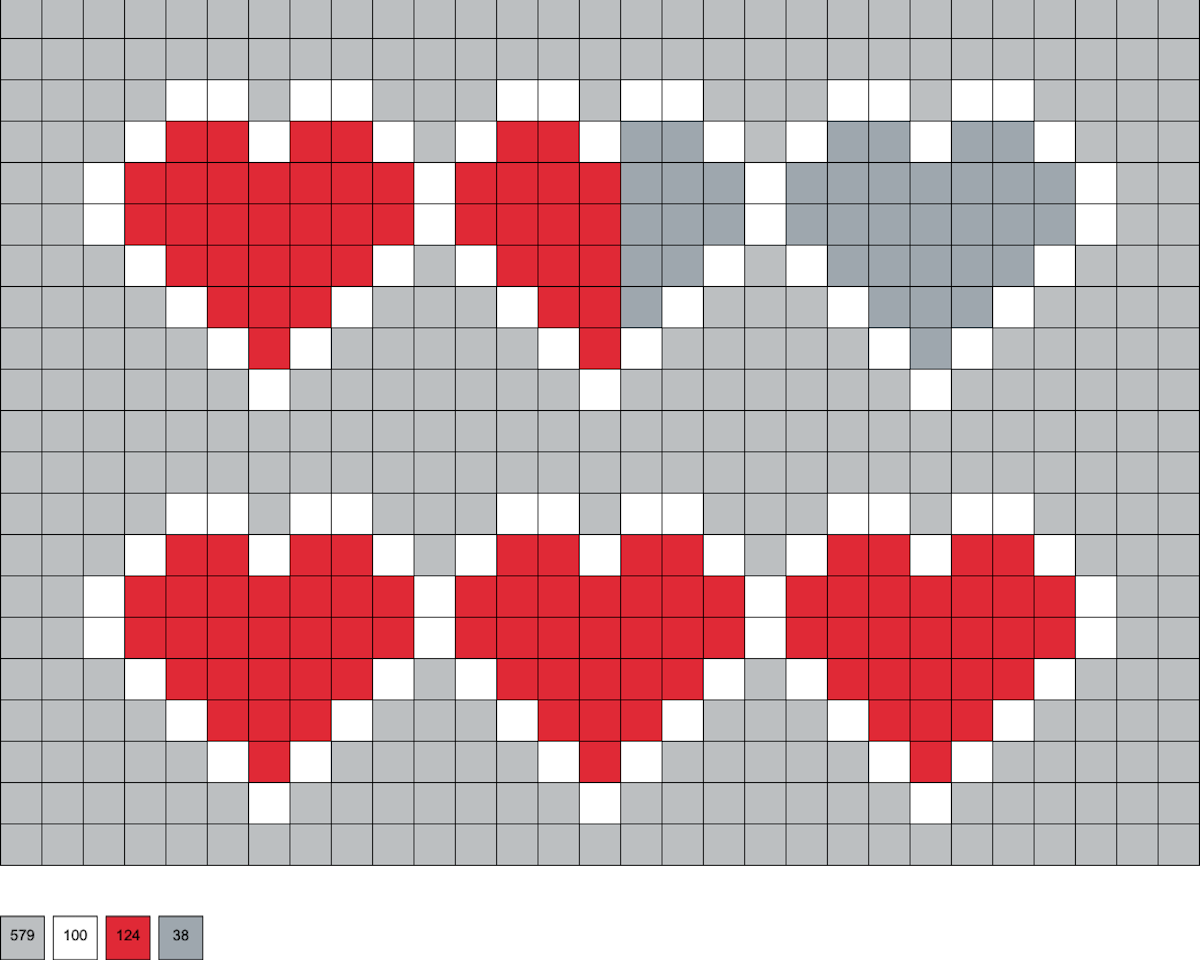
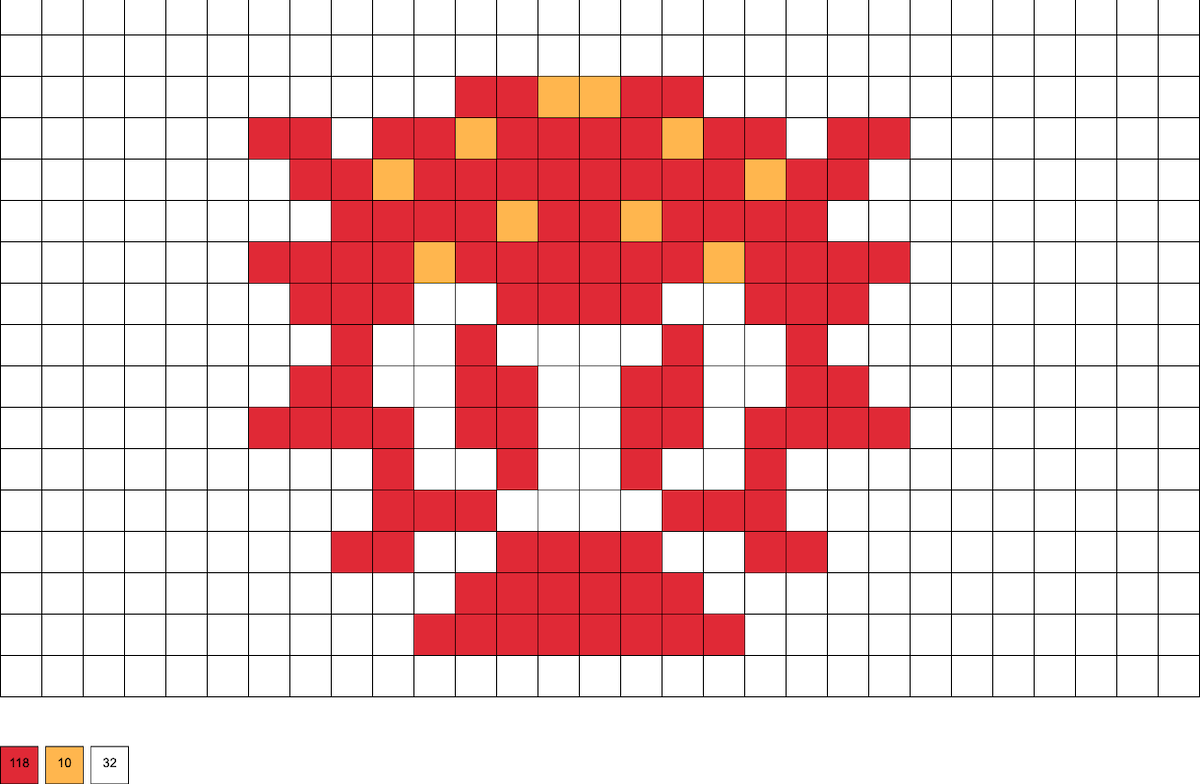
Hyrule Crest and Life Hearts
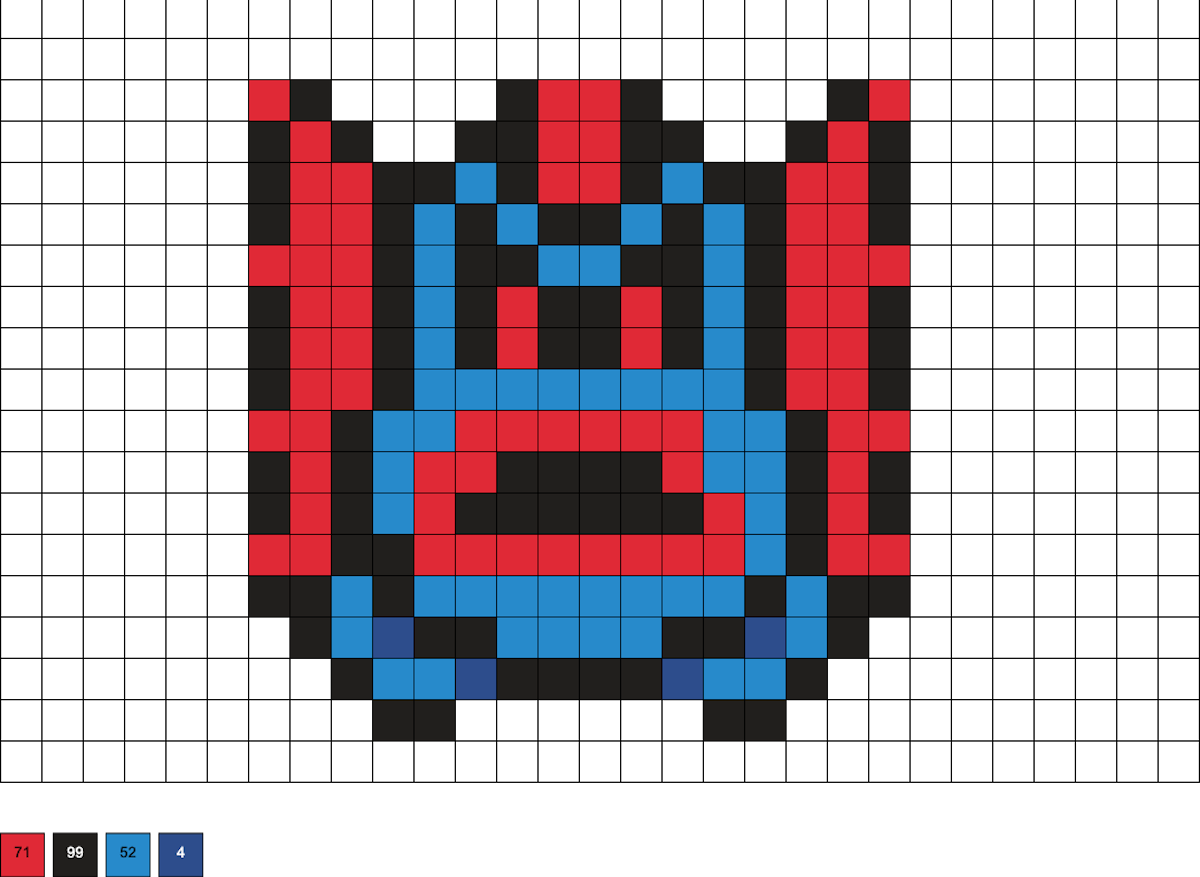
Zora and Moblin
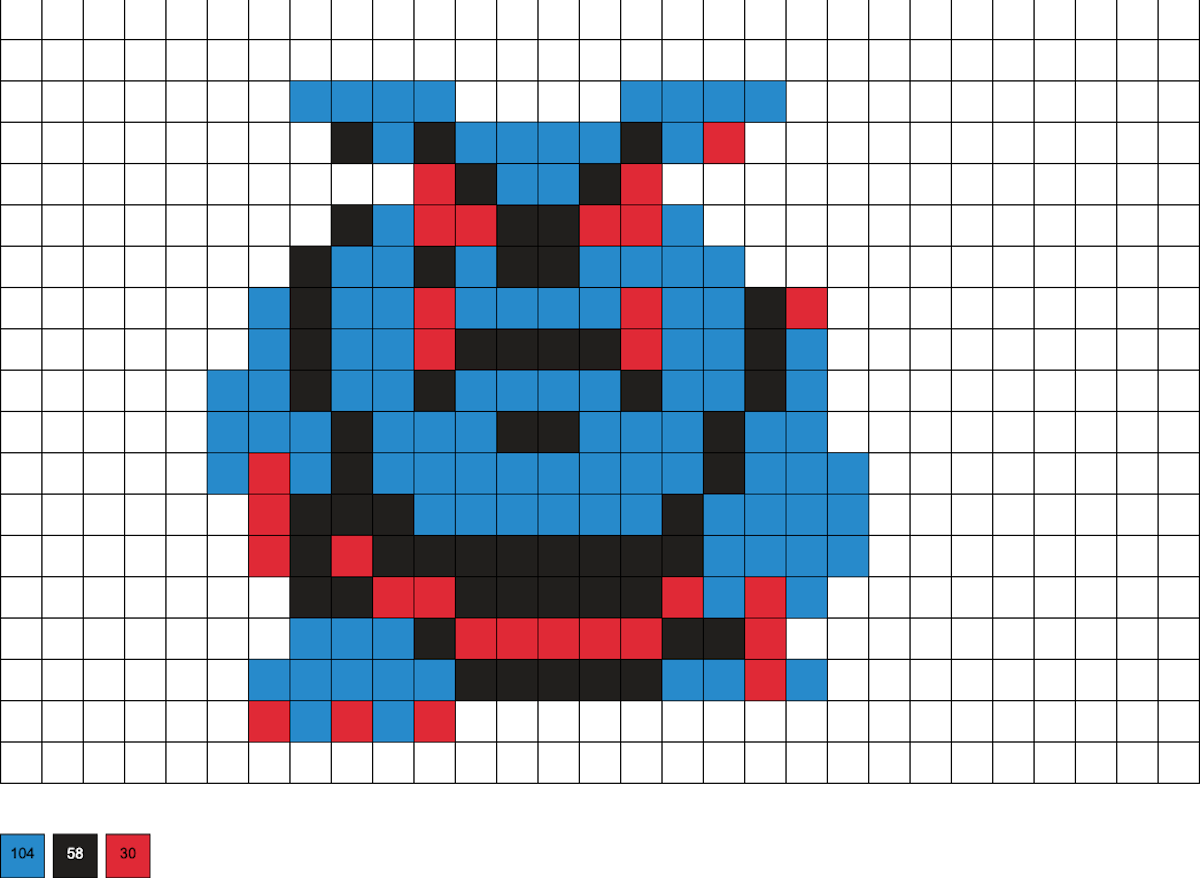
Octorok & Tektite
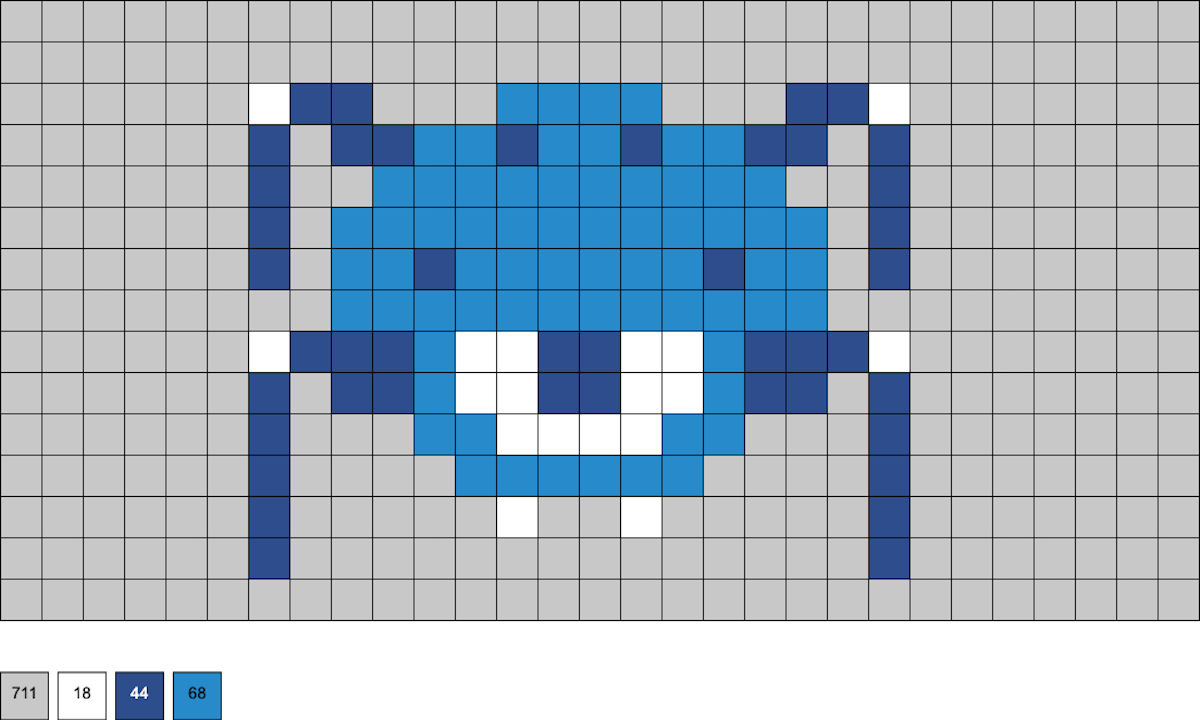
Stalfos & Gibdo
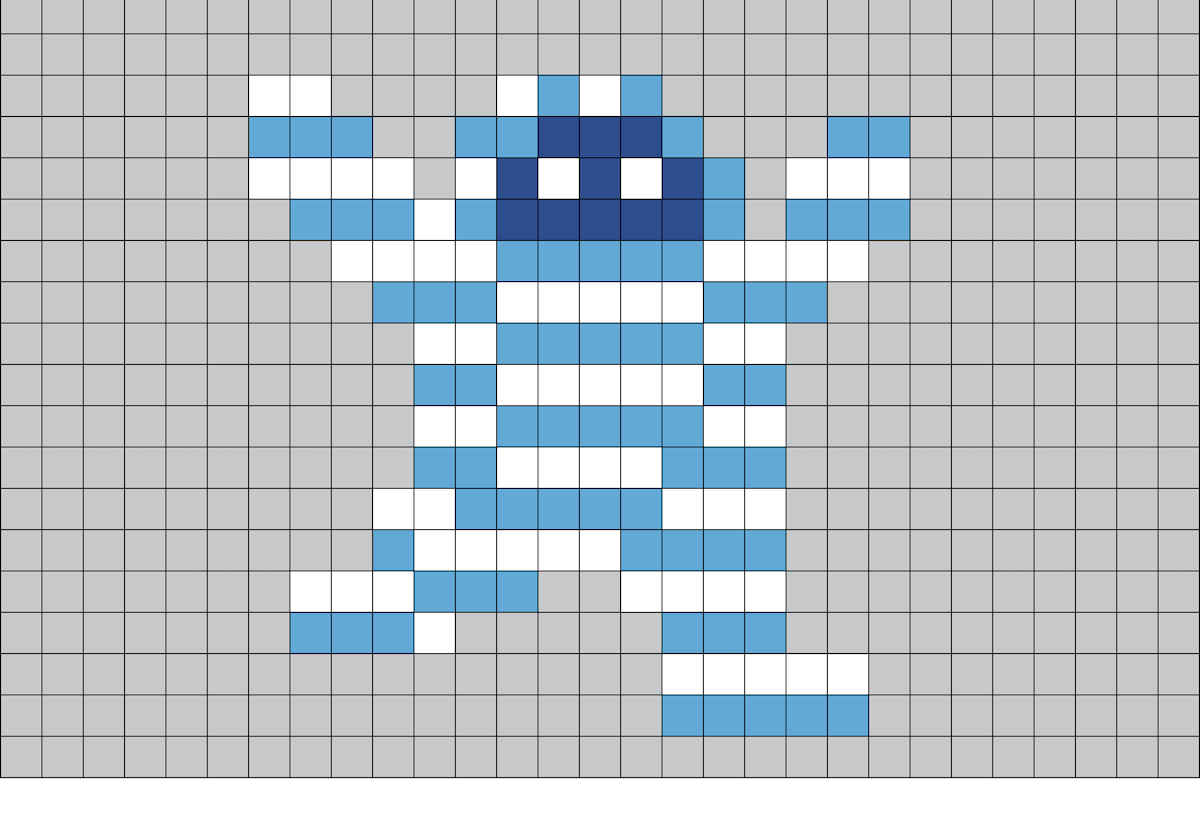
Large Gohma
This pattern uses 136 light gray, 104 white, 132 cobalt, and 189 pastel blue beads.
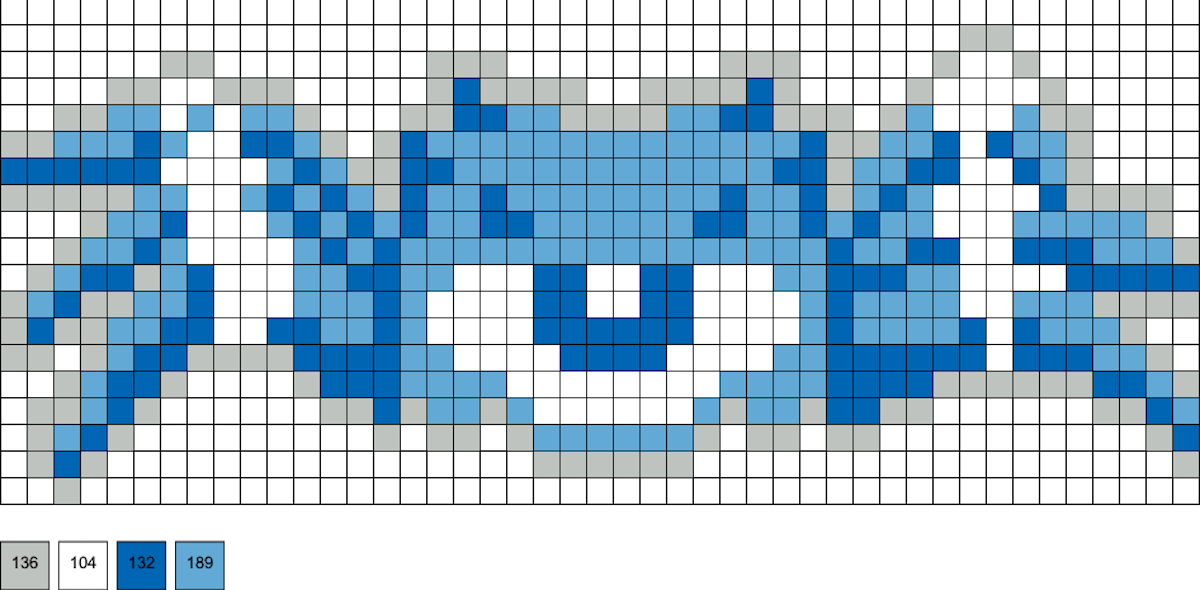
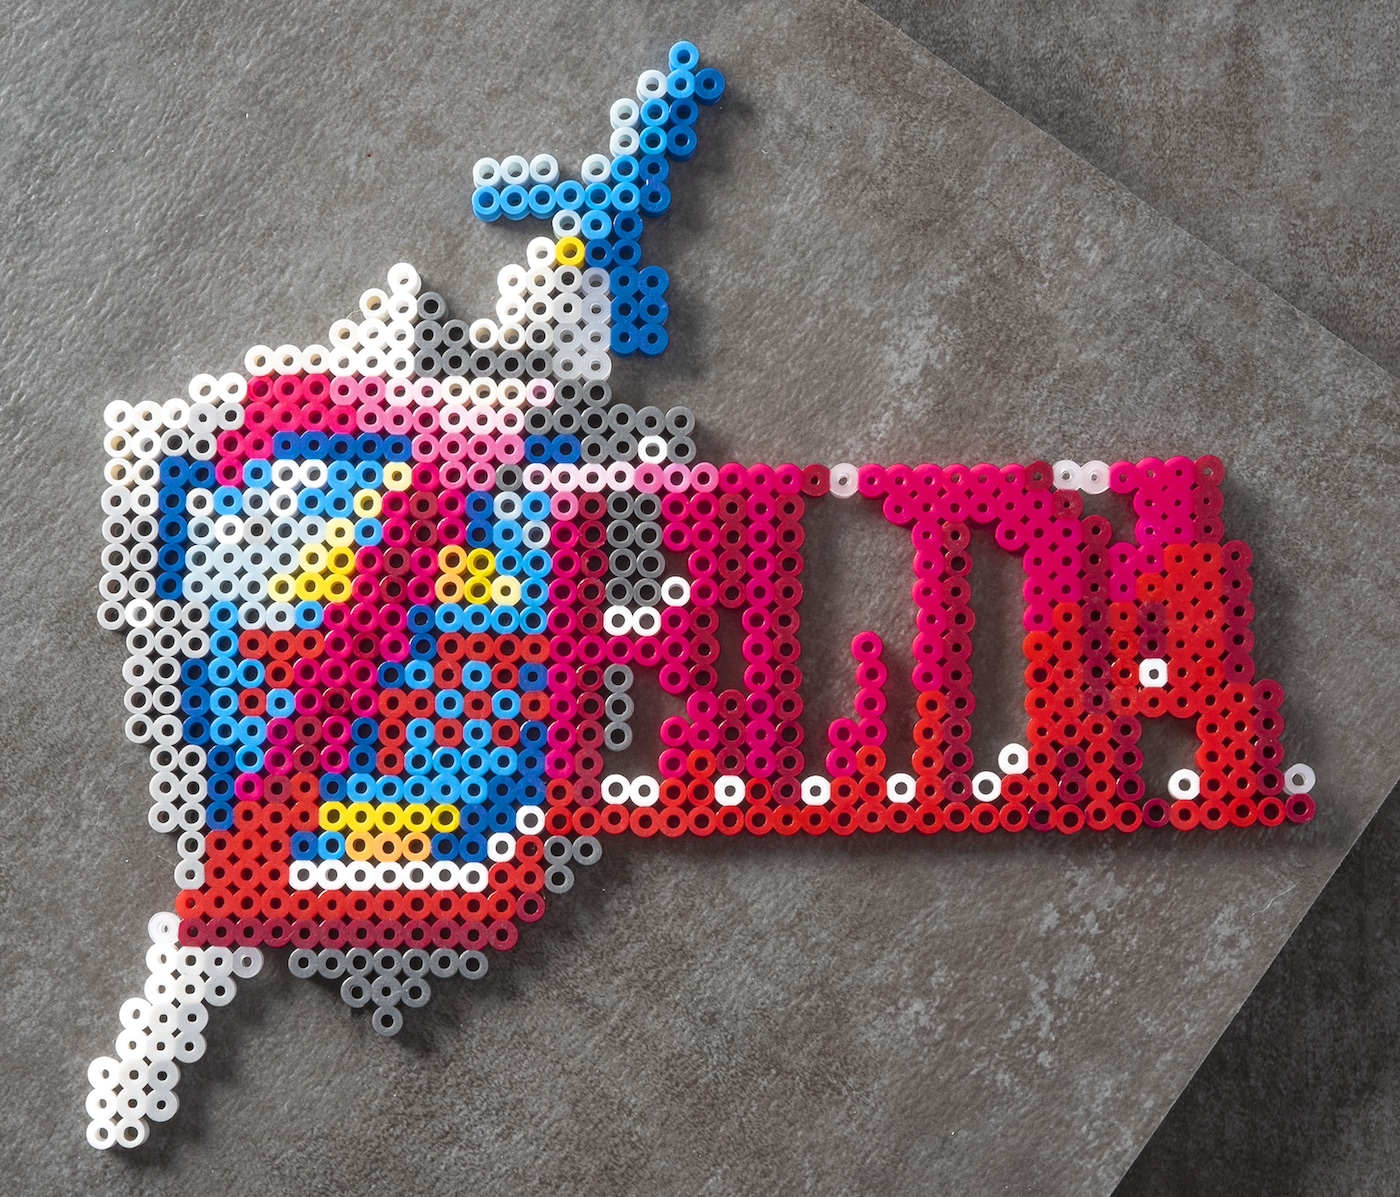
Legend of Zelda Logo
This pattern uses 12 periwinkle, 8 blueberry creme, 52 cobalt, 45 white, 11 yellow, 24 pewter, 45 gray, 45 dark gray, 114 hot coral, 15 salmon, 10 flamingo, 3 peach, 37 light blue, 17 pastel blue, 6 pastel yellow, 95 cranapple, 5 butterscotch, and 120 red beads.
If you enjoyed these Zelda perler beads, I’d love for you to check out these other patterns:
Among Us • Baby Yoda • Batman • Bob Ross • Care Bears • Emoji • FNAF • Harry Potter • Hello Kitty • Kuromi • Mickey Mouse • Minecraft • Minions • Pokemon • Sonic • Spider Man • Star Wars • Star Wars Hello Kitty • Stitch • Super Mario • Superhero