Origami Christmas Ornaments You Can Fold with the Whole Family
Learn how to make easy origami Christmas ornaments with kids! Step-by-step tutorial for colorful folded paper chains. A fun and festive holiday craft.
Skills Required: None. You’ll be folding paper and assembling these ornies . . . they are so simple, even kids can do them.

Looking for a fun (and easy) way to jazz up your Christmas tree this year? Well, put down that glitter (trust me, you’ll thank me later) and grab some colorful origami paper instead — because we’re about to make the cutest easy origami Christmas ornaments you’ve ever seen.
This project is perfect for kids, beginners, or anyone who loves the idea of crafting but not the idea of a craft store meltdown.
Remember those old gum wrapper chains we used to make as kids? This is the same idea — but classier. And less sticky.

Instead of candy wrappers, we’re folding bright origami paper into a paper chain ornament that’s simple enough for little hands but pretty enough for your main tree. Or your kids’ tree. Or the dog’s tree. (No judgment.)
If you’re new to origami, here are a few quick tips:
- Use thinner origami paper — it folds easier and stays put.
- Crease those folds nice and sharp — a bone folder or the back of a spoon works great if your fingernails aren’t up for it.
- Don’t worry if your chain is a little wonky. That’s called “charm.”
So turn up the Christmas music, plop down with the family, and start folding your way to a festive, colorful tree.
These easy step-by-step origami Christmas ornaments are not only fun to make but also a sweet way to create memories (and maybe even start a new holiday tradition). Ready? Let’s fold!

Get the printable how to card below:

Origami Ornaments
Equipment
- Bone folder optional
Materials
- 20 pieces Origami paper in various colors
- String
- Craft glue
Instructions
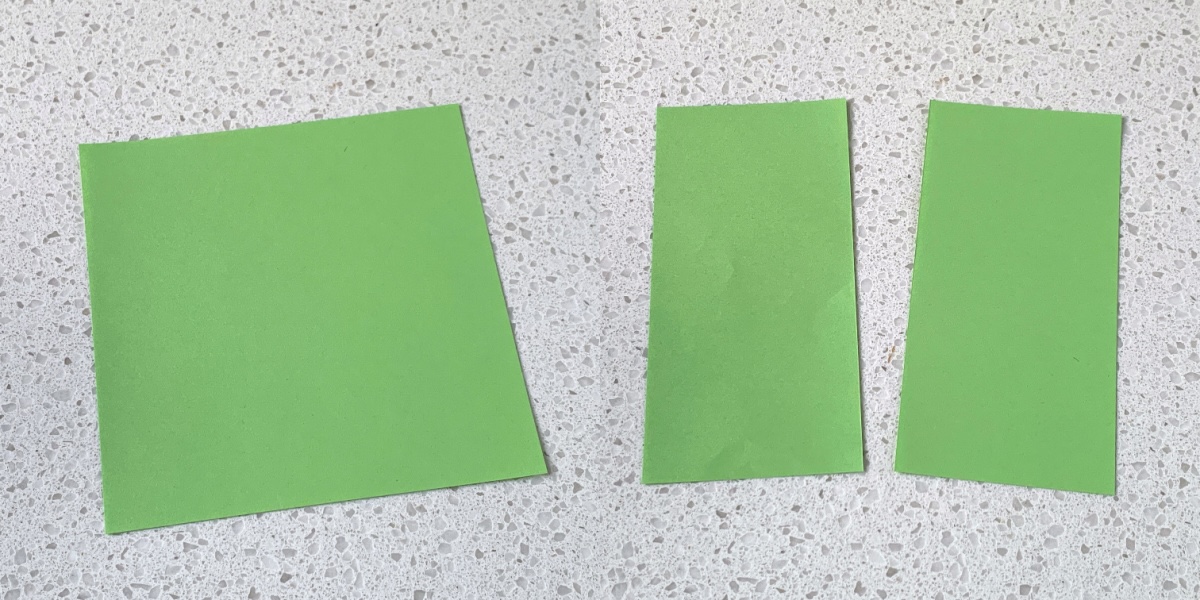
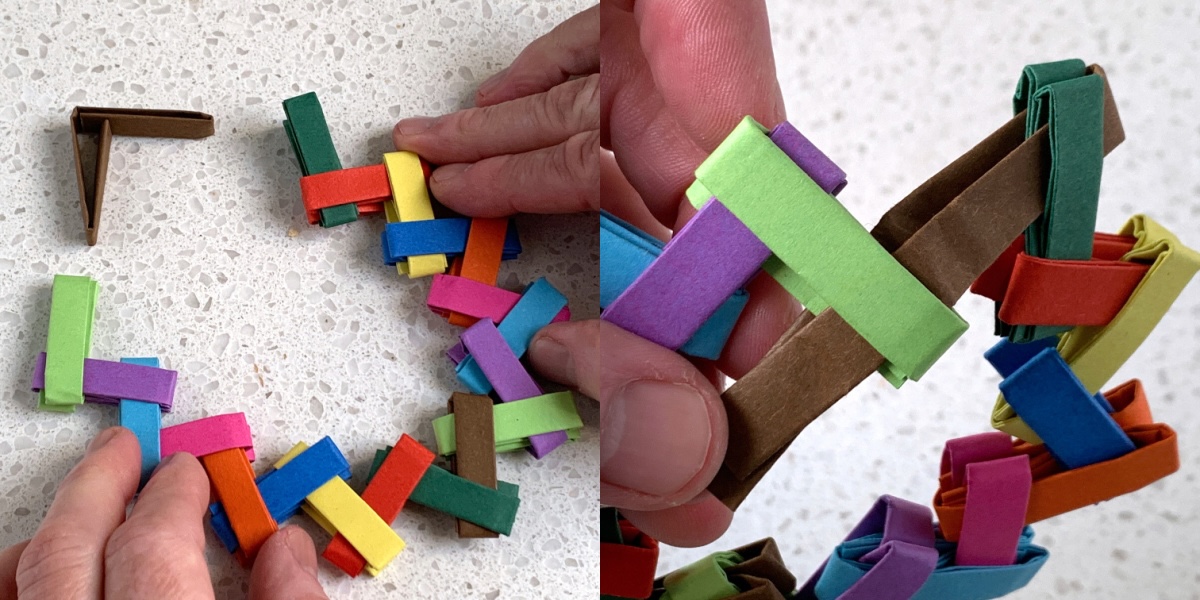
- Fold a sheet of origami paper in half. Cut it in half. You'll work with one of the half sheet pieces at a time.
- Place the half sheet color side down. Fold it in half and open it up. Fold up both sides so that they touch in the middle at the crease you just made.
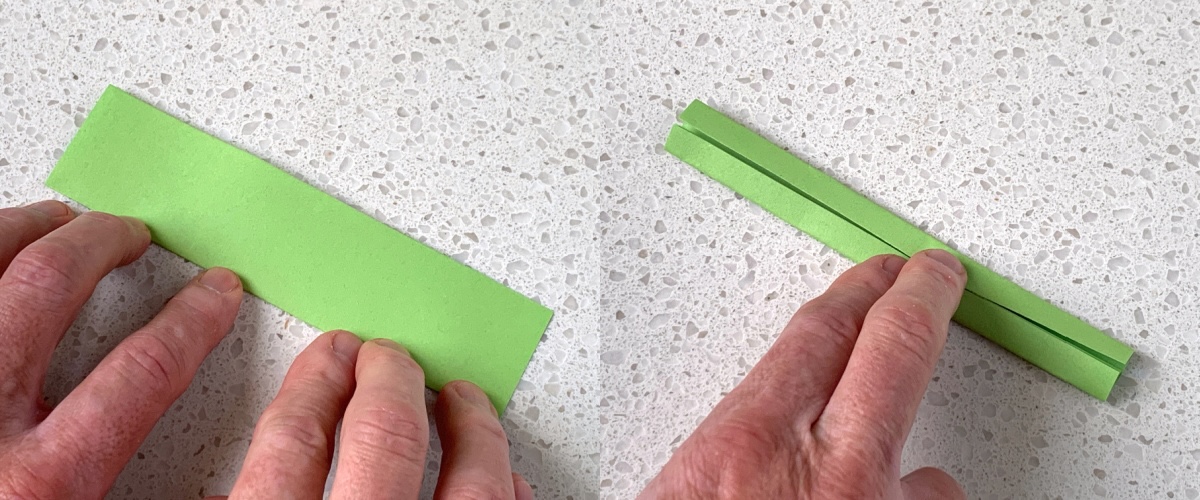
- Fold it in half again. You have a long, folded strip of origami paper.
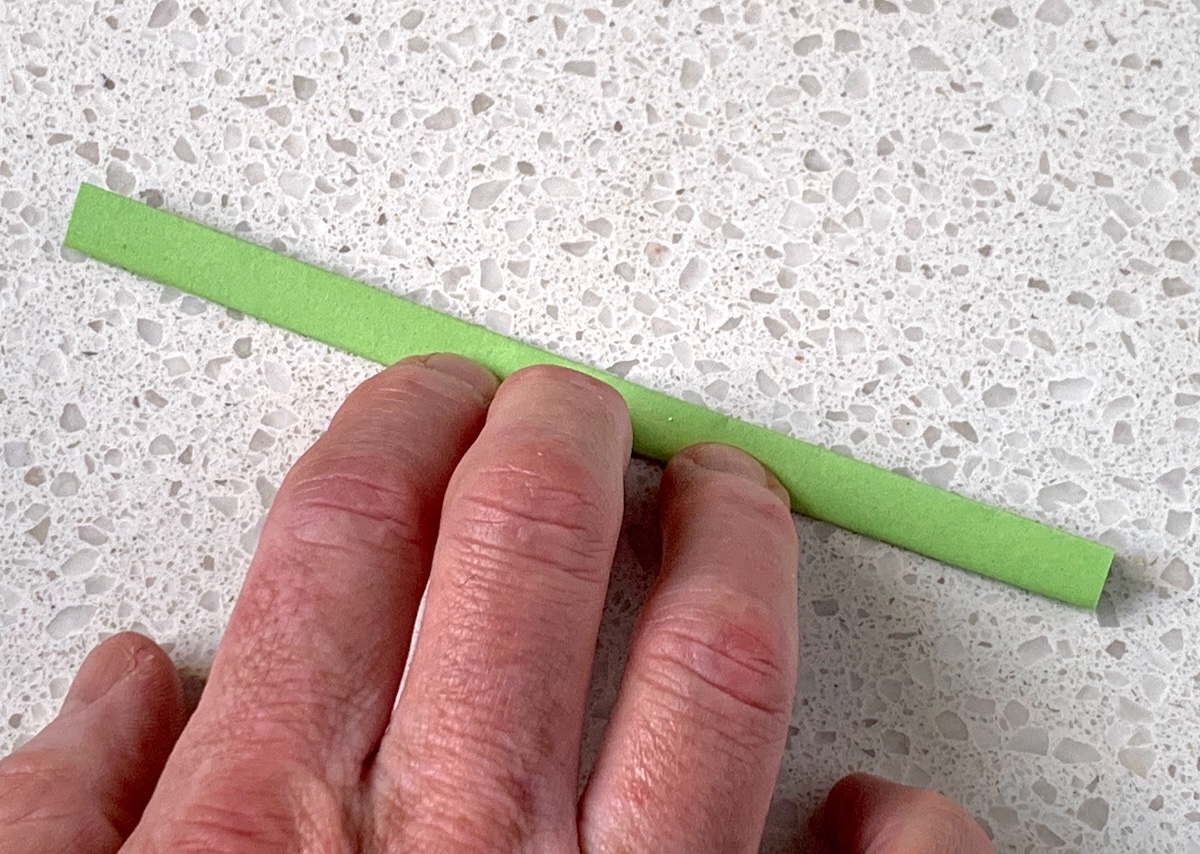
- Now fold the paper in half lengthwise and open it up. Fold both left and right sides of the paper to meet in the middle and make a V. Repeat this several times with multiple colors of paper.

- Start with two of the folded V pieces. Slide the top portion of one V into the top portion of another V. Then slide your folded paper through and pull tight.

- Keep sticking the V’s together in the same way as step 5.
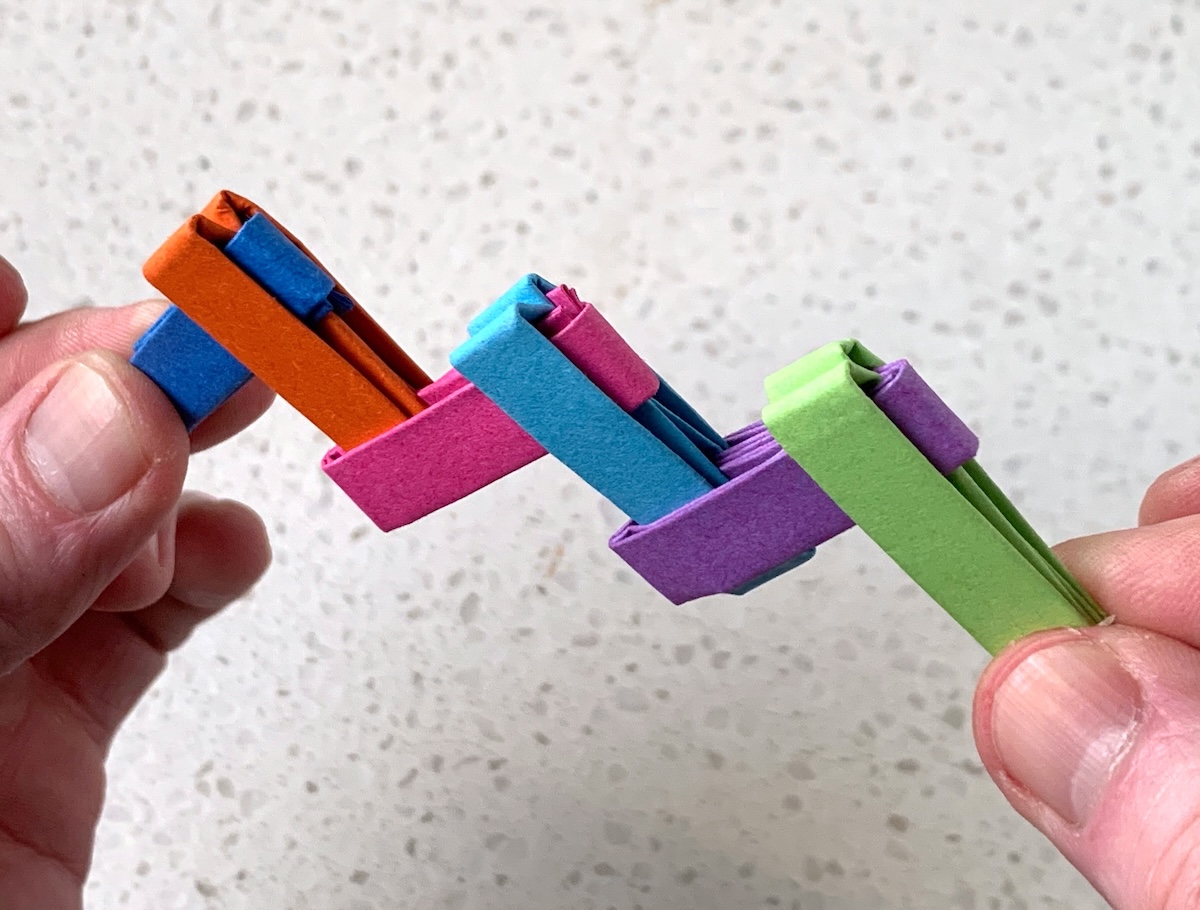
- When you have enough Vs to complete a circle, pull out the folded arms of your last V so that it is just folded in half. Stick the two unfolded portions through your first V.
- Now fold up your two unfolded arms. Stick them under a previous V and glue them to secure them in place.
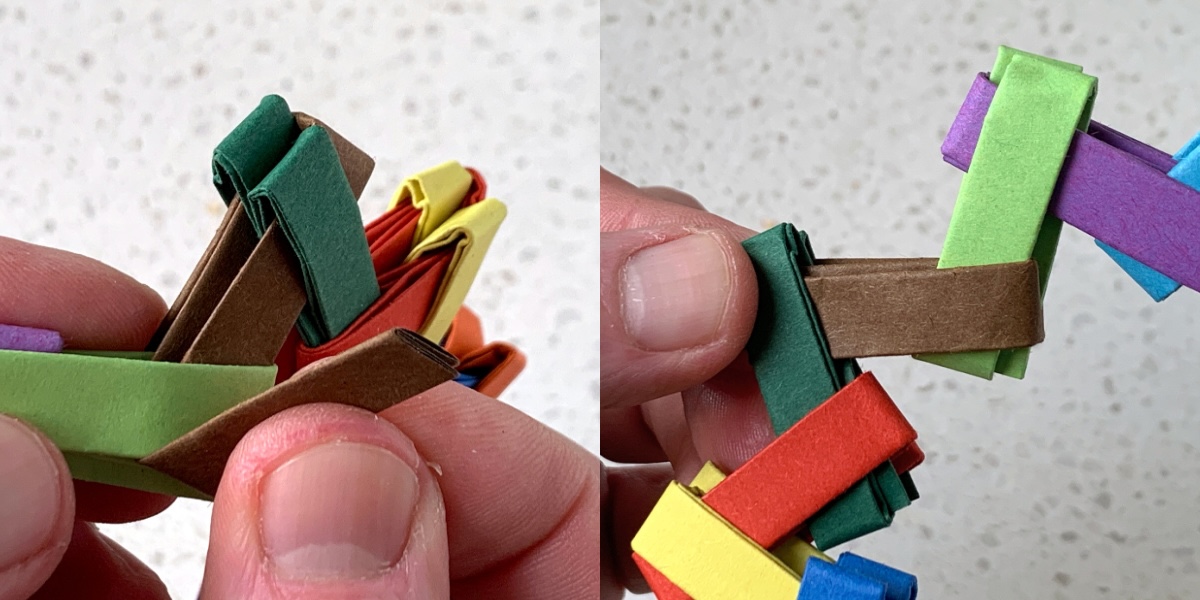
- Cut a piece of baker's twine or string and tie on to finish.

Notes
If you enjoyed this idea, let me know in the comments! Please also check out these other ornament ideas:
Candy Cane • Cookie Cutters • Crochet Angel • Crochet Bell • Cross Stitch • DIY Gnomes • DIY Snow Globe • Mandala • Metallic Keys • Mini Wreath • Poinsettia • Polymer Clay • Temporary Tattoos • Washer Star • Wood Bead • Wood Bead Snowman • Wood Bead Star • Wood Slice • Yarn Wrapped


What size paper do you use!
You can use any size origami paper but this is 6″!
@Amy,
I tried with 6 inch paper and they aren’t long enough to put another one thru it. what could I be doing wrong?
Hi Anna! Was it a square? If you fold it four times you should have at least 3″ to work with. I’d have to see a picture of what is happening!
They look so colourful and cute! Great because I haven’t yet bought my decorations for my tree this year.