DIY Christmas Apothecary Jars That Look Luxe for Less
Make your own DIY Christmas apothecary jars to hold holiday candy using affordable supplies from the dollar store! This festive craft is both simple and budget-friendly.
Skills Required: Beginner. You should be familiar with a paintbrush since you’ll be doing quite a bit of painting. You’ll also be gluing. It’s relatively simple, you’ll just need patience during the drying time.
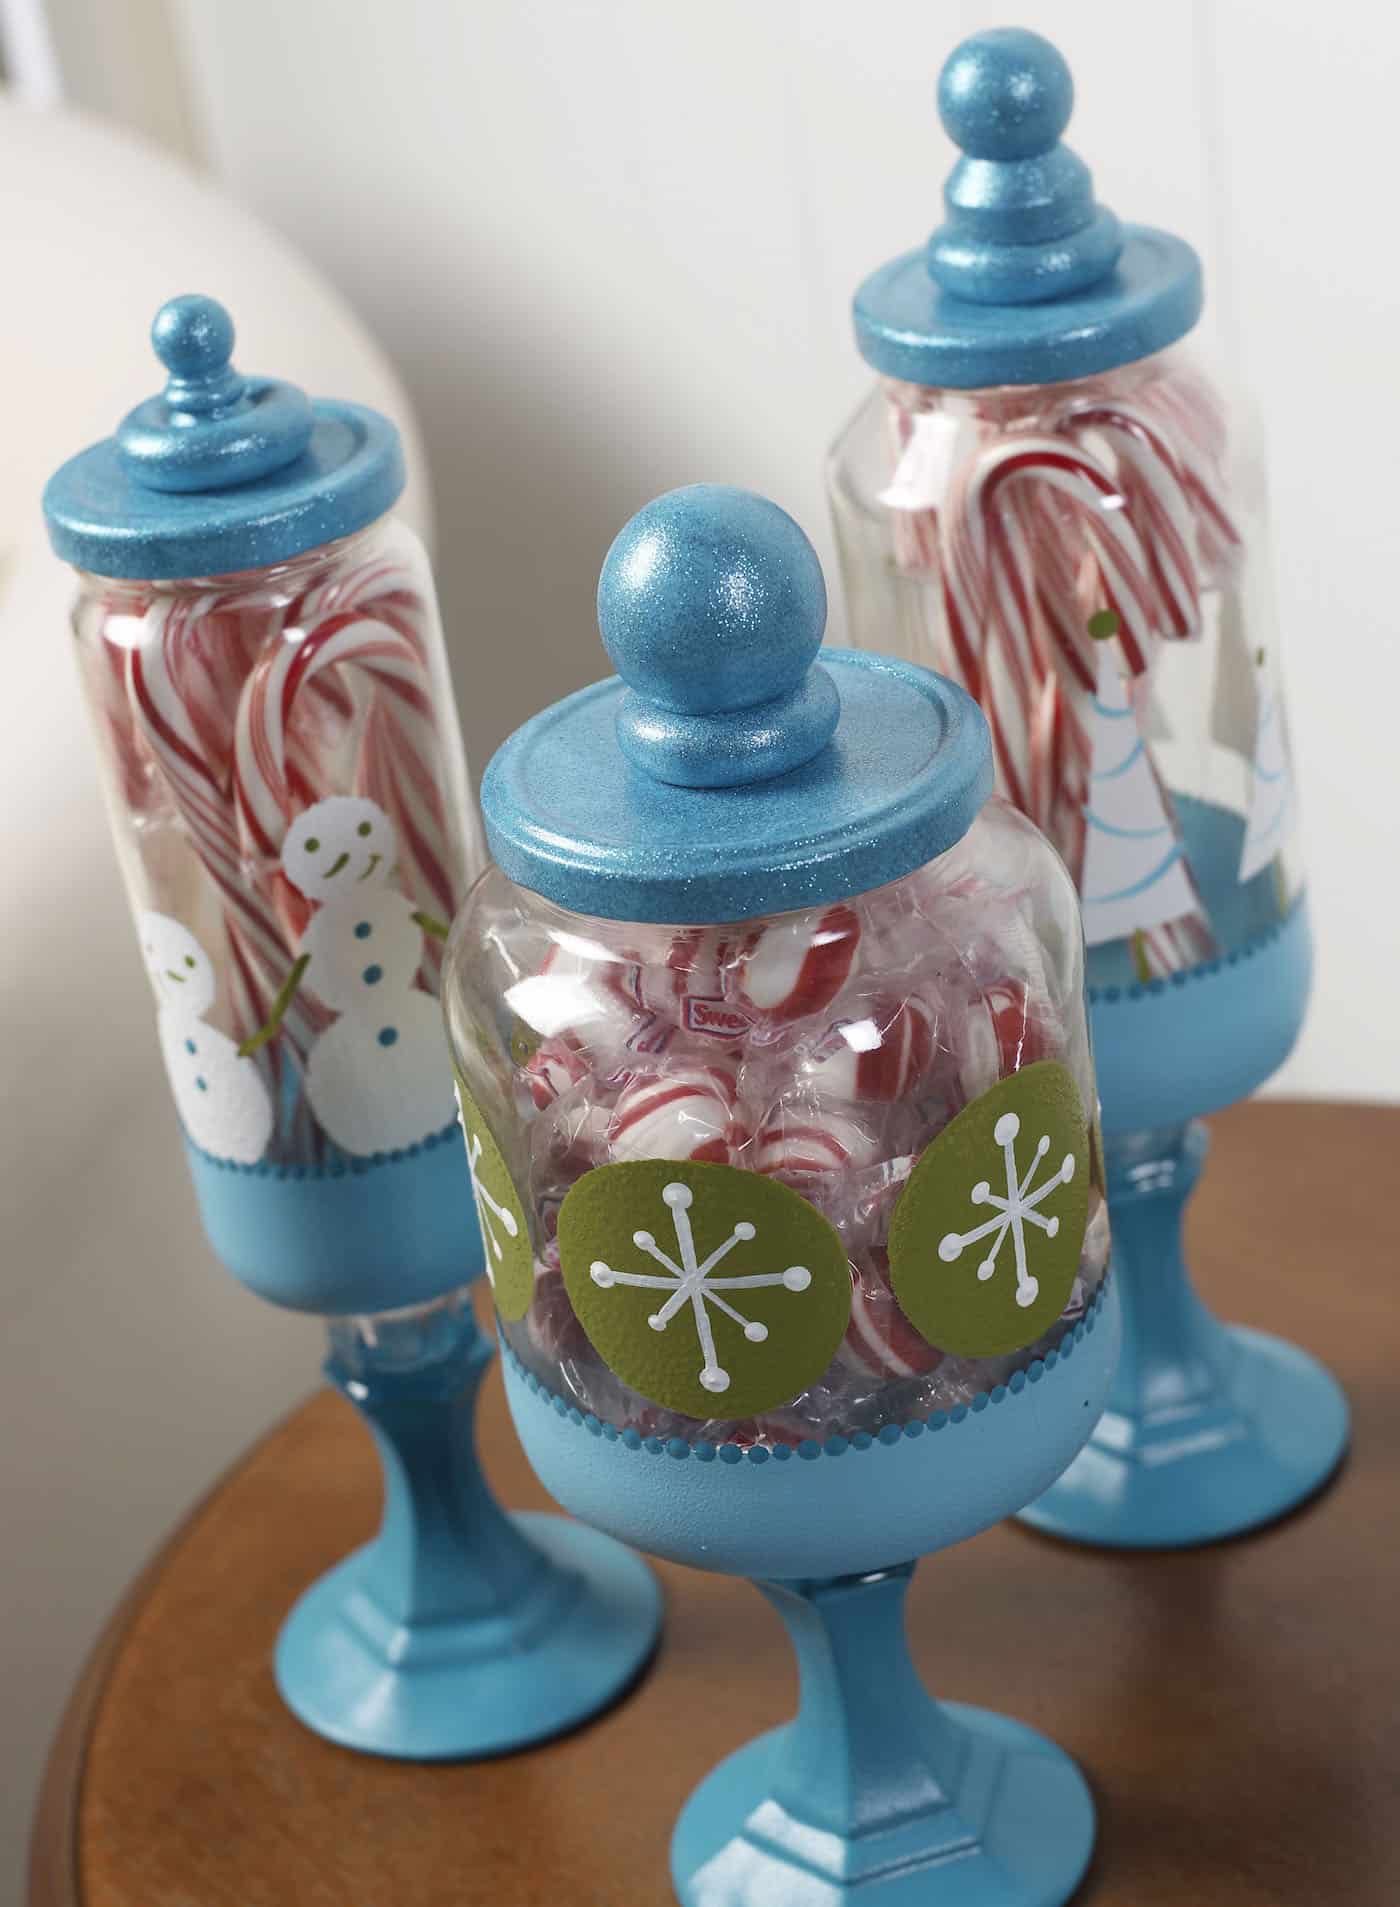
These glass Christmas apothecary jars are pretty cool. I have a secret actually . . . they aren’t “true” apothecary jars – they are dollar store and recycled items married together for a beautiful, functional accent to your seasonal decor.
These jars make great Christmas table decorations as well as something to place in the entryway for guests to grab a few holiday sweets as they are coming or going. You can keep them out all winter. And – they’re easy to make!
Sure, you can buy apothecary jars at the craft store or Target, but I’ll be honest – they aren’t cheap. If you purchase at the craft store, be sure to use your app and a coupon.
BUT If you like saving money, I have a better way to make these Christmas candy jars. DIY them with recycled jars and candlesticks. It’s my favorite secret for making a jar display like this one.
It’s also kind of fun to use various styles of candlesticks and mason jars for somewhat of a random look. I love it for the holidays!
All you’re going to need to do for this unique Christmas craft is paint and glue some stuff. It doesn’t sound that hard, now does it? It’s not. These look a lot more complicated than they are! Learn how to make them below.
(if you love the dollar store, you’ll love this DIY Christmas topiary with Santa hats!)
Gather These Supplies
- FolkArt Enamels Paint – Aqua, Calypso Sky, Forest Moss, Wicker White
- FolkArt Acrylic Paint – Calypso Sky
- FolkArt Extreme Glitter – Turquoise
- ¼”, ¾” stencil tape
- ¾”, 1 ¼”, 1 ¾” foam spouncers
- Craft glue
- E-6000
- ¼”, ½” flat brush
- #1 Liner brush
- Assorted wood knobs/balls/wagon wheels
- Glass candlesticks – Dollar Tree
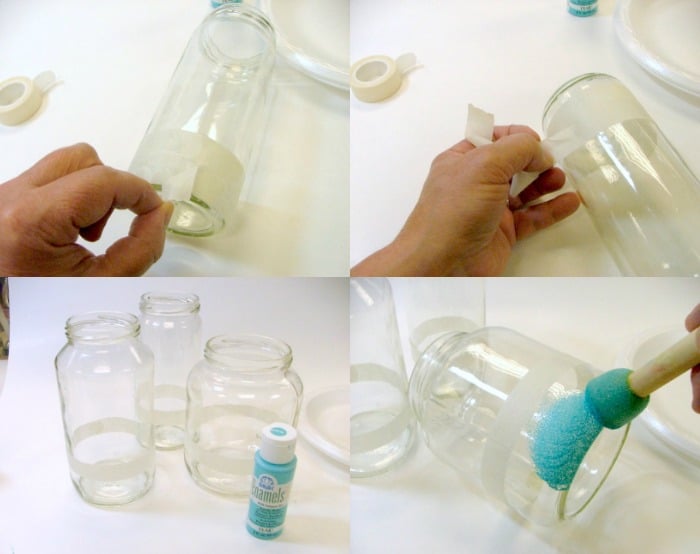
- Glass jars w/lids (recycled) – labels removed and jars thoroughly washed
I have a great post on painting glass over at Mod Podge Rocks so be sure to go see it!
Fill your jars with peppermints or holiday candy . . . even ornaments! I love this pretty – and glittery – display.
Get the how to card for this project below:
DIY Christmas Candy Jars
Equipment
- 3 Foam spouncers ¾”, 1 ¼”, 1 ¾”
- 2 Paintbrush(es) ¼”, ½”
- 1 Liner brush(es) #4
Materials
- 4 bottles FolkArt Enamels Paint Aqua, Calypso Sky, Forest Moss, Wicker White
- 1 bottle Acrylic paint Calypso Sky
- 1 bottle FolkArt Extreme Glitter Turquoise
- 2 rolls Stencil tape ¼”, ¾”
- Craft glue
- E-6000
- Assorted wood knobs/balls/wagon wheels
- 3 Glass candlesticks
- 3 Glass jars w/lids recycled
Video
Instructions
- Apply Aqua enamels paint with spouncer to your glass candlesticks. Only apply up to the decorative rim at the top of the candlestick. Set aside to dry.

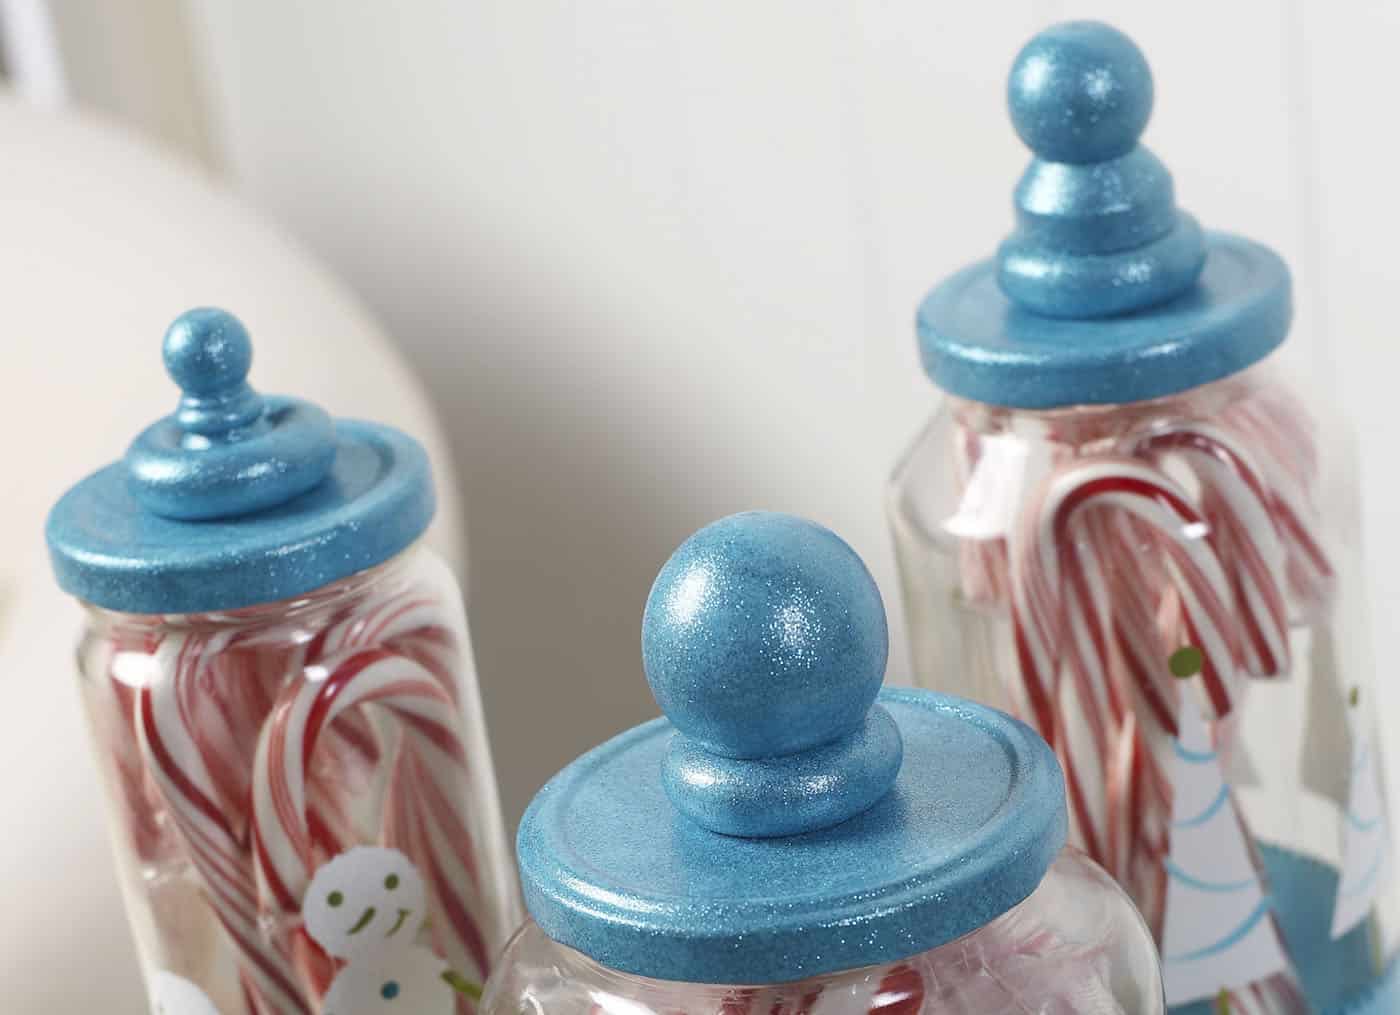
- Glue your assorted wood pieces together to create three finials.
- Paint the finials and glass jar lids with Calypso Sky acrylic paint. Let the lids dry between coats. Apply several coats of Turquoise Extreme Glitter Paint to lids and finials. Let dry.

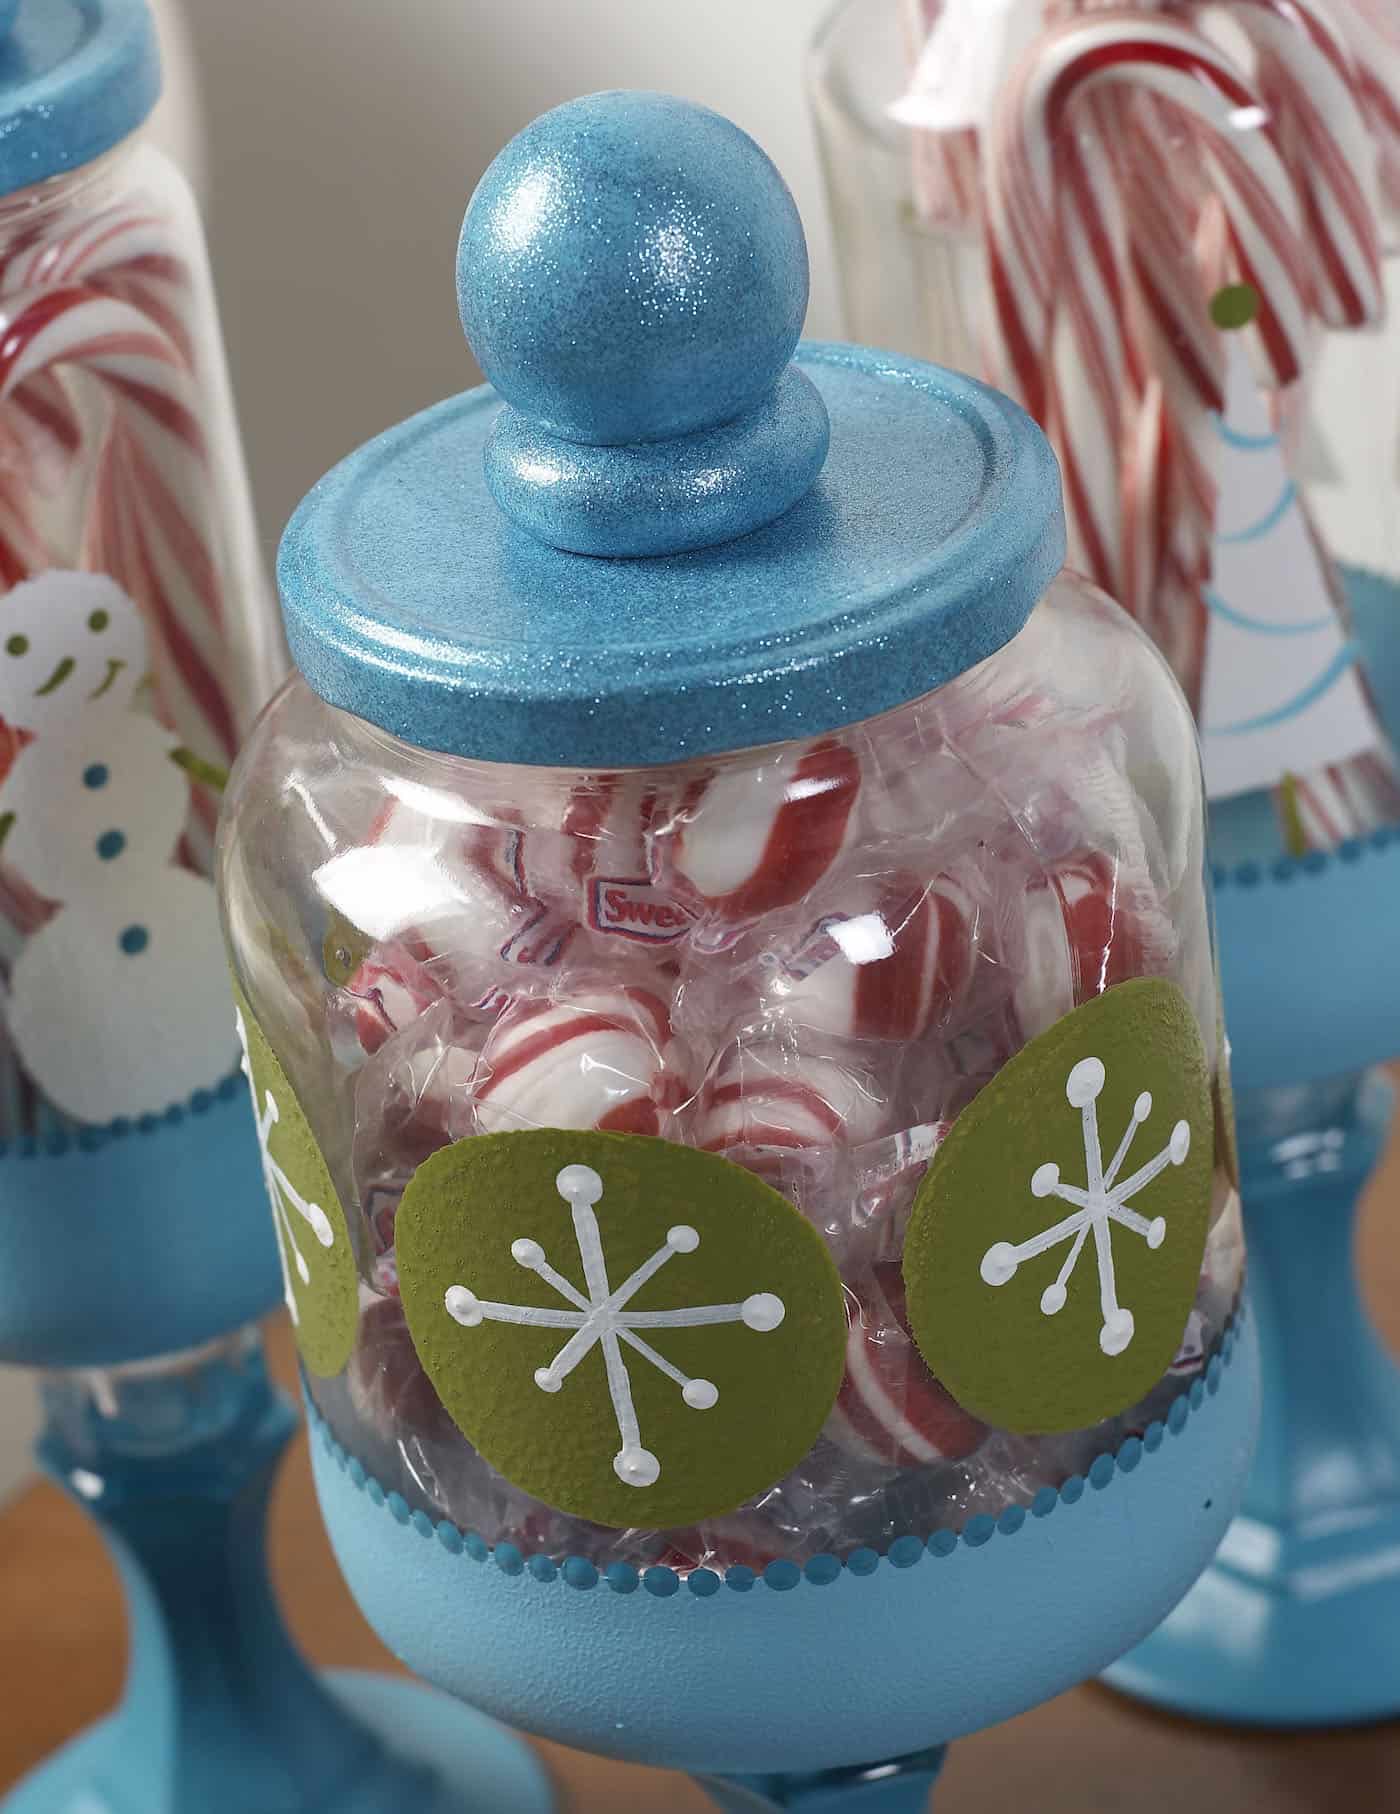
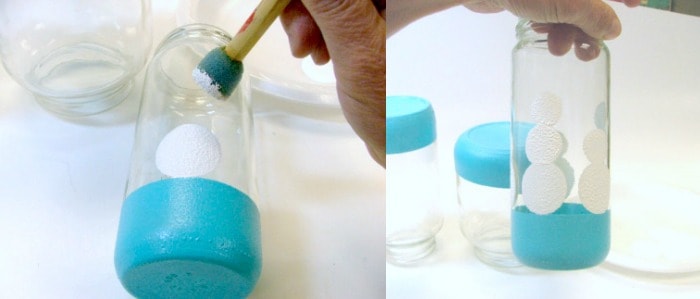
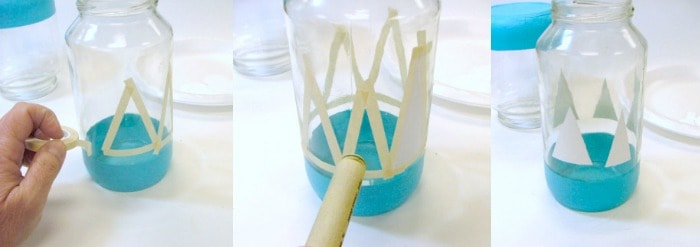
- Tape off an area approximately 1 1/2" at the bottom of each jar using the 3/4" stencil tape. Apply several coats of Calypso Sky enamels paint with spouncer. Remove tape before paint dries.
- Create snowmen around one jar with assorted spouncer sizes in Wicker White.
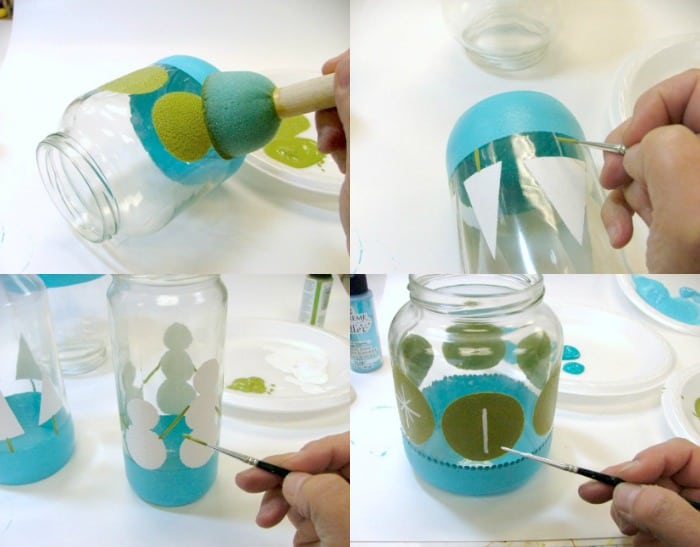
- Tape off triangle shapes on another jar using 1/4” tape. Apply Wicker White and remove tape.
- Create large dots around third jar with largest spouncer in Forest Moss. Paint details with liner brush and create all dots using opposite end of paintbrush dipped in paint.
- Either bake or air dry the glass jars and candlesticks following instructions on bottle (don't bake the lids or wood pieces).
- Apply E-6000 to the candlesticks and attach to bottom of jars. Glue finials to jar lids with craft glue to finish. Let dry before using.

Let me know what you think of this winter craft in the comments! I’d also love for you to check out these other holiday posts:
Candy Cane Centerpiece • Christmas Magnets • Christmas Tree Candle Holders • Christmas Shadow Box • Decorative Candles • Felt Mistletoe • Gift Card Holders • Gnome Decor • Magazine Christmas Tree • Pom Pom Garland • Recycle Cookie Tins • Santa Mason Jar • Santa Napkin Rings • Snowman Mason Jar • String Art • Sweater Clips • Wine Cork Snowman


The jars look amazing. I’ve made similar ones for gifts in the past, and because I ran across your post, I’m definitely going to made some in the near future ( Christmas!) Thanks for sharing and inspiring 🙏🏾 🙌🏾 😀
I absolutely love this DIY idea! The apothecary jars look so chic and perfect for the holiday season. I can’t wait to try this out and personalize them with my own decorations! Thanks for the inspiration!