DIY Baby Shower or Party Decor on the Cheap
Do you love DIY baby shower and party decor? Here are some awesome ideas on making your next celebration cute and budget friendly!
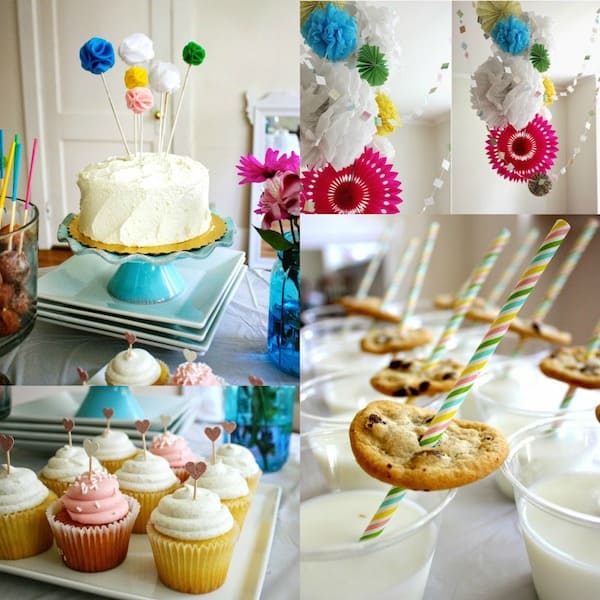
Hello again, friends! This is Liz from The Pretty Life Girls, and I’m here to share with you some tips to adding the perfect extra touches to your next shower or party that are inexpensive and easy, but make a big impact!
Recently I threw a baby shower for a dear friend where I had a limited budget to work with so we were on threat level orange for needing serious creativity.
I wanted it to be perfect but I had to keep things real affordable. Luckily, I thrive under fiscal pressure so we made it work. Here’s what I did to make this pretty party decor:
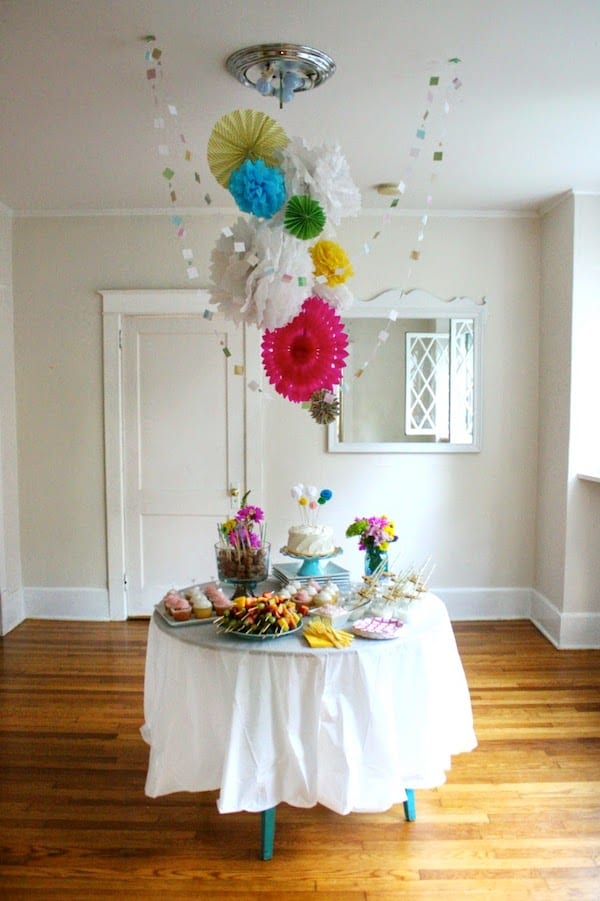

First, let’s talk ceiling decor.
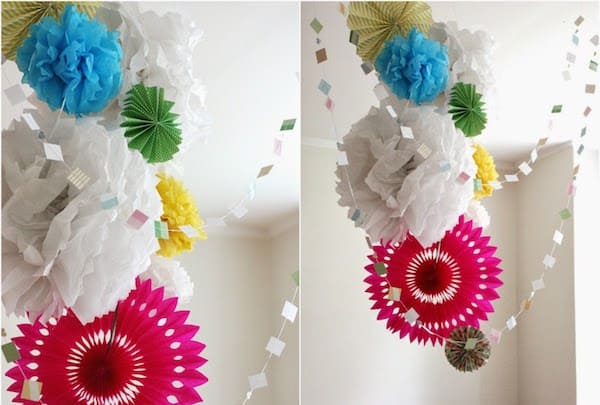
Hanging a little something from the ceiling can help to draw the eye up and make your decorations feel more put together and dramatic. Doing a couple of different kinds of decorations can add a lot of interest, so instead of relying just on pom poms or fans, do pom poms AND fans. More is more!
You can find tutorials for tissue poms and fans like these that I made all over Pinterest and I bet you already have the supplies hanging around your house! Tossing in a little garland can also add so much and will cost you pennies.
To make the one I used all I did was cut out squares from some scrapbook paper and punch out some little hearts, hot glue them to some string, and BAM, an adorable garland was born!

Next, the food table. This is all about aesthetics. You can buy the simplest of cupcakes or donuts or cookies from the most boring of grocery stores and make them look like a million with a couple of simple touches.
How do I know? I didn’t make a dang thing. (Baking is hard. Judge me.) So, here’s what I did to make those bakery items my own.
First, I turned these donut holes sassy by picking up some plain kabob skewers and adding some craft paint! So easy, so cute. You know you have a bunch of craft paints rolling around your drawers, so add a little color to your next party table and paint your skewers!

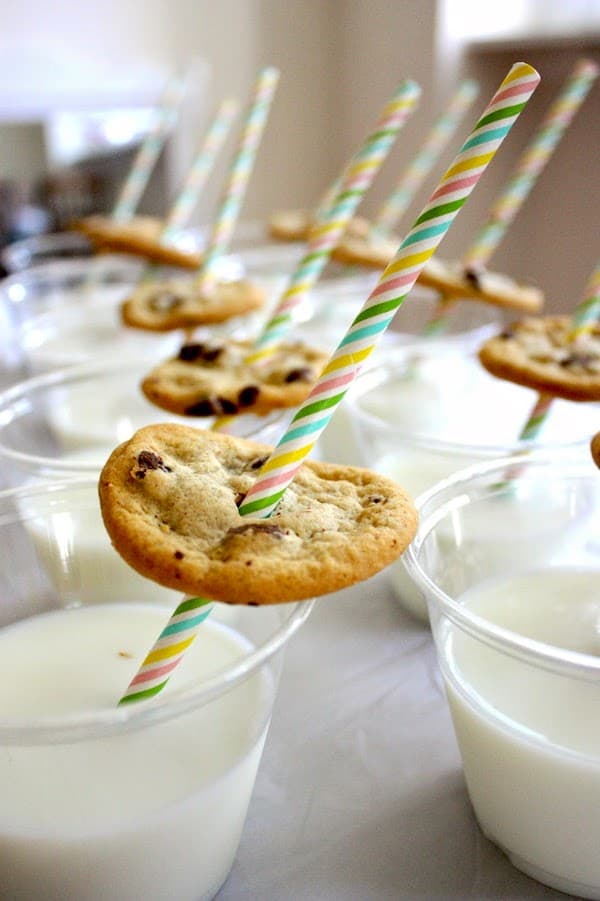
Next, I stuck some colorful straws through some chocolate chip cookies and added some milk. You can find these straws at Target or on Etsy for just a couple of dollars and guests love them. There’s just something about a pretty straw that makes a party feel like a party.
To take my store-bought cupcakes to the next level, I used a heart punch to punch out some glittery hearts from scrapbook paper and stuck them on some toothpicks!
There was nothing to it and it cost me zero dollars because I already had all the supplies. Also I should note that I’d put a heart on pretty much everything I eat if it was acceptable. I mean, look how cuuuuute.

I really didn’t do anything with these fruit skewers, but fruit is just pretty on its own so let’s look at it:

Since I was at the grocery store anyway I also picked up a bunch of their cheapest blooms, brought them home and rearranged them in some mason jars I had lying around. This is such an inexpensive way to add pretty to any table! I think it cost me 4.99 for the bunch!

And my favorite part of the DIY baby shower decor: the cake. This cake just a simple white cake from a grocery store bakery, but I knew that if it was going to be the centerpiece of the table then it needed some spunk. So, I fashioned a little pom pom cake topper with some felt and leftover skewers to give it that sass.
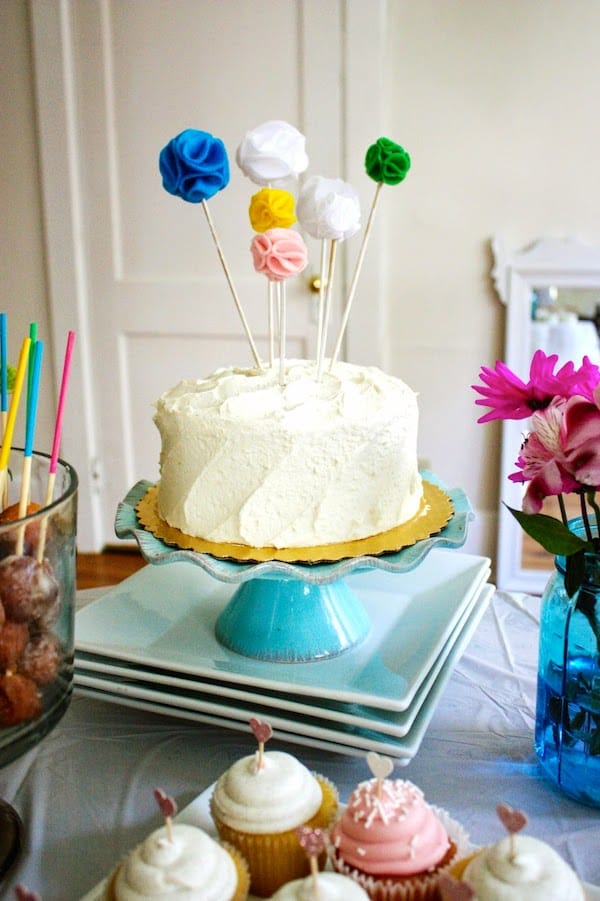
Here’s how I made it:
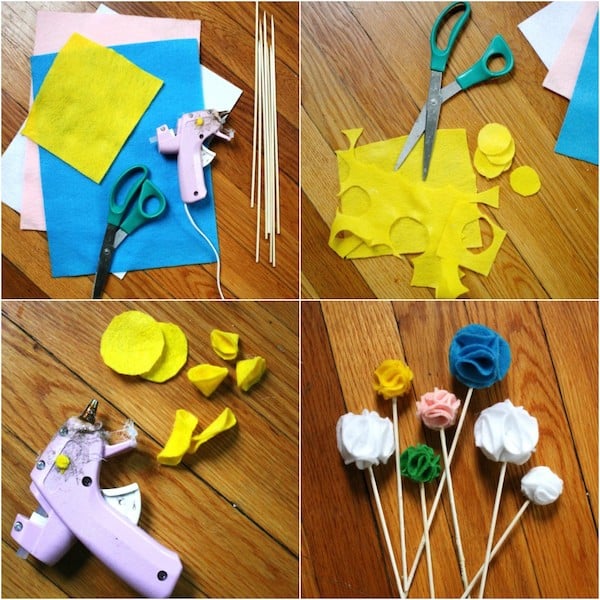
First, cut out six circles from your felt (about an inch in diameter for the smaller poms, and two inches for the bigger) and fold them in half with a dot of glue on the inside keeping them shut. Then, fold them in half again so you are making a little triangle and secure this way with another dot of glue.
Then glue all six together by their corners, making a flower or pom pom shape. Lastly, secure with more glue to a kabob skewer! So easy and a sheet of felt costs .25. Cute cake=handled!
The final touch of this party was so simple it was ridiculous, but it added such a cute final touch to the event. I simply filled some plan treat bags with my friend’s favorite candy and stapled the paper used in the decor to the top.
So easy my toddler could do it (but he didn’t do it because that kid is wild, and certainly would staple his face to the wall.) and the gals went nuts over them.

Now you’re ready to party! (And have money leftover to get yourself some extra donut holes for after everyone leaves. Party planning makes me hungry.)
Happy partying! And be sure to come and visit my sister and me as we blog about style, food, and the things we love over at The Pretty Life Girls.
If you need more brilliant ideas like this one, visit these related posts for party fun:
Colorful Paper Garland • Crepe Paper Flowers • Crepe Paper Garland • Cupcake Birthday Card • Pom Pom Garland • DIY Candy Garland • DIY Oscars • Felt Ball Garland • Giant DIY Greeting Cards • Make Cascarones • Make a Paper Chain • New Years Photo Booth Props • Photo Booth Props


Seriously? I thought it would be very expensive if you throw a baby shower for a friend, but this one is really interesting. I’d like to have a simple and inexpensive baby shower, but I don’t know how to that. Thank you for sharing this. This will help me a lot.
This is amazing! I am planning donut holes for my wedding and trying to decide how to display them. Can you tell me if they stay on the sticks when turned upside down like this? I just imagine them sticking together in the container and coming off before being pulled out. Thanks!