This DIY Poster Hanger is EASY & Budget Friendly
Use scalloped wooden trim and magnets to make the most budget friendly DIY poster hanger ever! Get any trim you like and your favorite stain color to customize.
Skills Required: Beginner. You’re going to be cutting wood with a craft knife, and then staining it. If can use a craft knife and a bottle of glue, you’ll do well with this project.
This is one of the easiest projects I have ever made, but I love how it looks! That is my favorite kind of project – not super time-consuming, inexpensive supplies and simple steps, but so cute and makes an huge impact in a room!
It’s also very versatile. You can put it in the kitchen, a bedroom, the living room. You can change the look a little bit just by changing the trim you choose, or the stain.
You might be wondering why anyone would use a wooden poster hanger as opposed to a frame or sticking it directly to the wall. That choices comes down to a matter of style and cost.
In terms of aesthetics, this wall hanging is just another way of putting a poster on the wall. It’s interesting, unique, dimensional . . . and easy to change the posters in and out.
It’s also nice to use a holder when you have an unusual sized poster that doesn’t fit in a frame. This is a great alternative to custom framing, and it still looks great.
As far as cost, this method is a LOT less expensive than purchasing a frame. Of course it’s so cheap, it doesn’t even compare to custom framing.
With a lot of prints, I actually prefer this method as opposed to a frame. I just love the way it looks!
The downside: the poster isn’t really protected in a hanger, so if anyone touches or plays with the poster (kids!), you might end up with a ruined print or fingerprints. Neither of which you really want. So just keep that in mind!
How to Use It
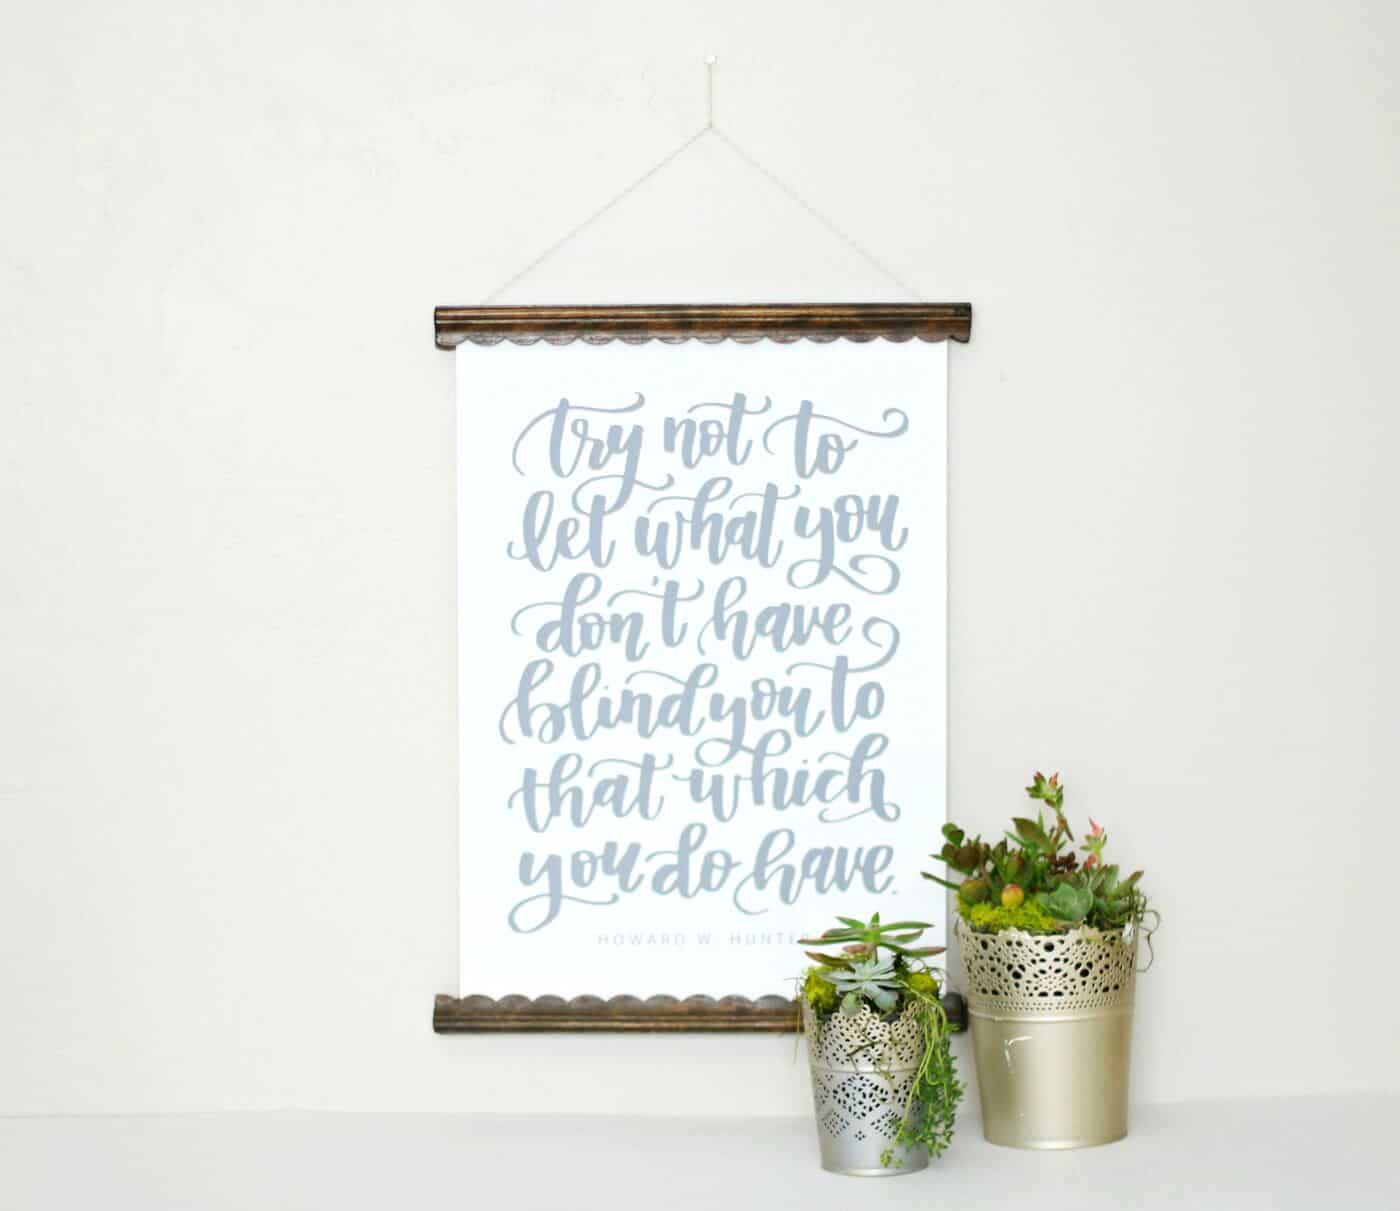
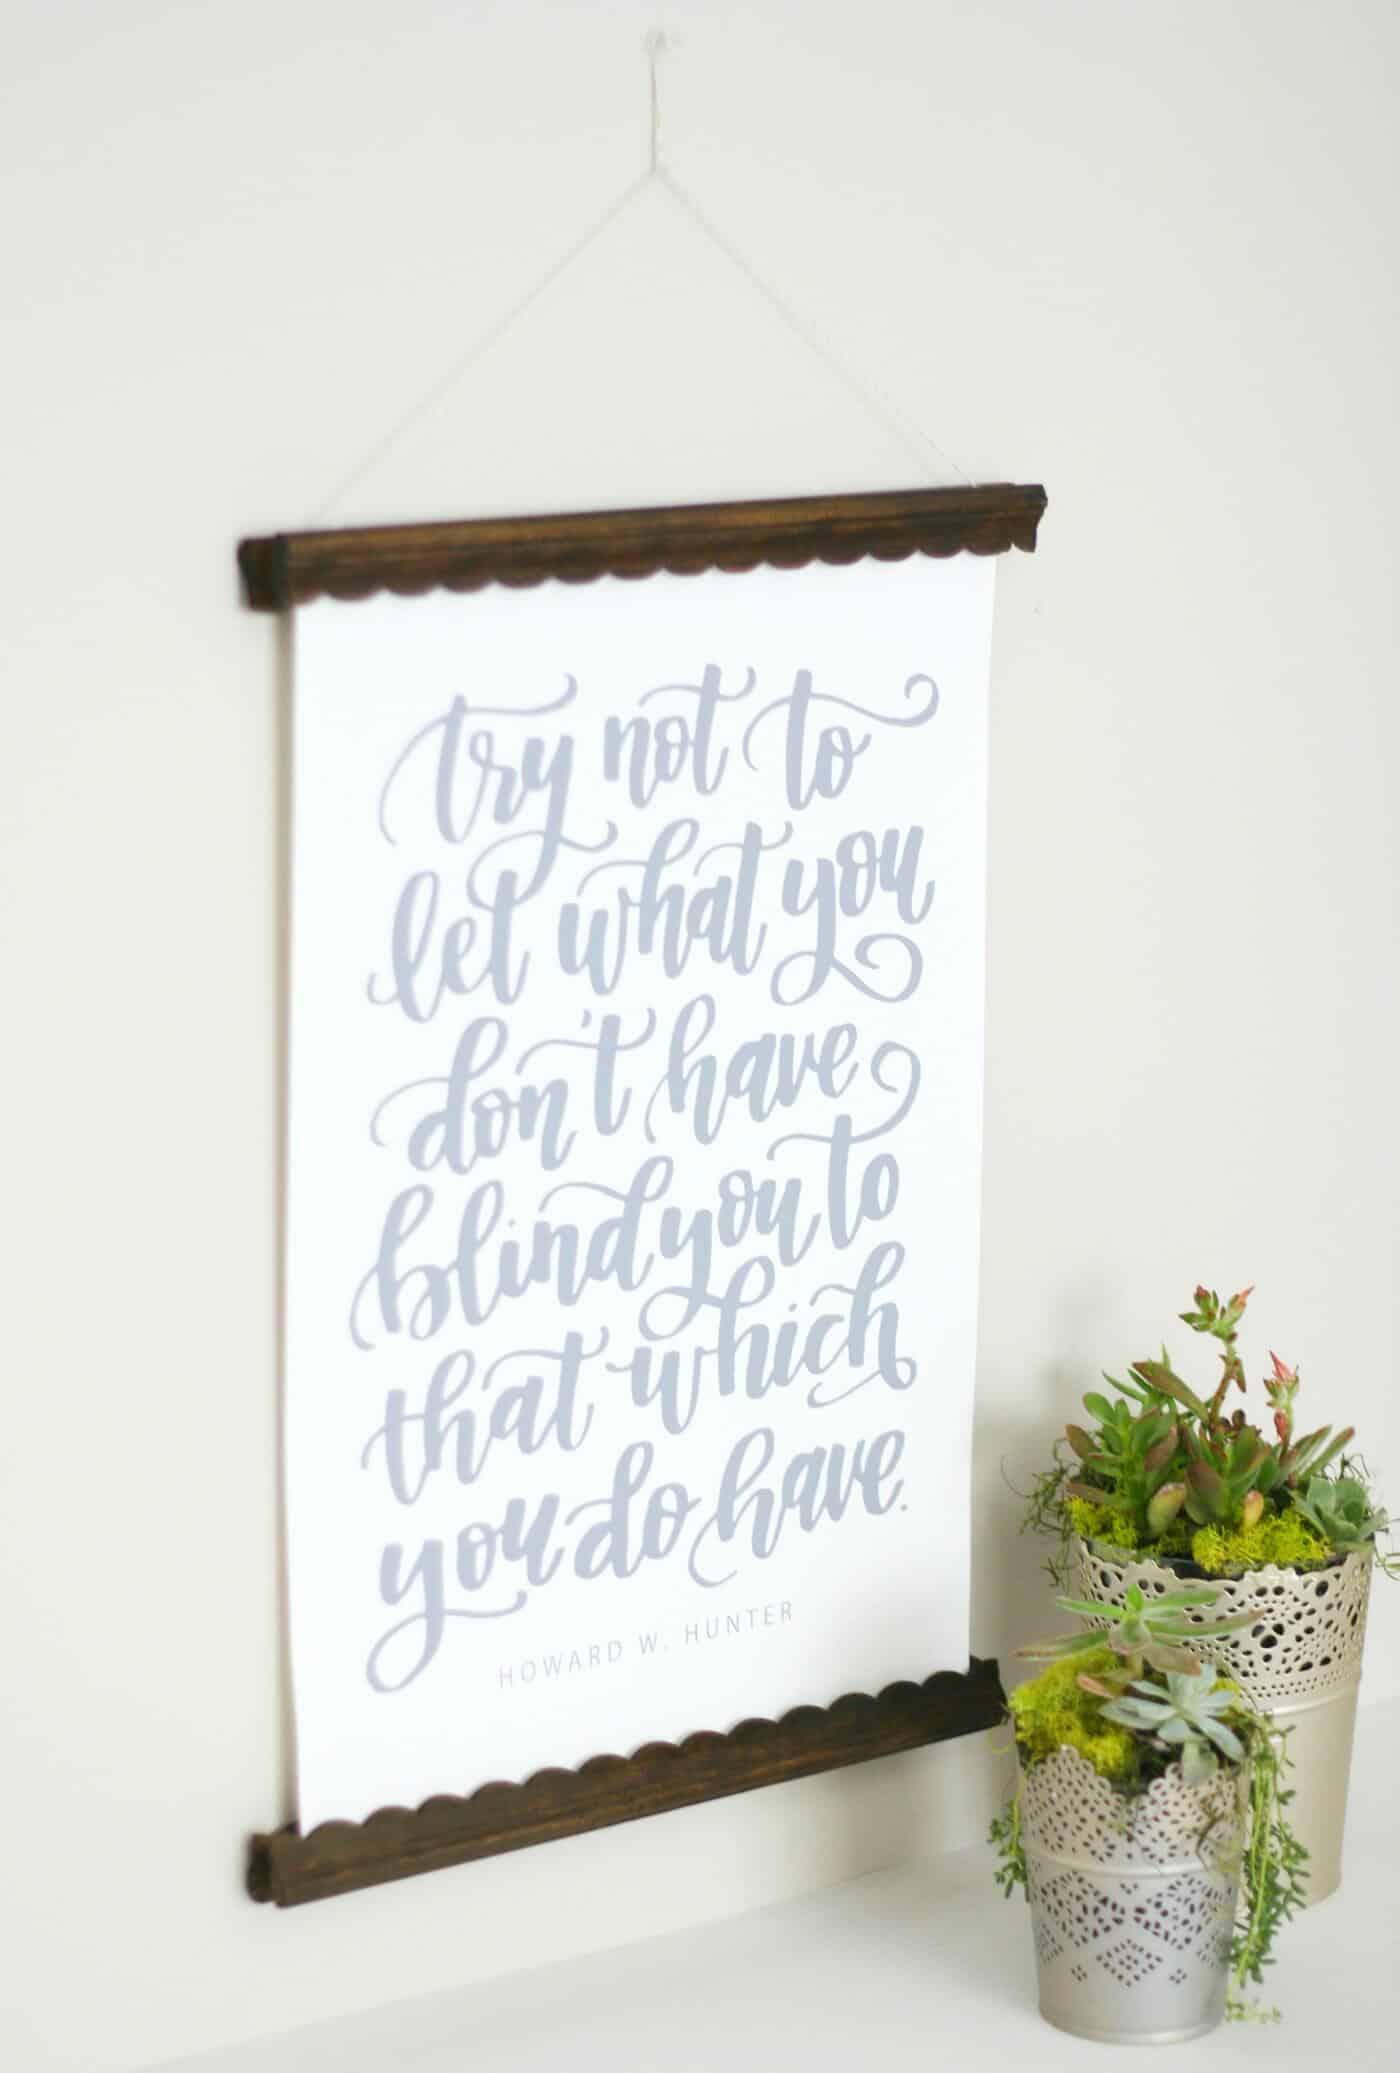
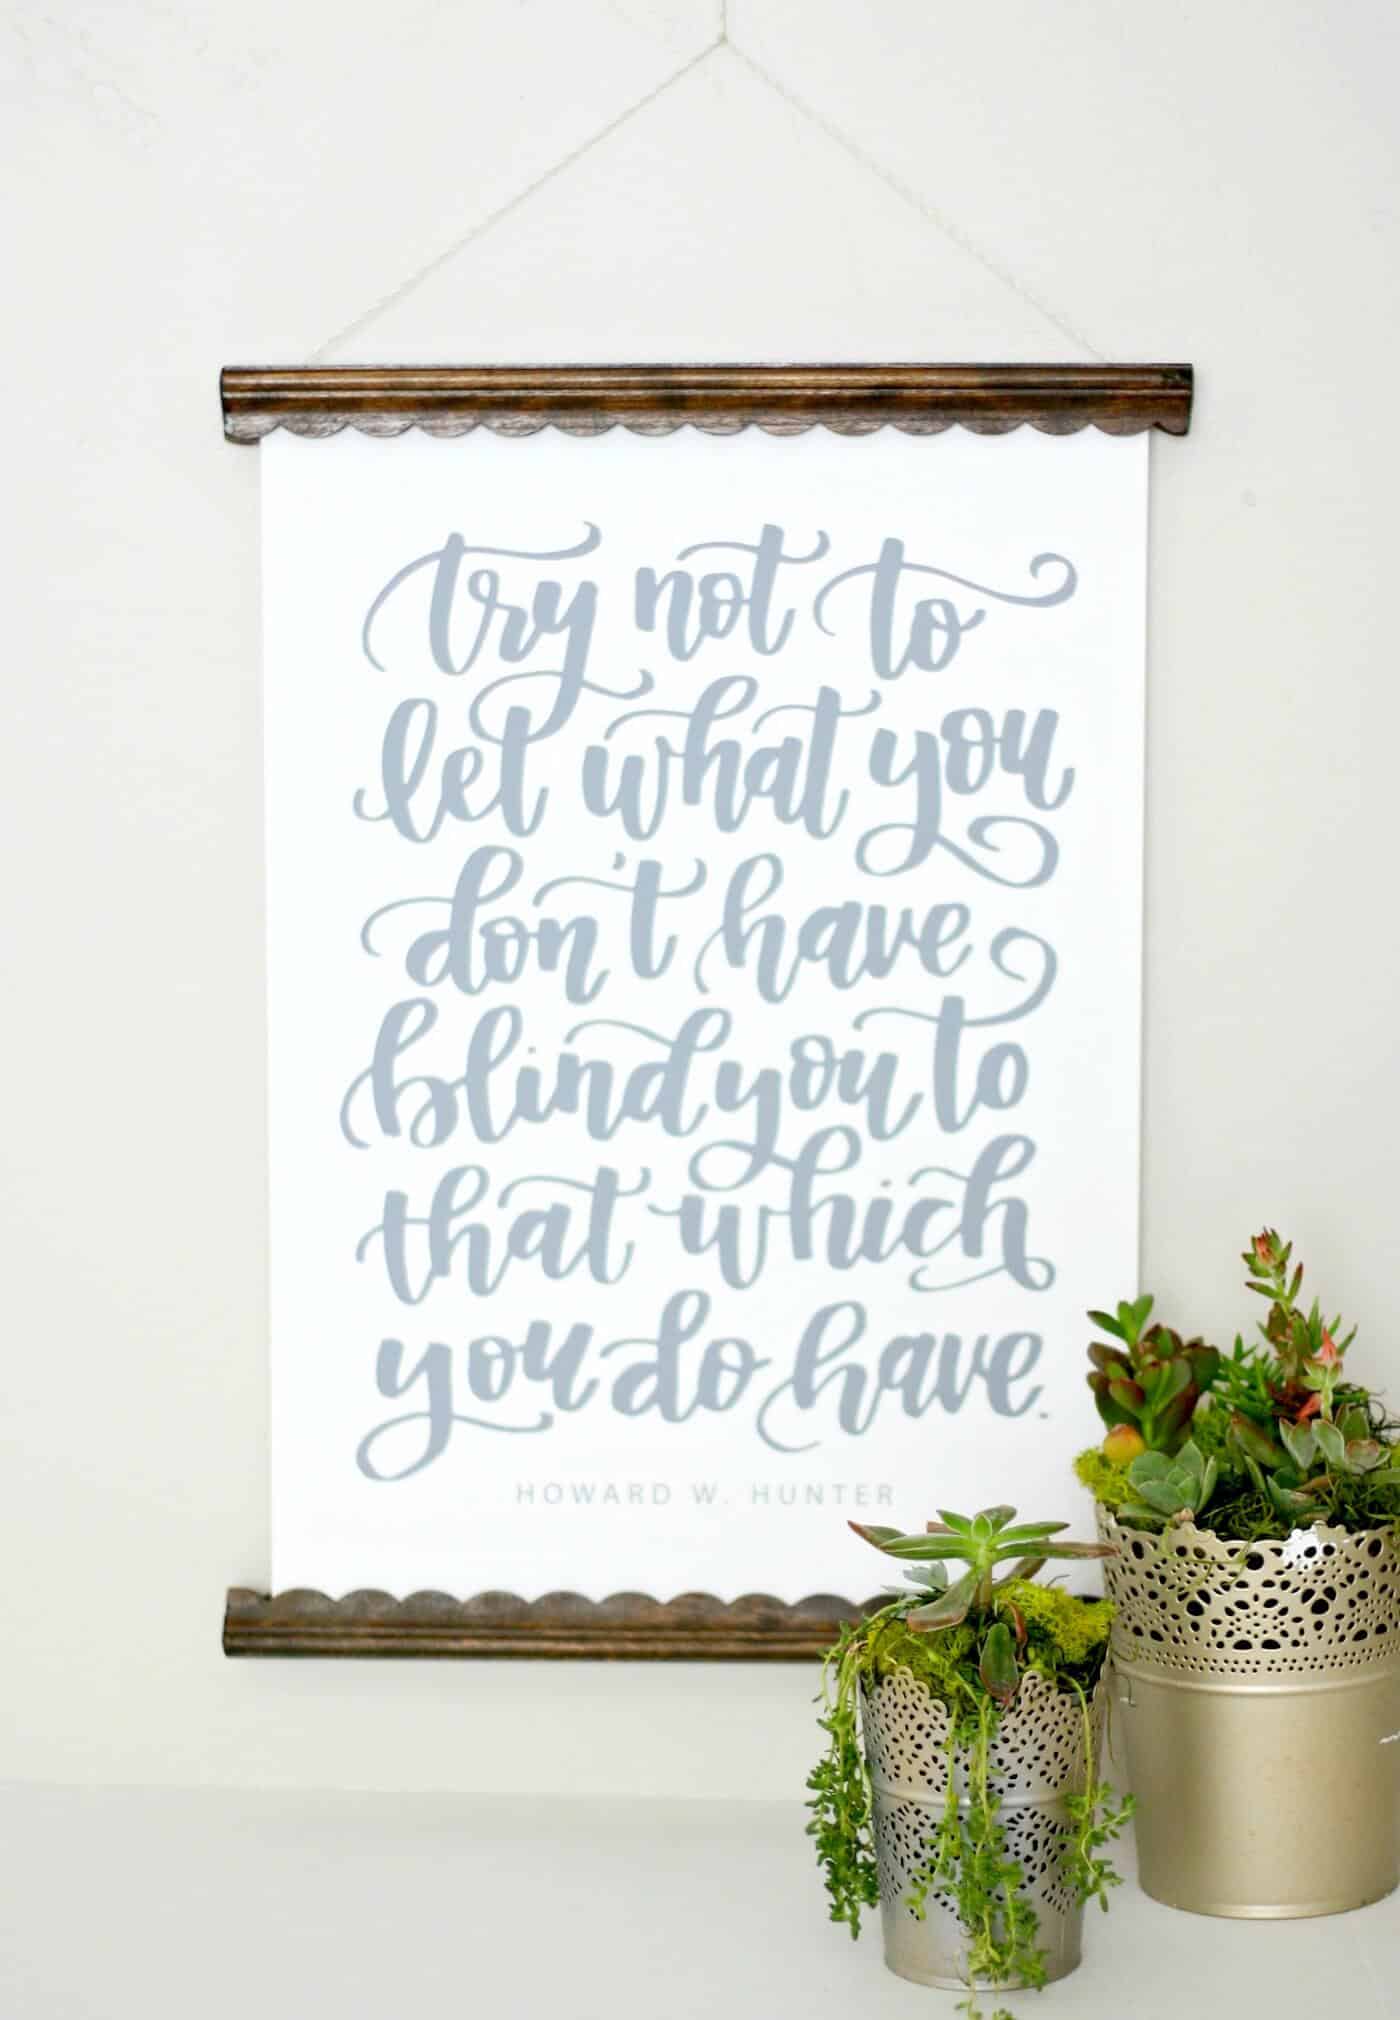
There will be four parts to this project – two pieces that go together with magnets at the top, and the same at the bottom. Your print will be sandwiched between the magnets.
There will be trim at both ends, and you’ll glue twine to one end. The print will hang from the trim at the top. The trim at the bottom is decorative and keeps the print from blowing around.
I really love how this hanger displays a poster from Latter Day Home. I’m so excited to share this tutorial with you! Here is how I made this DIY poster hanger.
If you’re ready to begin this project, grab the following goodies!
Gather These Supplies
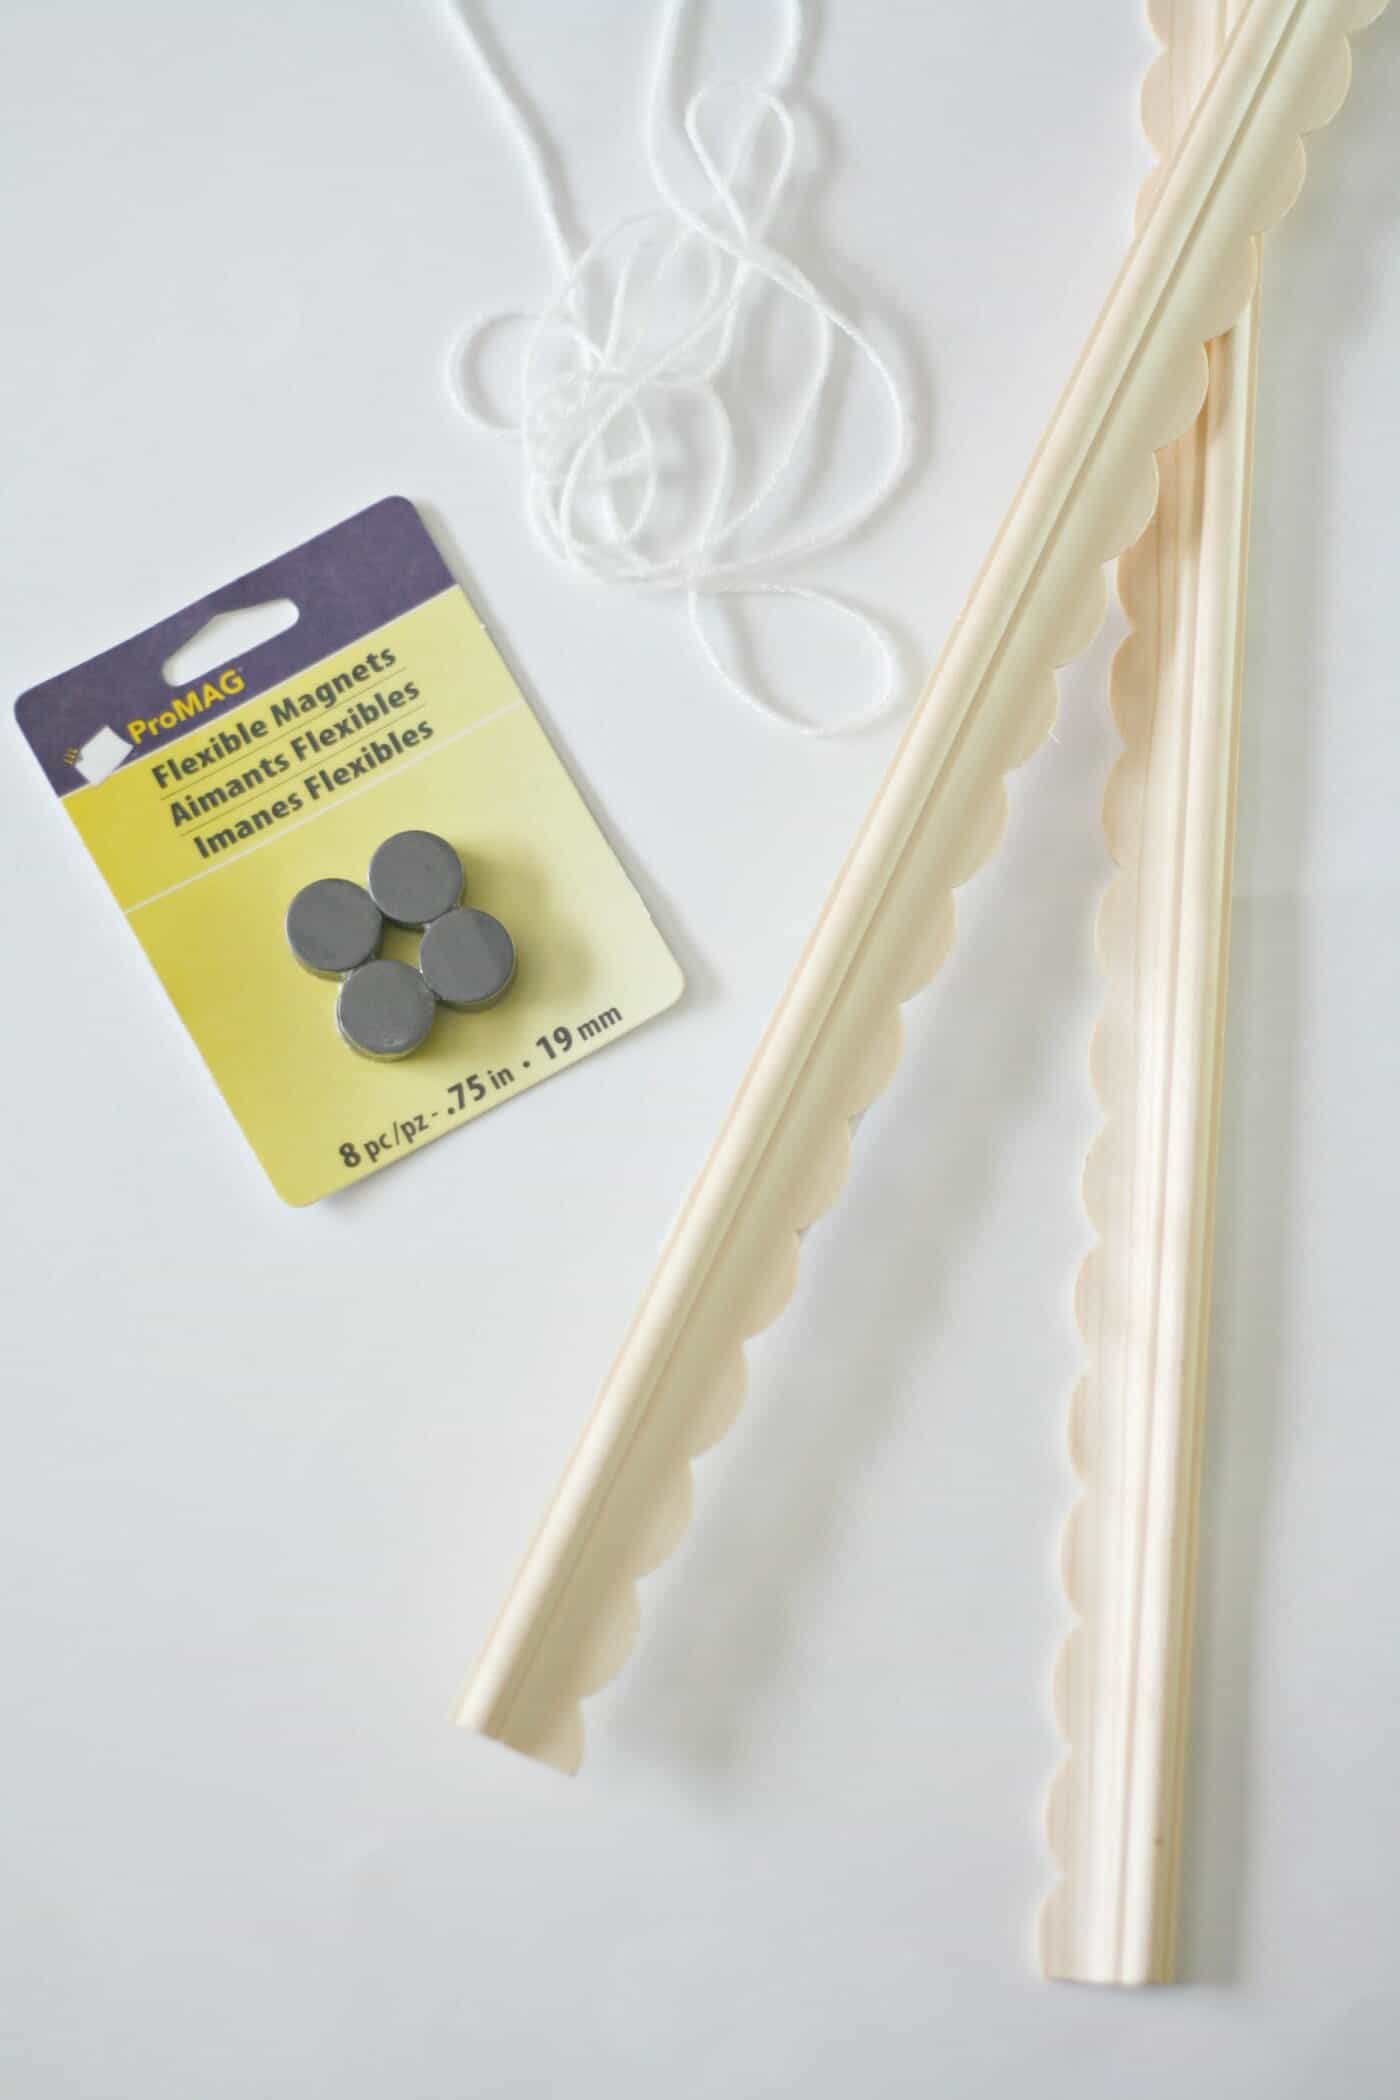
- Scalloped wood trim – approximately four times the width of your poster, plus extra
- Magnets – 8 (3/4″)
- Acrylic paint or stain
- Twine
- Scissors
- Glue
- Measuring tape
- Sandpaper
- Rags or paintbrushes
- Craft knife, box cutter, or small saw
Thoughts About This Project:
- Scalloped trim is just an option – there are other types of wood trim at the hardware store or craft store, so get creative.
- I think it would be fun to paint these in a variety of colors, especially if you are hanging a series of prints. Think about distressing with chalk paint as well.
- I’ve been asked if you can recess the magnets. For my trim, it’s way too thin to do that. If you have thicker trim, you may be able to use a router tool or a Dremel to cut out some of the material and recess the magnets. I’ll leave that up to you.
- You can hang with twine, baker’s twine, or ribbon. The string just has to be thick enough to support the weight of the poster and trim.
I just love the way this project turned out. Get the printable how to card below!

DIY Poster Hanger
Equipment
- Craft knife, box cutter, or small saw
- Rags or paintbrush
- Hot glue gun and glue sticks optional
- 1 Pencil(s)
Materials
- Scalloped wood trim
- 8 Magnets 3/4"
- Wood stain or paint
- Twine
- Craft glue
- Sandpaper
Instructions
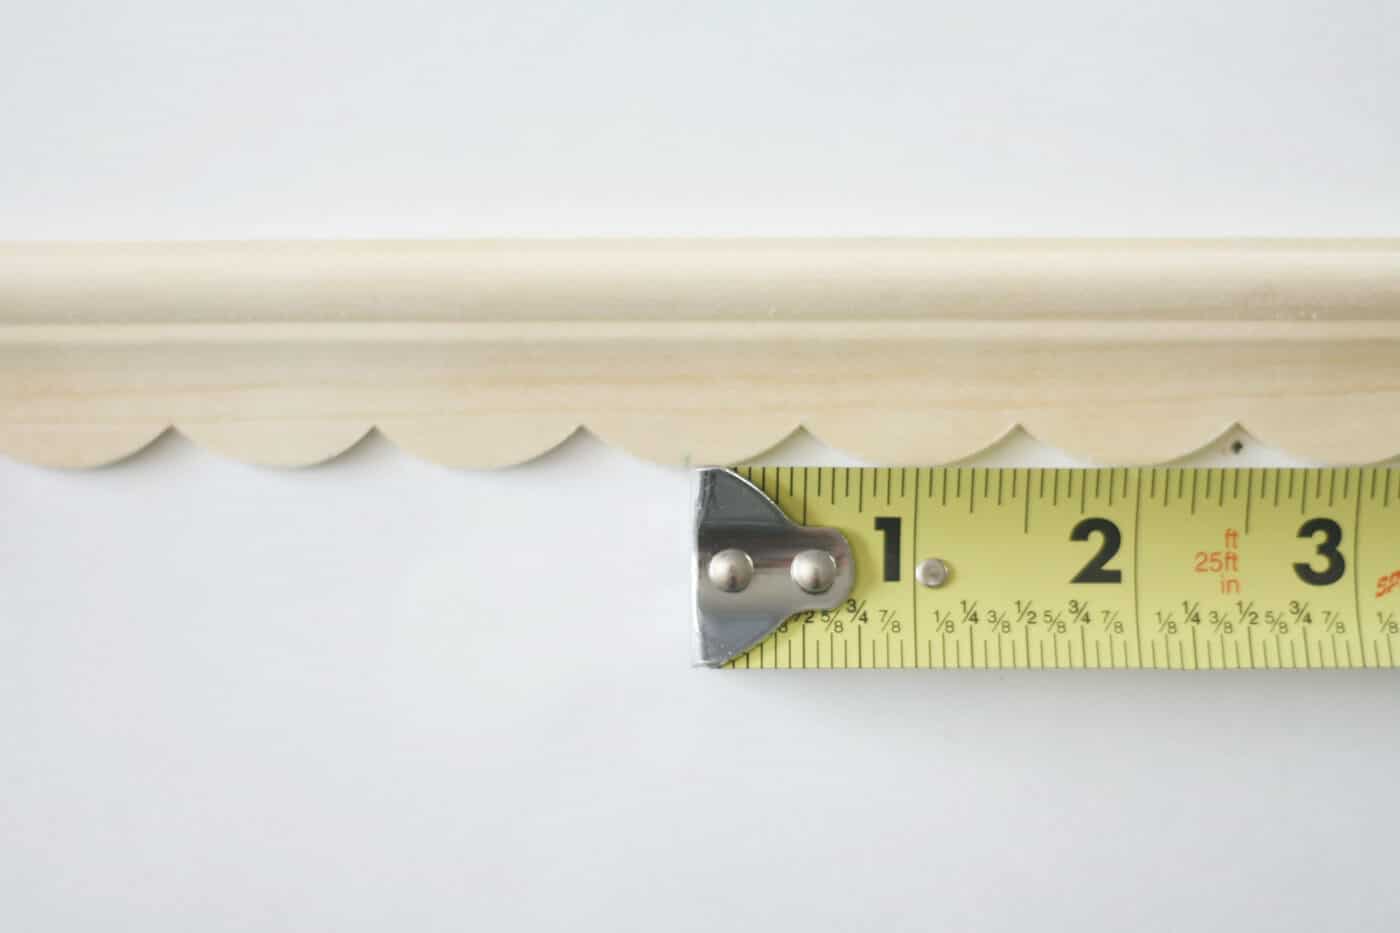
- Measure the width of your poster and gather your supplies. You'll need a length of trim that is approximately four times the width of your poster, plus extra.

- Measure the length of trim you will be cutting with a measuring tape. Mark with a pencil at approximately 1" wider than your poster, so that you will have 1/2" excess trim on all ends.

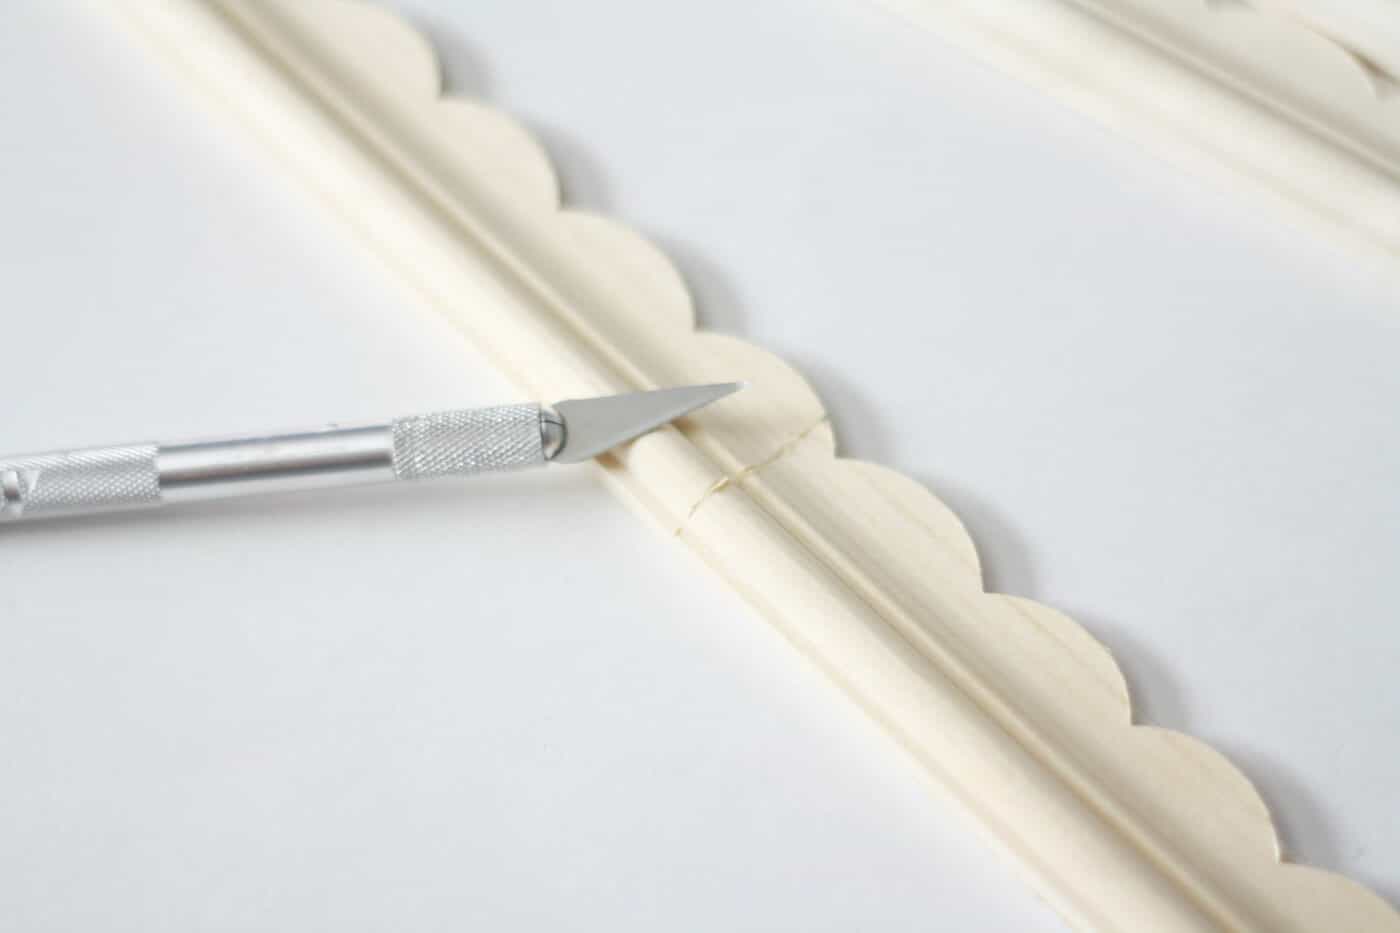
- Cut four pieces of trim to size with a craft knife (or box cutter, or small saw). They should all be the same length. You're going to score the trim on both sides and then snap it if you use a craft knife. Sand all ends of your trim.
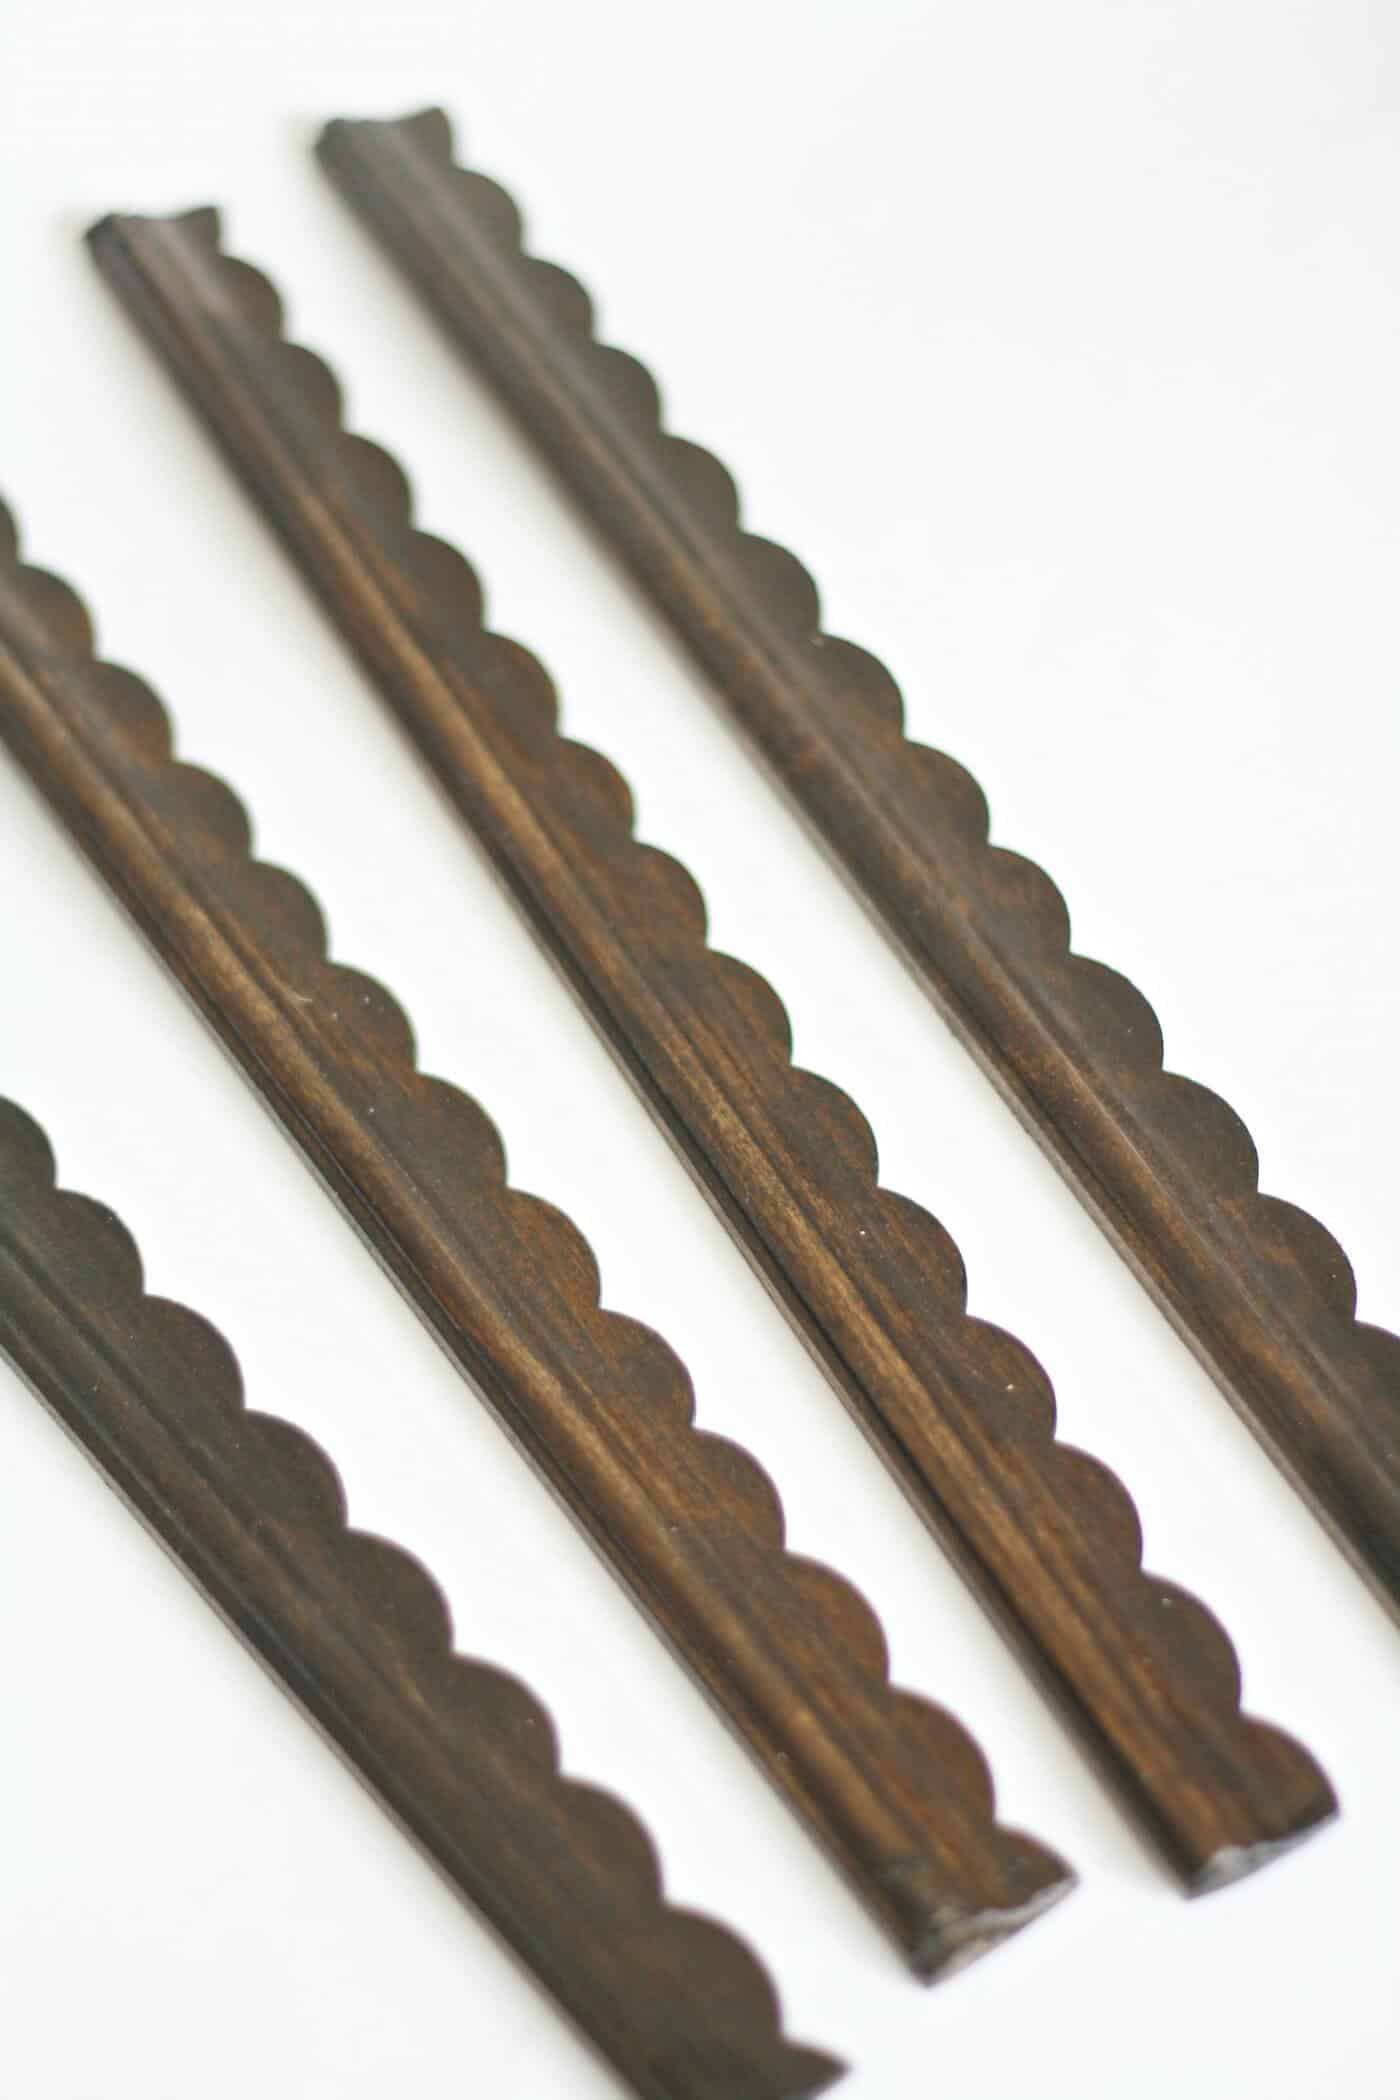
- Stain the trim using the acrylic stain and a rag, or paint with craft paint and a paintbrush. Let dry.
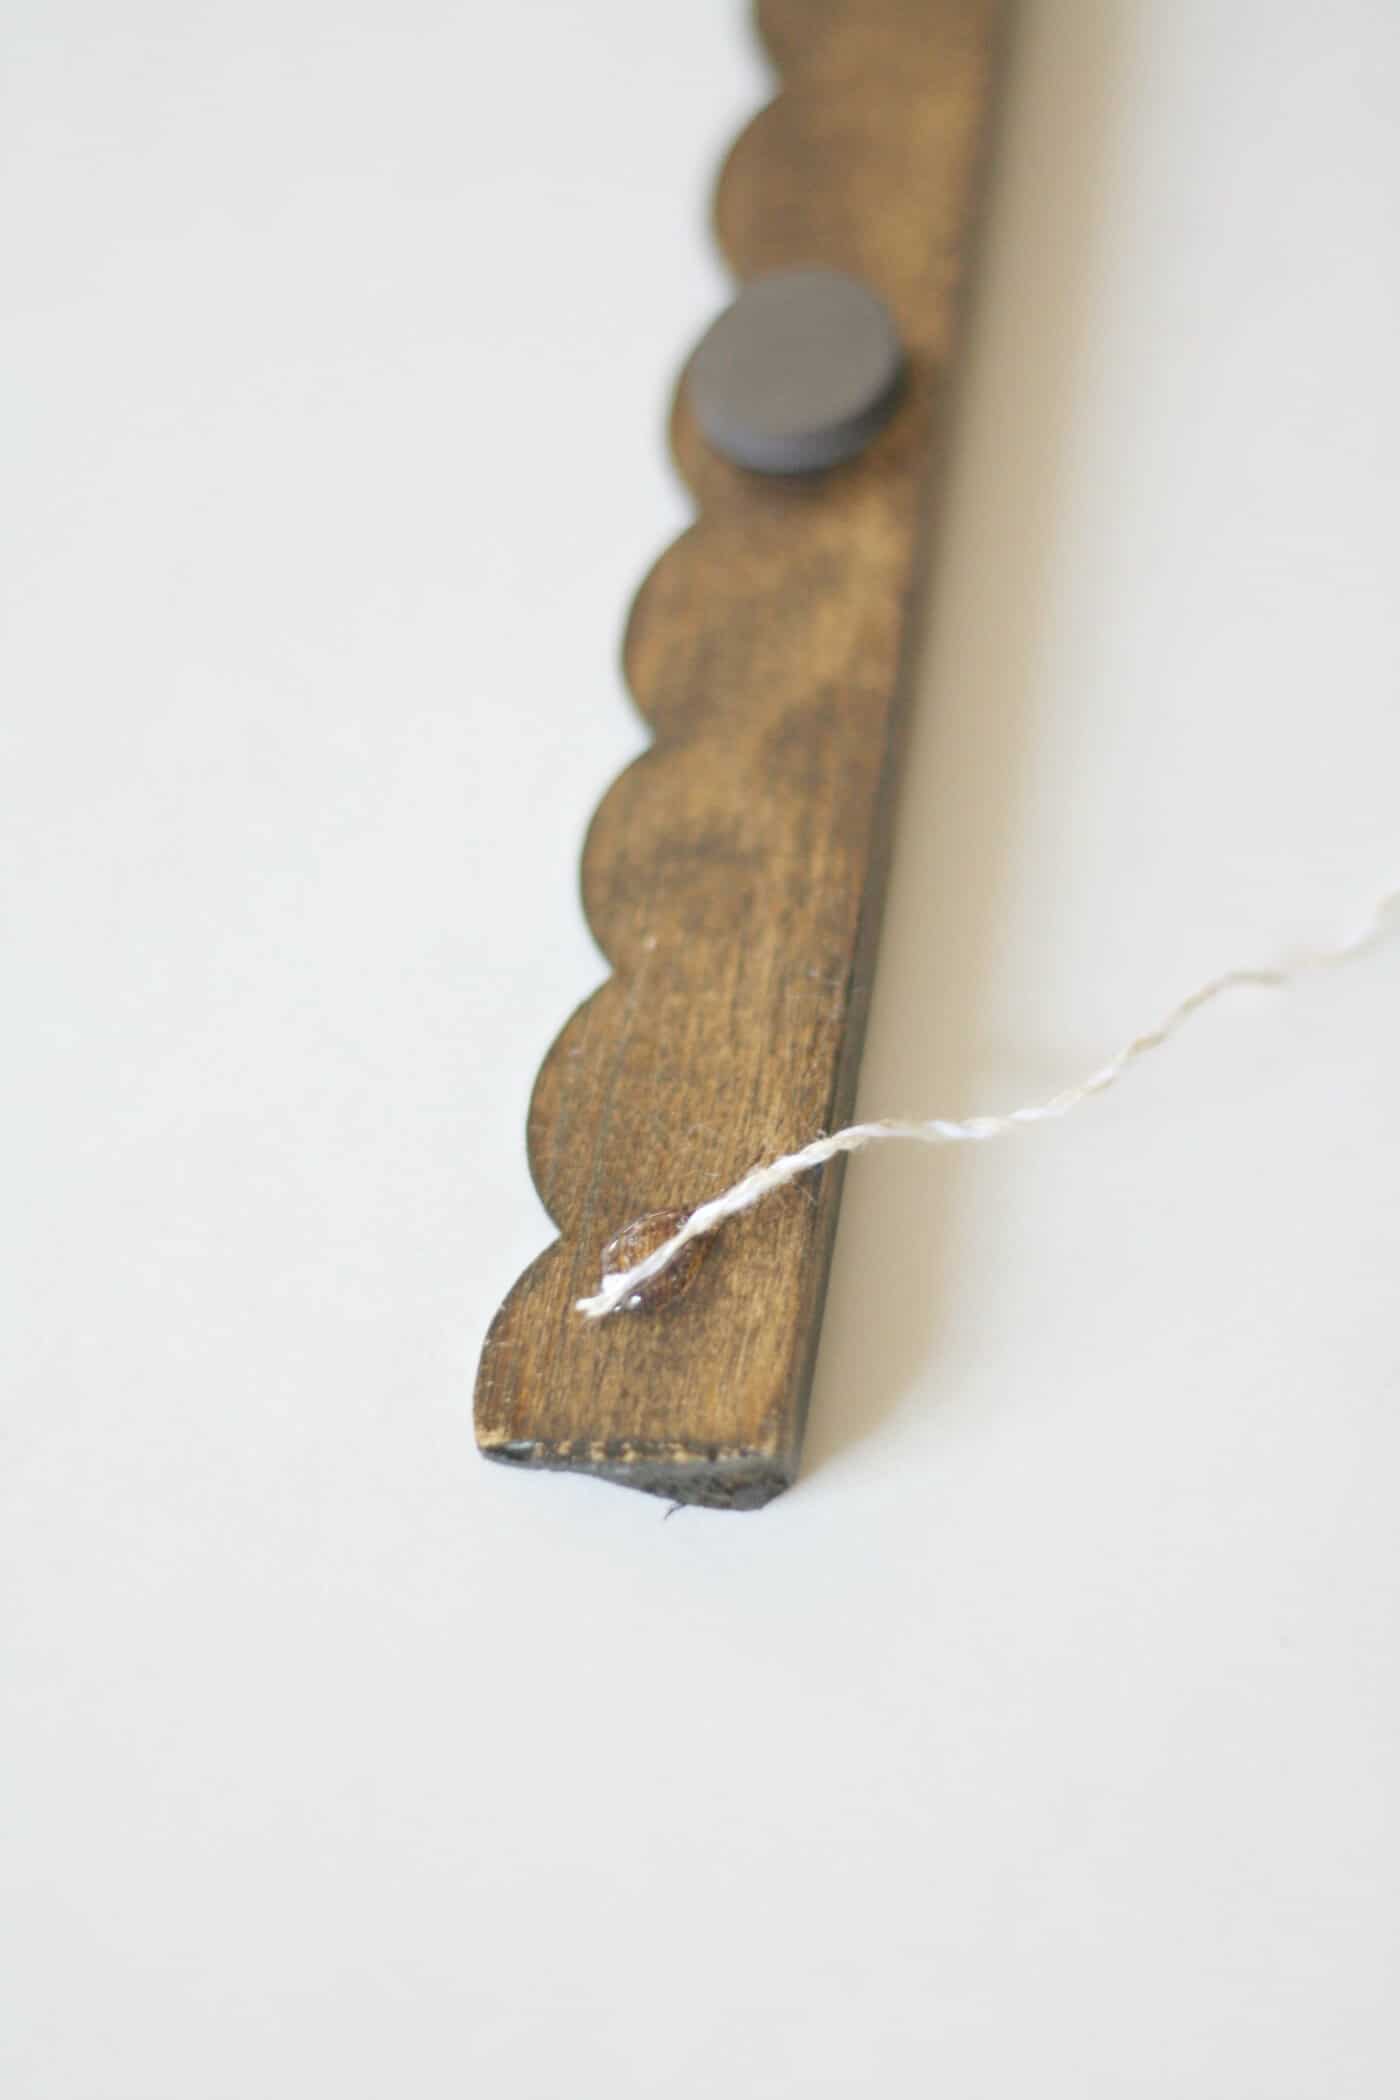
- Glue two magnets to the back of each piece of trim. Make sure the magnets are in the same place on each piece so they will line up when sandwiched together. Let the magnets dry.
- Glue the twine to the back of one of the sticks for hanging. Let dry.
- Add a print to the poster holder and hang on the wall.

Happy crafting! And, be sure to visit us as we blog about style, food, and the things we love over at the Pretty Life Girls!
If you like this DIY print hanger, I’d love for you to check out these other simple home decor projects:
Clay Photo Holders • Cross Stitch on Canvas • DIY Bulletin Board • DIY Door Stop • DIY Gold Frame • DIY Plant Hanger • Floral Hanging Frame • Glue Art • Mini Dry Erase Board • Mini Planters • Sand Terrariums • Song Lyric Art • Twig Candle Holders • Wall Decals • Wood Bead Garland • Yarn Wall Art • Yarn Wall Hanging


This is GORGEOUS! Where did you find the scalloped dowels?
Amy, did you ever find these? I’ve been looking as well but can’t find em!
Where did you find the scallop trim? I’ve been looking around everywhere for some. Thanks!! 🙂
Hi Bethany! Our Lowe’s has them as well as JoAnns!
I looked at my Lowes and they were out. I will give Joanns a try. Thanks so much! ??
I love this! The scallop trim makes it so unique. I’ll be on the hunt for those too!
This is EXACTLY what I needed! I want to be able to easily change out posters for out homeschool room. Not only is this a super cute way to do it, it’s also a project I could do myself.
Going to check out your other projects now. 😄
Thanks!!