Make a Wine Cork Christmas Tree That’s Full of Cheer
Make a rustic wine cork Christmas tree with this fun upcycled craft! Easy to customize and perfect for mantels, gifts, or holiday home decor.

I did it, my friends. I finally made a Christmas tree out of wine corks! And I’m very excited to share it with you today – not just because it turned out adorable, but because I learned a few things along the way that will save you some frustration.
I love working with wine corks. I’ve made a wreath, snowman, pumpkins, coasters, and even a skeleton! They’re just super easy to work with.
Honestly, this project is wonderfully simple: just paint, glue, and stack. If you’ve been looking for Christmas decor that feels handmade and cozy (without a money commitment), this is for you.
I do have to talk about dry time. When I began the tree, I thought, “This should take a few minutes. Paint the corks, hot glue, done!”
Famous last words, right? After the hot glue cooled, I picked up my little tree . . . and it instantly fell apart in one tragic clump. The hot glue peeled right off the corks.

It turns out whatever coating manufacturers put on corks to help them slide out of bottles absolutely does not bond with hot glue.
Instead, I switched to tacky glue. It added some dry time, but it also gave the wine cork tree the strong, long-lasting bond it needed. Once everything cured, the tree was rock solid. And honestly? The extra time was worth it. This is the kind of holiday décor you’ll unpack year after year.
If you’ve never crafted with cork before, I’ve collected all my best advice in this helpful guide to working with cork. It’ll give you a good foundation before you dive into the project.
You might also notice in the photos that I styled my cork tree alongside some yarn Christmas trees. If you’re building out a whole collection of handmade holiday decor this year, those yarn trees are another quick and satisfying craft you’ll love.
Pop on a Christmas playlist, settle in with a cozy drink, and let yourself enjoy the process. The beauty of this project is that it’s as relaxing to make as it is cute.
Ready to make your wine cork Christmas tree? Let’s get started! Oh, and PS: learn how to make a pom pom for the top here.

Christmas Tree with Wine Corks
Equipment
Materials
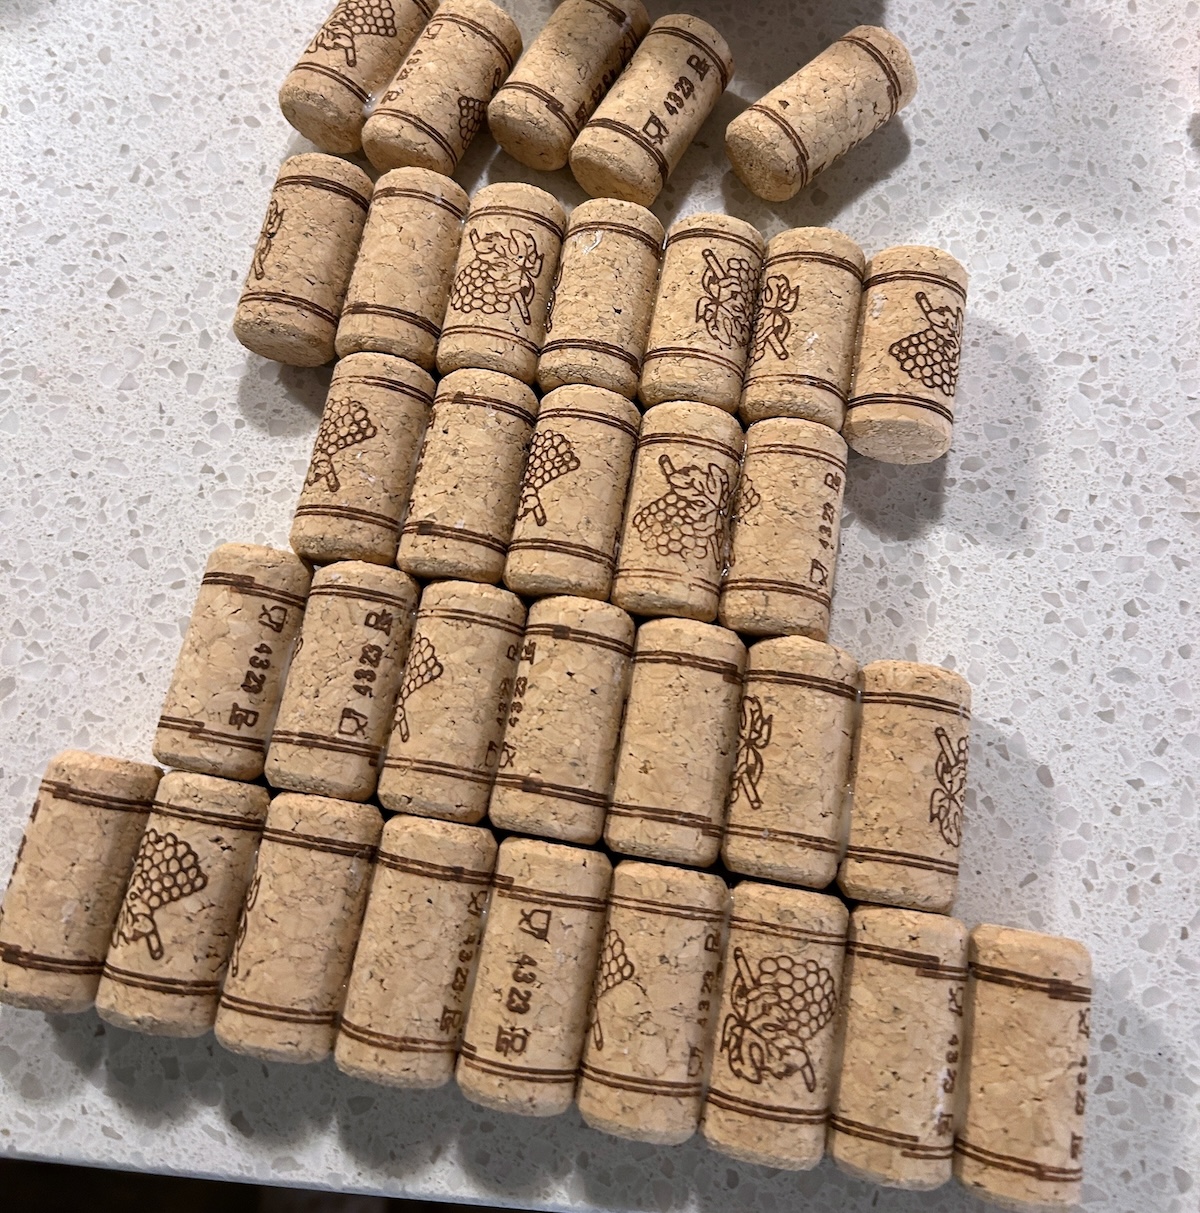
- 55 wine corks 46 for tree, 9 for trunk
- 1 bottle Multisurface craft paint green
- Craft glue I used tacky glue
- 1 large Pom poms optional for top
Instructions
- The first thing you need to do is plan your design. Lay out the corks on your work surface and put them into the configuration that you like. The key to making a tree is to have some rows of corks that are longer than others (to act as branches). Experiment until you are happy with the layout.

- Once you’ve decided on a layout, turn all the corks on their long sides as shown. You’ll do this because you’re going to be gluing them (on the long sides) into rows, and you want the rows to be flat so your tree doesn’t look wonky.
- Begin gluing the corks. Add a thin line of tacky glue to one cork, press to another, and hold for a few seconds. Let dry.

- Continuing gluing corks together, working in rows. As you glue a row of corks together and it is drying, press the corks down gently onto the work surface using your hand so everything is flat. Let all the rows dry.
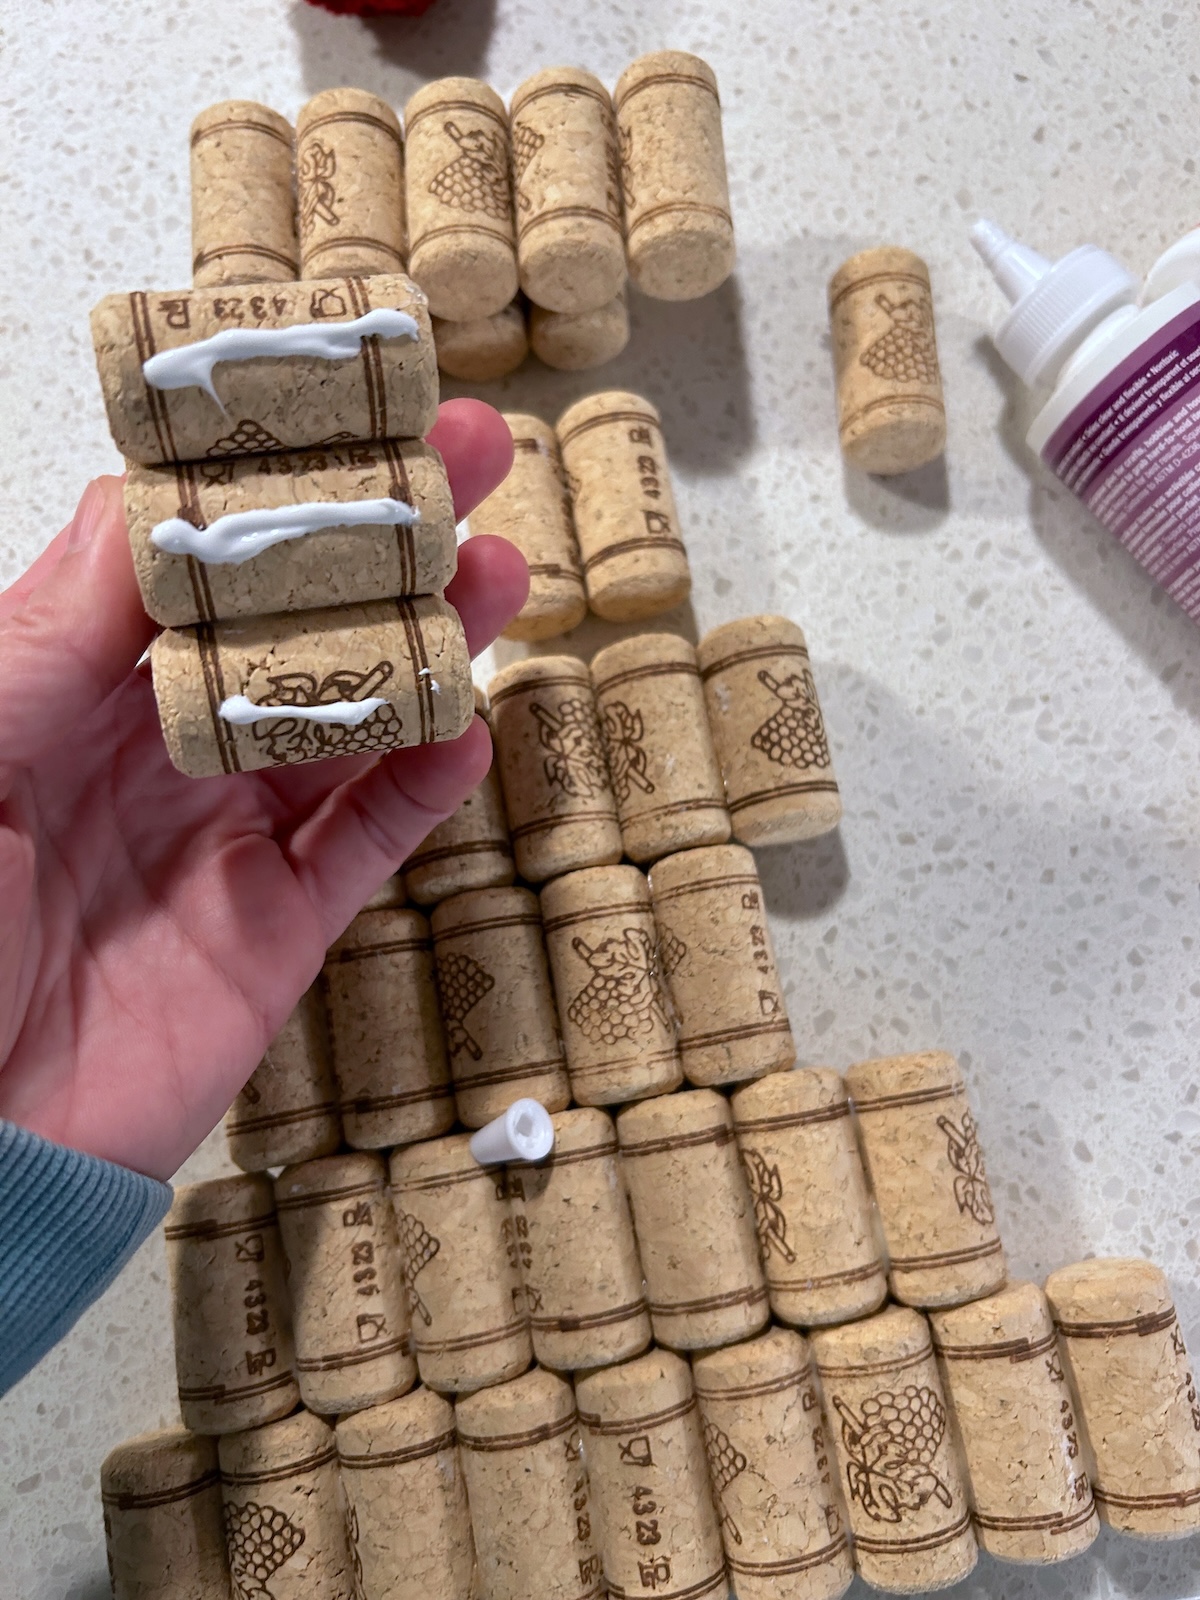
- Once all the rows are dry, it’s time to glue all the rows together. Don’t try to glue the entire tree together in one shot. You’re going to glue two rows together, let those dry, add another row . . . and on and on. Once everything is assembled, let your tree dry completely.

- Painting is easy! Simply paint one side of your project – the ends of the corks – with green paint. I left my “tree trunk” plain. Let dry.

- Add a second coat of paint if necessary. You can also use a smaller brush to get the edges of the corks. Let dry. Finish by gluing a pom pom to the top!

Notes
Did you enjoy this craft? Let me know in the comments! I’d also love for you to check out the other ideas:
Apothecary Jars • Candy Cane Centerpiece • Candy Cane Wreath • Christmas Shadow Box • Decorative Candles • DIY Nativity • DIY Upcycled Stocking • Felt Mistletoe • Gift Card Holders • Gnome Decor • Mesh Christmas Wreath • Pom Pom Garland • Recycle Cookie Tins • Santa Hat Topiary • Santa Mason Jar • Santa Napkin Rings • Snowman Mason Jar • String Art • Sweater Clips • Wine Cork Snowman • Wood Slice Magnets